



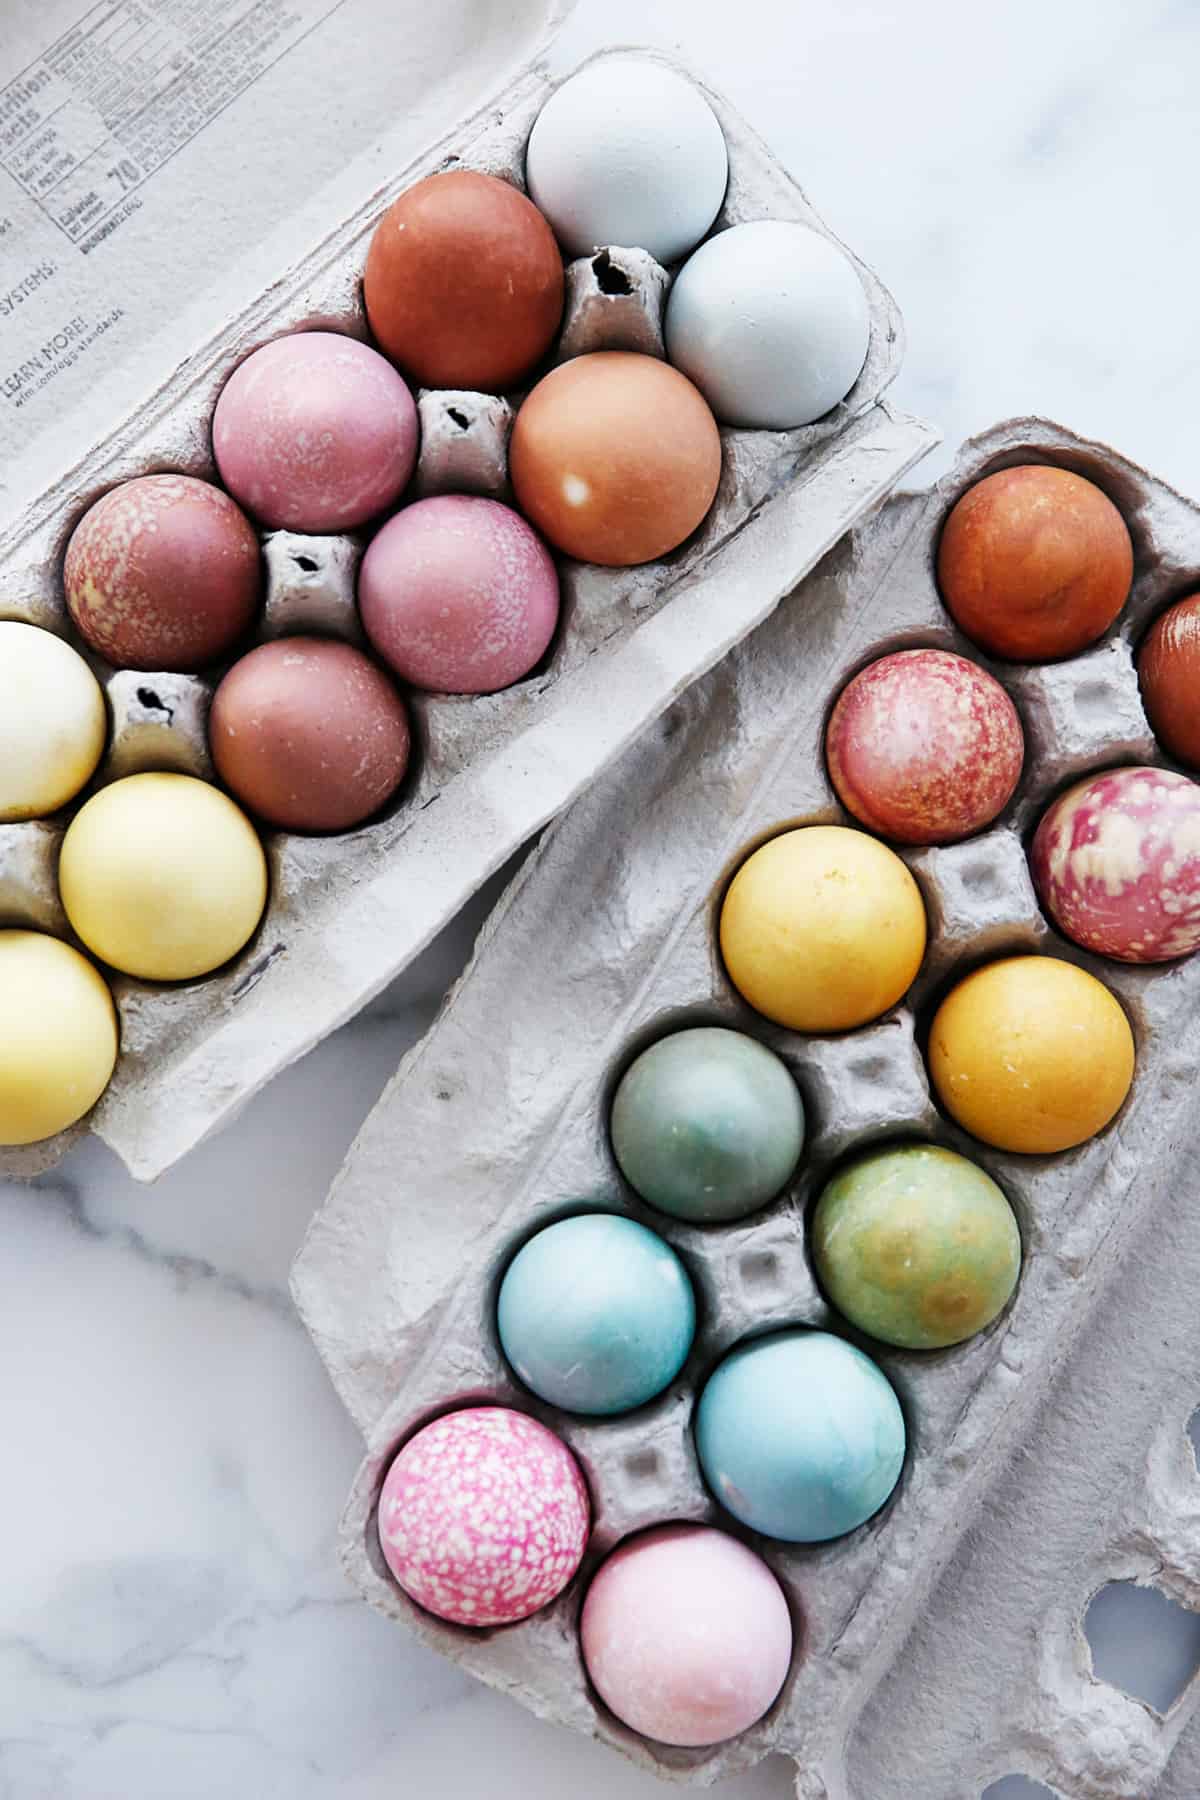
This homemade Easter Egg Dye is an easy way to naturally dye Easter eggs with real food (and pantry items)! This quick and easy recipe creates vibrant colors with no chemicals or dyes!
Homemade Dyes for Easter Eggs
We’ve all known how to dye Easter eggs with food coloring, right? And while some might say that you are just dyeing the outside of the egg, the reality is that more often than not that color seeps in through the shell and colors the egg.
It will be no surprise to you that we love to switch out artificial colors and unnecessary chemical additions to food as much as we can (like this Naturally Colored Buttercream and these plant-based Decorated Sugar Cookies)!
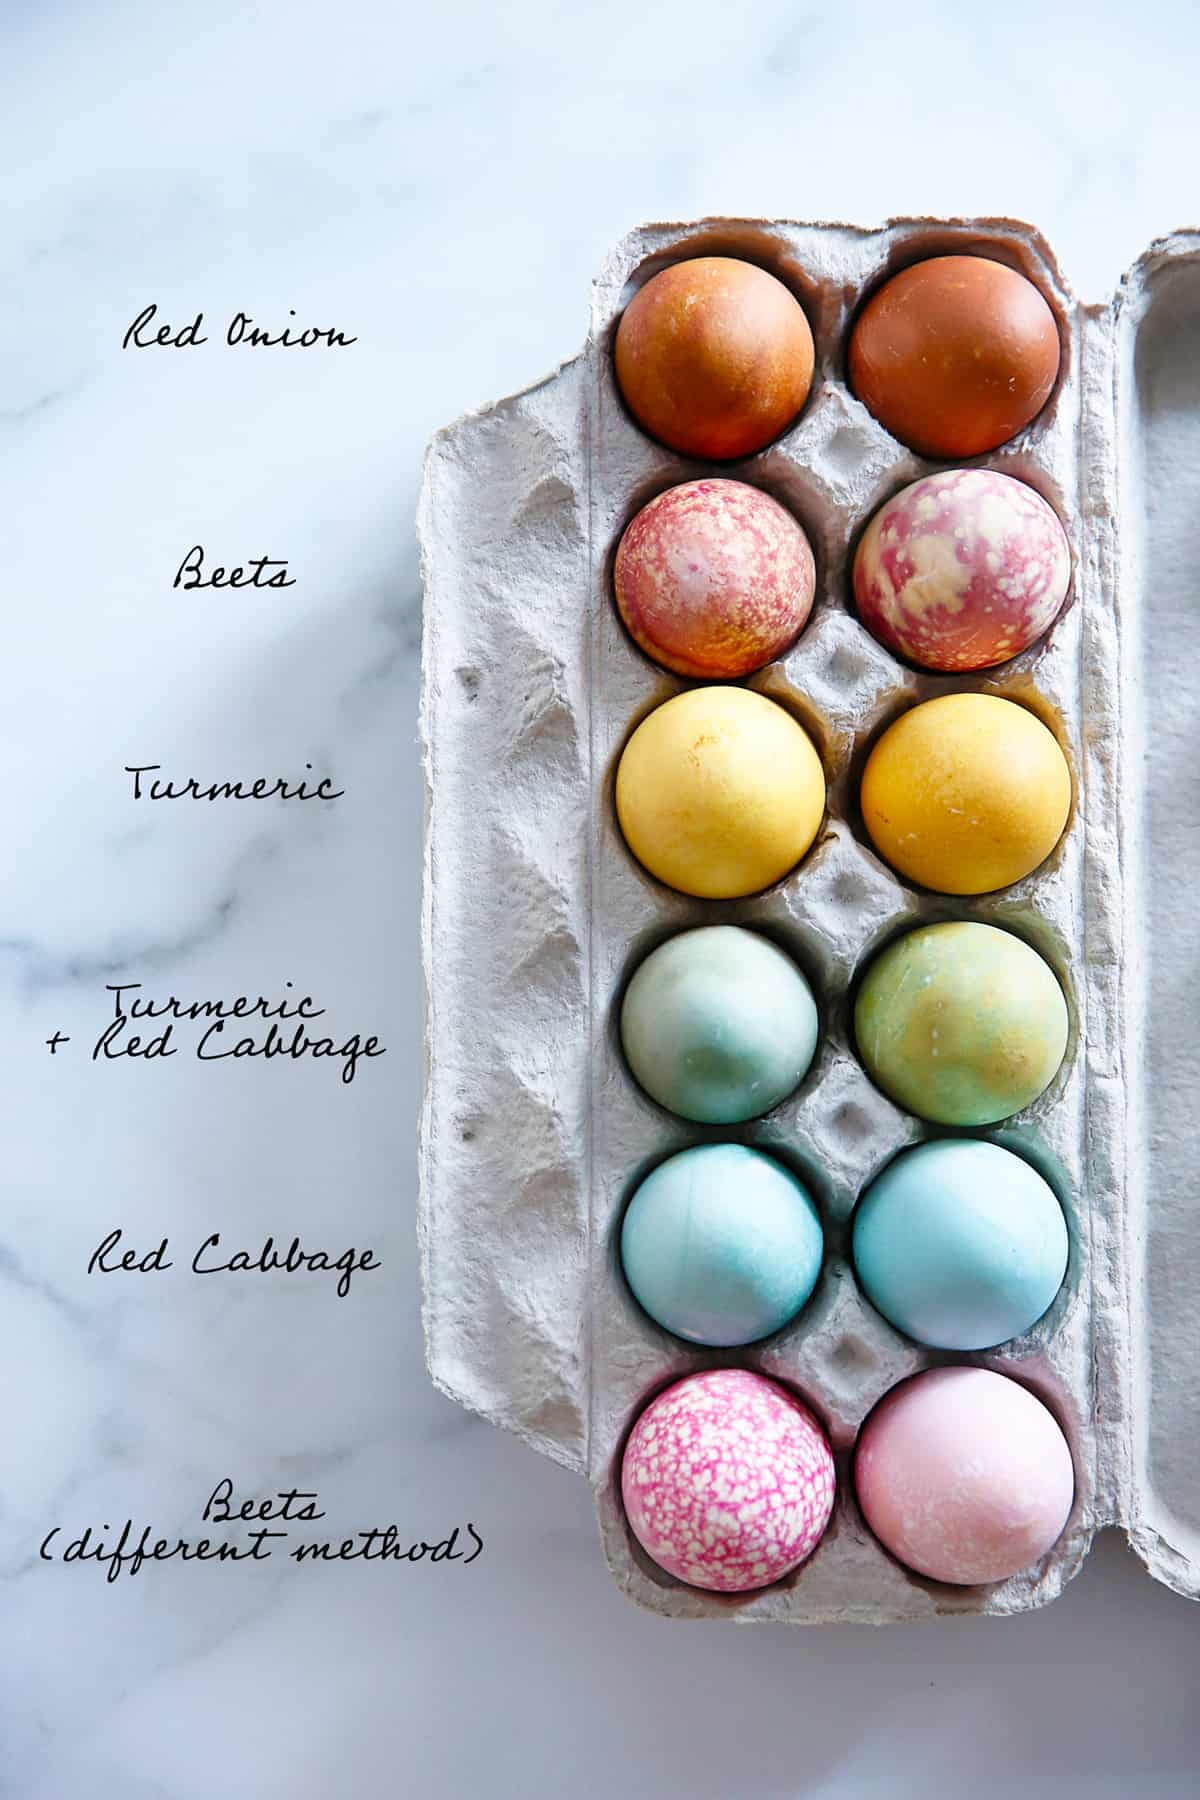
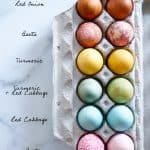
Enter this homemade, natural easter egg dye! This Easter egg dye is made with different pantry items to create different colors. Beets make pink or red, red cabbage makes blue, turmeric makes yellow…and so much more!
Play around with soaking times, double dip, combine colors… These natural dyes are incredibly simple to make and turn a fun holiday craft into a science experiment.
What to Use to Make Natural Easter Egg Dye
This homemade Easter egg dye can be made with natural ingredients you already have in your pantry or fridge!
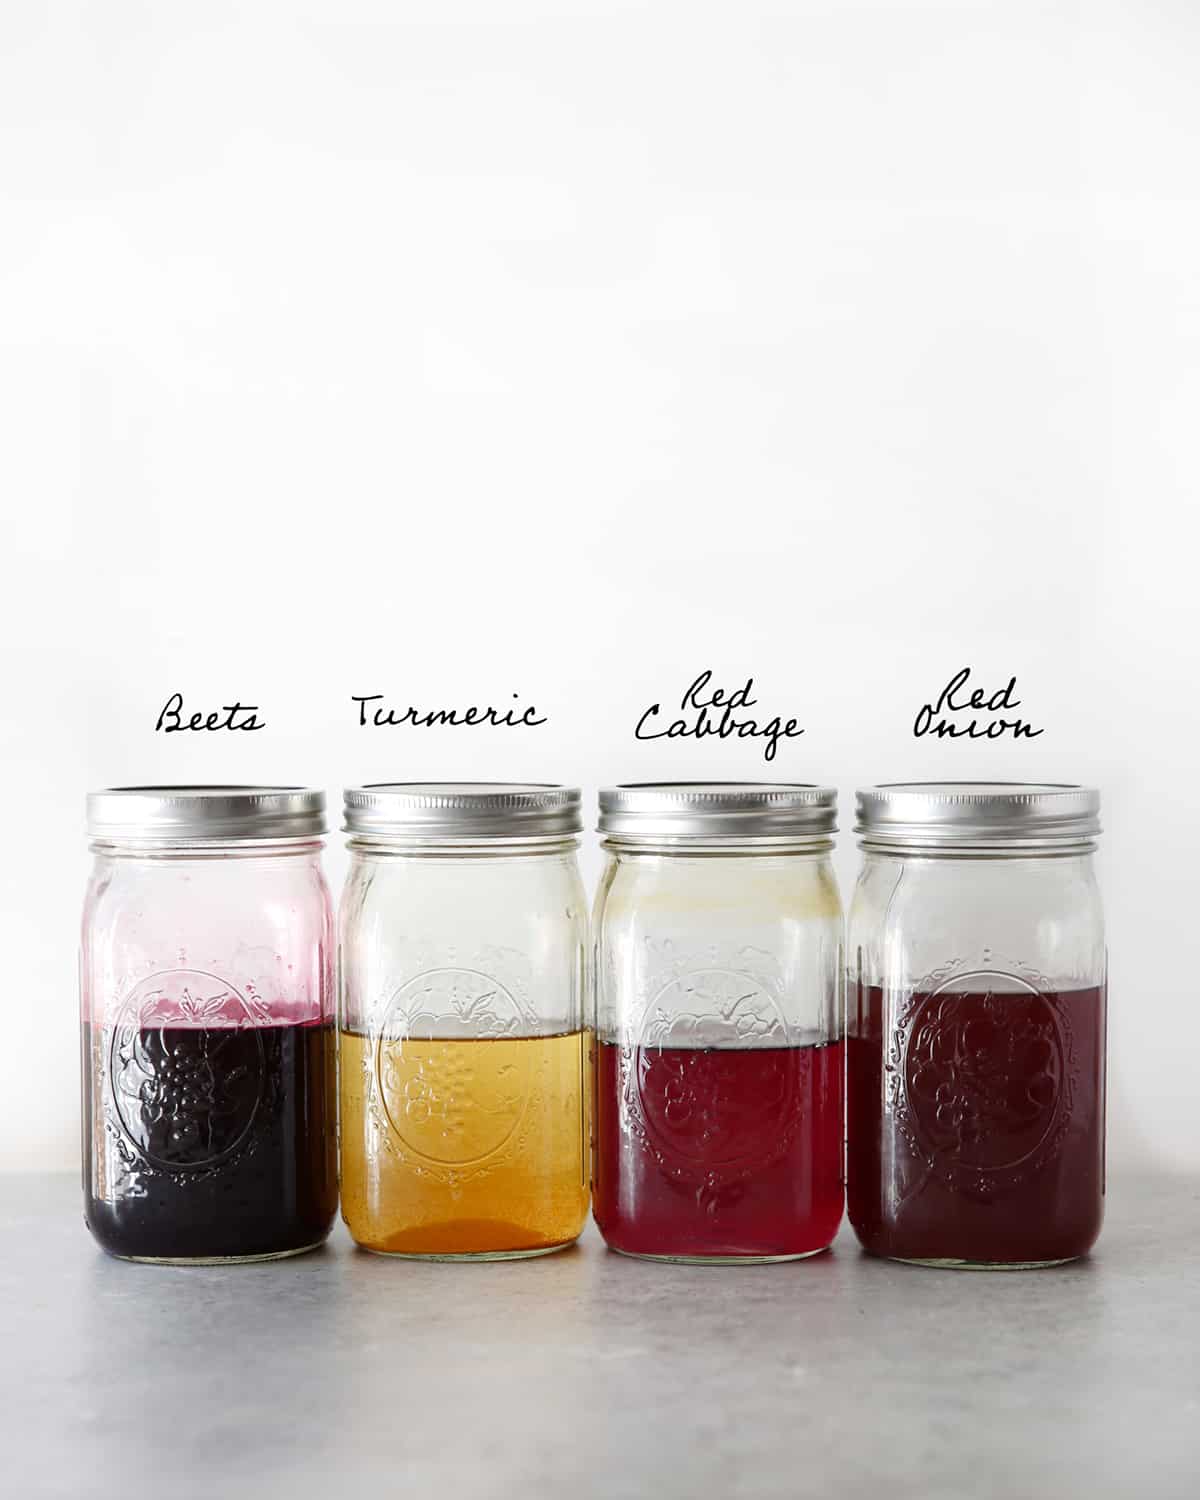
Here are the four we used:
- Beets (red/pink/brown): 1 large beet, diced + 2 cups water
- Red Cabbage (blue): ½ red cabbage, sliced + 2 cups water
- Red Onion Skins (deep orange/brown): skins from 4 large onions + 2 cups water
- Turmeric (yellow): ¼ cup sliced fresh turmeric or 2 tablespoons dried turmeric + 2 cups water
More Natural Color Suggestions
- Blueberries (grey/blue): 2 cups frozen blueberries + 2 cups water (don’t boil this one. Just let it steep!)
- Carrots (orange/yellow): 3 large carrots, sliced + 2 cups water
- Spinach or Parsley (green): 2 cups spinach or 1 bunch parsley + 2 cups water
- Yellow Onion Skins (orange): skins from 4 large onions + 2 cups water
- Coffee (brown): 2 cups strong brewed coffee
Here’s What You Need to Know to Make Homemade Easter Egg Dye
While you do have to let the eggs soak in the dye, the amount of hands-on time required for this recipe is super minimal!
- Boil the eggs: Use the water boiling or steaming method to hard-boil your eggs before coloring. Make sure they are completely cooled before you dye them! We recommend using the water boiling or steaming method. Check out this post here. We normally love the Instant Pot for steaming eggs, but not here. We don’t recommend using the Instant Pot for colored eggs because they are more likely to crack in the food coloring. Again, let the eggs cool completely before coloring.
- Boil the food item: Place 2 cups of water into a pan along with the food item of your choice. Bring the mixture to a boil, then let it simmer for 20 minutes. Strain and cool completely.
- Add vinegar: Once the dyed water is cool, add 2 teaspoons of vinegar.
- Soak: Gently drop the cooked and cooled eggs into the natural Easter egg dye so they are completely submerged. Let the eggs soak overnight in the fridge. The longer they sit, the more brilliant the color will be!
- Dip again (optional): If you want to dip the egg again to get a darker hue or to create another color, now’s the time.
- Dry: Place a clean kitchen towel down on the counter. Pull the eggs out of the dye and place them on the towel. Let them air dry. When you are ready to take the eggs out of the color, place a clean kitchen towel down and gently pull out the eggs and place on the towel, or you could place them on a wire rack to prevent and the towel from wiping off any of the color. Let it air dry, do not rub it. If you’d like to dip the egg again to get a darker hue do that once it has dried. In addition, if you want to combine colors to make different hues (think coloring an egg first yellow, then blue=green) now is the time to do it.
- Once completely dry: You can gently rub it with oil to help prevent the color from changing. We found that some of the eggs changed colors over a few days time (especially the beet one). Do them the day before Easter if you’d like them to be as close to the color as you want as possible.
Do You Have to Use Vinegar to Dye Eggs?
Yes! Without getting too science-y, the short answer is that the acid from the white vinegar brings the mixture to the pH level that’s needed for the dye to adhere to the egg shell.
You will need approximately one teaspoon of vinegar per one cup of egg dye, but feel free to play around with amounts for different effects.
Tips and Notes
- Submerge completely. Make sure the eggs are entirely covered by the dye so they’re completely colored.
- Keep them in the fridge. The eggs can over-cook in the natural dye, so make sure you keep them in the fridge as they sit.
- Air dry! Don’t rub the eggs to dry them. This can smudge off the color.
- Keep in mind the stored eggs change color over time. If you’d like them to be as close to the original color as possible, dye them the day before Easter.
Should eggs be cold or at room temperature for coloring?
You want both the boiled eggs and the natural dye to be cool during the dye process, so that not only do the eggs not overcook in the natural dye, but also for safety. Leave the eggs in the dye in the refrigerator overnight.
How to Make Different Effects on Naturally Dyed Easter Eggs
- Add more vinegar. When we added more vinegar to the dye, it created a bubbly effect which is what created the dots you see on some of the eggs.
- Change the dipping time. Try dipping the eggs for shorter or longer periods of time for different shades. For the pink spotted eggs seen in the pictures, we just briefly dipped the eggs in the beet dye for about 10 seconds, then let them dry.
- Double dip. Different colors and color combinations can create different effects. We’ve had different results each time, so have fun experimenting!
- To create an ombre effect you can start dying a batch of eggs, and then every few hours take one of the eggs out of the dye.
How to Make Green Naturally Dyed Eggs:
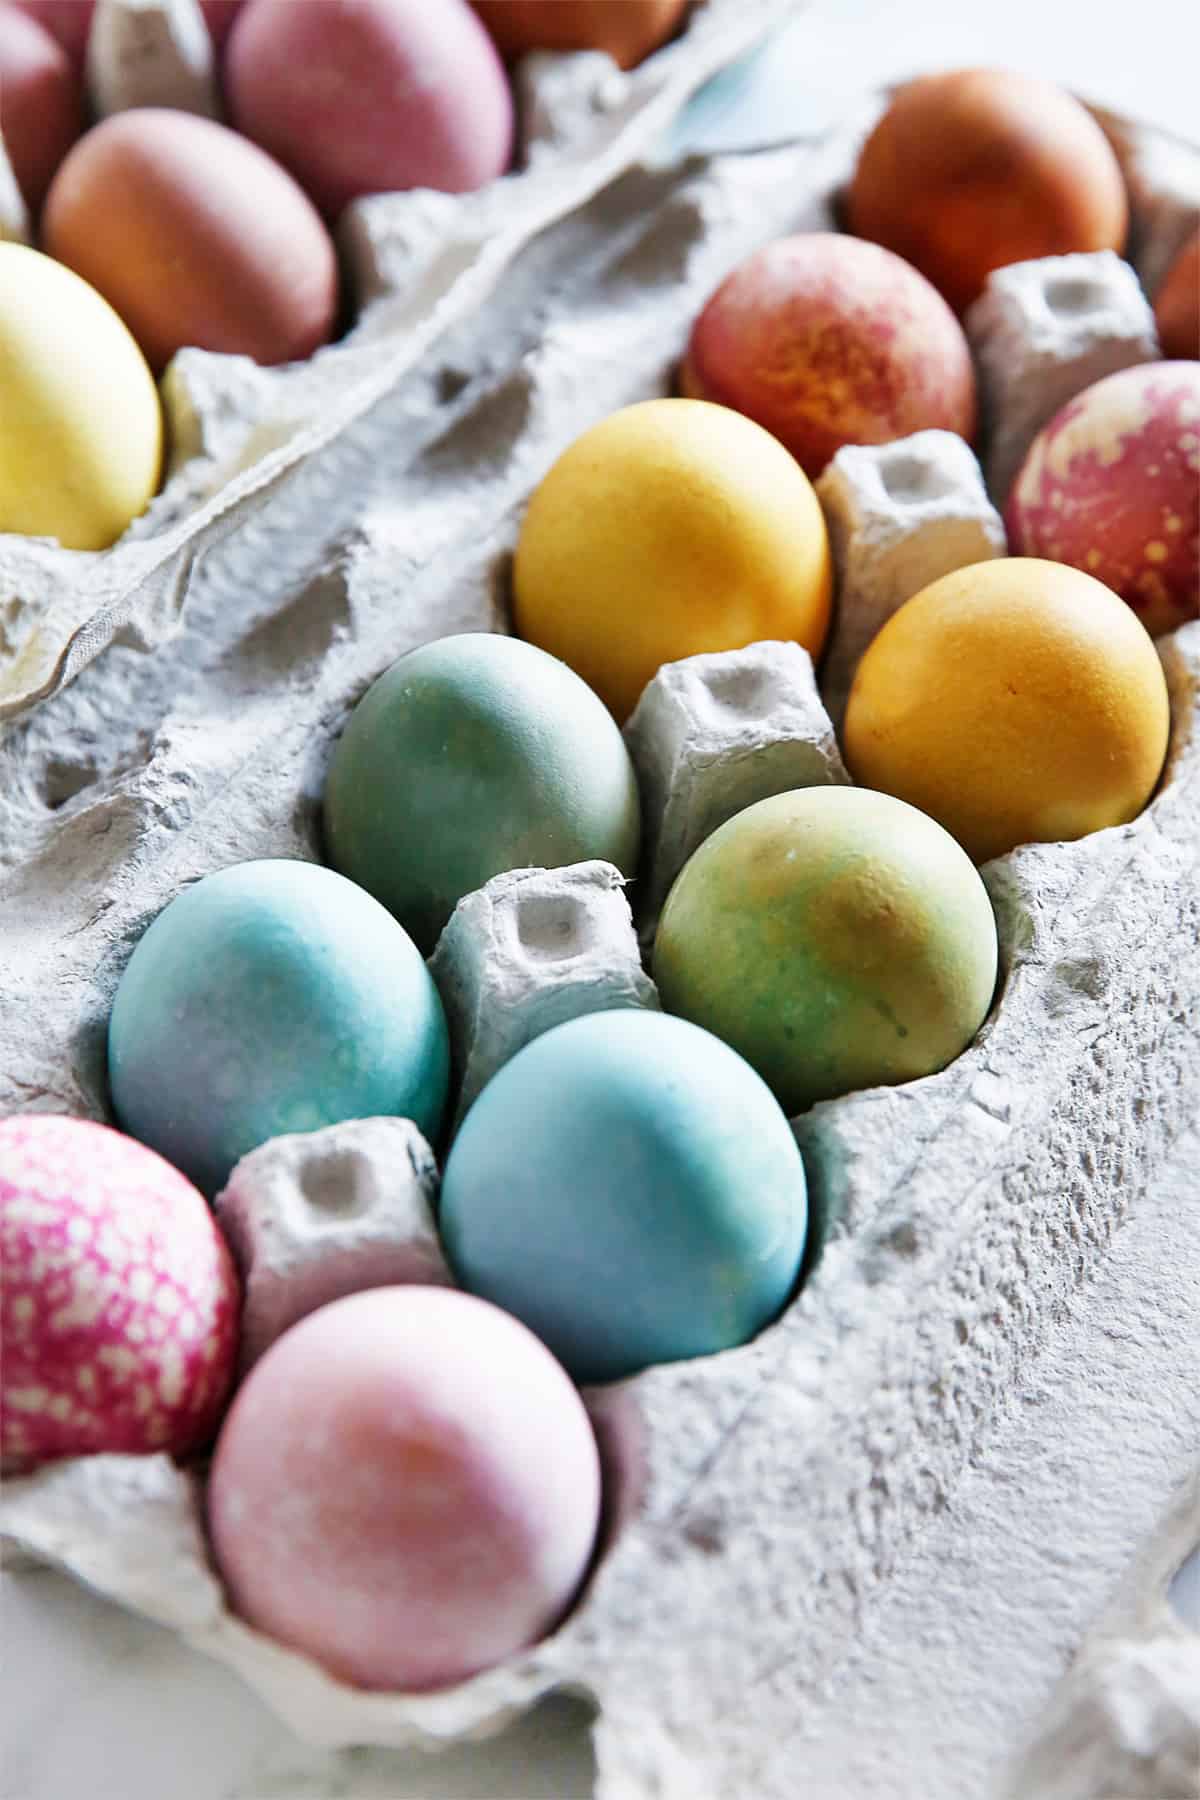
To make green we first dyed the egg with turmeric (yellow) and then dyed it with red cabbage (blue) to make the egg green!
How to Store
Dyed Easter eggs will last in the fridge for 4-5 days. Keep in mind their color can change as they sit. Don’t worry, though. They taste the same on the inside!
More Easter Favorites
Here are a few of my favorite recipes to serve at Easter gatherings!
Don’t want to make your own dye but want to try naturally coloring eggs?
There are also a few different products on the market. Try these good brands:
Tools we used in this recipe:
Watch The Video:
Natural Easter Egg Dye
This homemade Easter Egg Dye is an easy way to naturally dye Easter eggs with real food! This quick and easy recipe creates vibrant colors with no chemicals or dyes!
- Category: DIY
- Beets (red/pink/brown): 1 large beet, diced + 2 cups water
- Red Cabbage (blue): ½ red cabbage, sliced + 2 cups water
- Red Onion Skins (deep orange/brown): skins from 4 large onions + 2 cups water
- Turmeric (yellow): ¼ cup sliced fresh turmeric or 2 tablespoons dried turmeric + 2 cups water
- More Natural Color Suggestions
- Blueberries (grey/blue): 2 cups frozen blueberries + 2 cups water (don’t boil this one. Just let it steep!)
- Carrots (orange/yellow): 3 large carrots, sliced + 2 cups water
- Spinach or Parsley (green): 2 cups spinach or 1 bunch parsley + 2 cups water
- Yellow Onion Skins (orange): skins from 4 large onions + 2 cups water
- Coffee (brown): 2 cups strong brewed coffee
Instructions
- Boil the eggs: Use the water boiling or steaming method to hard-boil your eggs before coloring. Make sure they are completely cooled before you dye them! We recommend using the water boiling or steaming method. Check out this post here. We normally love the Instant Pot for steaming eggs, but not here. We don’t recommend using the Instant Pot for colored eggs because they are more likely to crack in the food coloring. Again, let the eggs cool completely before coloring.
- Boil the food item: Place 2 cups of water into a pan along with the food item of your choice. Bring the mixture to a boil, then let it simmer for 20 minutes. Strain and cool completely.
- Add vinegar: Once the dyed water is cool, add 2 teaspoons of vinegar.
- Soak: Gently drop the cooked and cooled eggs into the natural Easter egg dye so they are completely submerged. Let the eggs soak overnight in the fridge. The longer they sit, the more brilliant the color will be!
- Dip again (optional): If you want to dip the egg again to get a darker hue or to create another color, now’s the time.
- Dry: Place a clean kitchen towel down on the counter. Pull the eggs out of the dye and place them on the towel. Let them air dry. When you are ready to take the eggs out of the color, place a clean kitchen towel down and gently pull out the eggs and place on the towel, or you could place them on a wire rack to prevent and the towel from wiping off any of the color. Let it air dry, do not rub it. If you’d like to dip the egg again to get a darker hue do that once it has dried. In addition, if you want to combine colors to make different hues (think coloring an egg first yellow, then blue=green) now is the time to do it.
- Once completely dry: You can gently rub it with oil to help prevent the color from changing. We found that some of the eggs changed colors over a few days time (especially the beet one). Do them the day before Easter if you’d like them to be as close to the color as you want as possible.
- Store: Dyed Easter eggs will last in the fridge for 4-5 days. Keep in mind their color can change as they sit. Don’t worry, though. They taste the same on the inside!
Notes
- Submerge completely. Make sure the eggs are entirely covered by the dye so they’re completely colored.
- Keep them in the fridge. The eggs can over-cook in the natural dye, so make sure you keep them in the fridge as they sit.
- Air dry! Don’t rub the eggs to dry them. This can smudge off the color.
- Keep in mind the stored eggs change color over time. If you’d like them to be as close to the original color as possible, dye them the day before Easter.


