

There are many ways to preserve food for long-term storage at home. Here we take a closer look at canning, root cellar and dehydration.
")
image from antonio mendez from Pixar
3 Ways to Preserve Food Long-Term
There are many ways to preserve food long-term in the home setting – canning, freezing, cellaring, dehydrating, salting, freeze-drying and fermenting, just to name a few. Today, let’s take a closer look at canning, root cellar, and dehydration. (But I encourage you to research as many others as possible!)
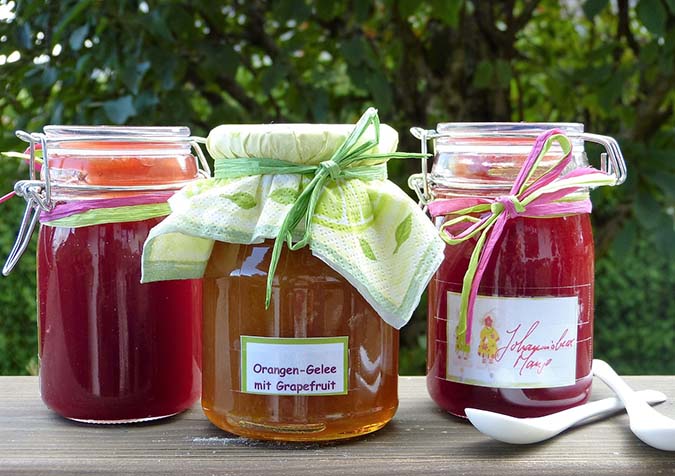
Types of Food Storage Containers
")
image from Nicole Trumpet from Pixar
When it comes to storing dry goods, canned goods, and dehydrated foods, there are several best long-term food storage options.Glass glass bottlevacuum seal bags, mylar bags, and food grade tubs are all highly recommended.
You can also enjoy:
While mason jars are often associated with home canning, they can also be used for dry canning.mason jars and vacuum seal bag Can be used in conjunction with a vacuum sealer to remove most or all of the oxygen, extending shelf life.food grade buckets and Mylar bag Also great for storing bulk dry goods.
Remember that all of these containers can and should be used with oxygen absorbers to prevent any moisture from being absorbed from the environment.
Bonus: Download the Food Preservation Processing Time Log
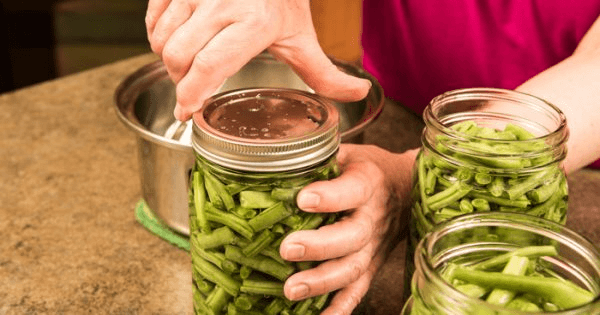
can
")
What is canning?
Canning is one of the most common ways people preserve food for long periods of time in a home setting. While you can’t do everything, there are hundreds of things you can do safely at home!
There are two types of canning: water bath canning (for high-acid or preserved foods) and pressure canning (for low-acid foods). Both are great ways to protect your harvest and create food security for your family!
Learn how to safely use canning with step-by-step instructions in our online training –“Water Bath Cans” and “Pressure canned.”
Canning Safety
Knowing how to properly dispose of cans and how to keep food from spoiling is critical to your success.Check National Center for Home Food Preservation website, or buy ball book Get safe, trusted and tested home canning recipes.
Canning equipment
To successfully preserve your harvest with home canning, you’ll need some equipment. If you’ve never canned before, the initial investment may seem high. But if you’re shrewd —I know you are–Then it doesn’t have to break the bank!
Thinking outside the box pays off! Ask friends and family if they have kitchen equipment you no longer need. Find glass bottles, utensils, and jars on sites like Craigslist or eBay. Search garage sales or flea markets, as they are gold mines for finding available canning equipment and canning.
Once you get these tools, they will most likely last a lifetime! The only thing you need to buy every year is a new cover.
water bath canned
- large stock pot with rack
- Bottle lifter (pliers)
- tank funnel
- Air Bubble Remover/Headspace Tool
- Jars, Lids & Straps
The water bath canning or boiling water method is by far the easiest method of home canning. The water bath method can only be used for highly acidic foods. Some of the best garden fresh foods for water bath canning are tomato-based recipes, pickles, jams and jellies, and other preserved foods.
- tomato products Products that are safe for water bath canning include salsa, tomato sauce, tomato juice, crushed or diced tomatoes, tomato sauce, and tacos or salsa.
- pickles Safe foods for water bath canning include all types of pickles, chutneys, and appetizers.
- Jams, jellies, preserves and fruit spreads Ingredients safe for water bath canning can be made from berries, figs, apples, grapes, peppers, citrus and more!
Easy Chili Mix Recipe
For this recipe, you can choose to keep the peppers whole or chop them into 1-inch pieces.
PLEASE NOTE: While not outlined in the recipe below, please follow standard canning practices for water bath canning, jar sterilizing, heating jars, headspace, checking for seals, height adjustments, etc..
1-1/2 lbs.Banana Pepper
1 lb jalapeños
1/4 pound serrano peppers
6c. Vinegar
2 degrees Celsius water
3 cloves of garlicPut the peppers together in a bowl. on hold.
Bring vinegar, water, and garlic to a boil in a large stainless steel pot. Reduce heat and simmer for about 5 minutes. When done, discard the garlic.
Pack peppers into heated jars, leaving 1/2 inch of headspace.
Spoon hot vinegar mixture over peppers, leaving 1/2 inch headspace.
Remove air bubbles from jars.
Wipe the edges and add a two-piece cover and ring. Tighten the cap with your fingers.
Submerge the jar completely in a boiling water bath for 10 minutes.
Remove and cool for 24 hours before checking the seal.
pressure canned
- Pressure tank with pressure gauge
- Bottle lifter (pliers)
- tank funnel
- Air Bubble Remover/Headspace Tool
- Jars, Lids & Straps
Pressure canning is a little more complicated than the water bath method above. Pressure canning is used to preserve low-acid foods. Canned low-acid foods are processed at about 240°F, which is much hotter than water-bath canning at 212°F. These elevated temperatures ensure that all bacterial spores are destroyed during processing.
Some fresh vegetables that are good for pressure canning include green beans, potatoes, carrots, beans, corn, and mixed vegetables. Since the pressure allows for more versatility, you can even put things like soups, stews, and meats!
It’s important to note that a pressure pot is different from a pressure cooker. A pressure cooker cannot be used for home canning.
Easy Canned Beans Recipe
")
For this recipe, you can use any dried beans (kidney, navy, pinto, etc.).
PLEASE NOTE: While not listed in the recipes below, you will need to follow standard canning practices for pressure canning, jar sterilizing, heating jars, headspace, checking for seals, height adjustments, etc..
3/4 pound dried beans per quart
Salt
waterPlace beans in a large pot and cover with 2 inches of water. Boil for about 2 minutes.
Remove from heat and let stand 1 hour.
Drain beans and cover with 2 inches of fresh cold water.
Boil beans again for 30 minutes, stirring frequently.
In another pot, bring water to a boil.
Pack hot beans into hot jars, leaving 1 inch of headspace.
Add 1/2 tsp. salt to a pint jar, and 1 tsp. salt to quart jar (optional).
Cover beans with boiling water, leaving 1 inch of headspace.
Remove air bubbles from jars.
Wipe the edges and add a two-piece cover and ring. Tighten the cap with your fingers.
Handle pint jars at 10 lbs for 1 hour and 15 minutes. Pressure, quart jar 1 hour 20 minutes at 10 lbs. pressure.
Please note: Altitude affects processing time and pressure pounds.see National Center for Home Food Preservation website or ball book to know more information.
How to Safely Take a Power Outage
")
What would you do without electricity? Do you have a way to save your harvest? With a little know-how and planning, you can still own a stove even in the unthinkable.
Now, buy something as simple as a camping stove or grill, both of which run on propane. If you have a fire pit, you can even use it! Maybe you have an outdoor kitchen. My husband built an outdoor canning stove from a used stove we bought off Craigslist.
root cellar
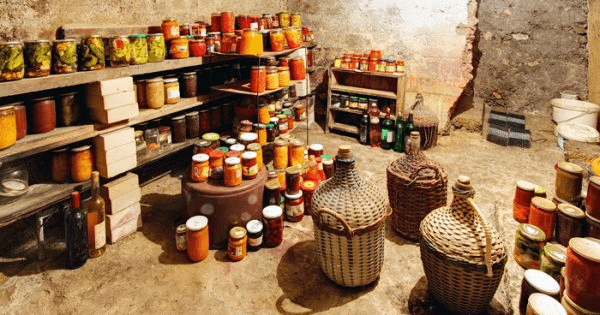
What is a root cellar?
In the simplest terms, a cellar is a household “cellar” for storing root vegetables. This is one of the best ways to store the right foods. The key to a successful root cellar is establishing optimal conditions.
You can also enjoy:
Typically, a cellar will be underground or in a basement. However, your cellar doesn’t have to be a real cellar. (You could use an old refrigerator, for example.) However, there are a few things to consider when designing a root cellar.
security measures
A root cellar needs four things to be successful:
- ventilation
- humidity
- Temperature (closer to 32°F but not lower)
- dark
If you have a cellar or basement, convert a portion of this space into a cellar. Do some research ahead of time to make sure you have the best conditions. On the other hand, if you don’t have a basement, bury a drum in the ground or use an old refrigerator.There are a lot of very clever and thorough tutorials on the internet How to Build a Root Cellar.
You can also enjoy:
“Planning a Summer Kitchen: 17 Design Considerations”
Most produce should be stored in open woven baskets and kept off the floor. Ideally, don’t pile things too deep, as excess weight can lead to premature spoilage. The same goes for fruits, preferably not touching each other, or even individually wrapped in tissue paper.
You can build or buy storage boxes and shelves specially designed for the best root cellaring.re
What can I store in a root cellar?
You can store apples, dried beans, carrots, garlic, onions, parsnips, pears, peas, potatoes, sweet potatoes, winter squash, and more!
dehydration
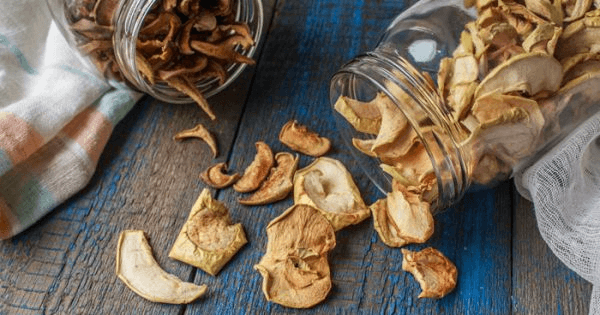
What is dehydration?
Dehydration is a method of food preservation that involves removing moisture from food to prevent spoilage. Most foods can be dehydrated. By eliminating all moisture, you can extend the shelf life of any given food product.
You can also enjoy:
You can eat some dehydrated foods as is, but others need to be reformulated or rehydrated. Some foods that are commonly eaten dehydrated are dried fruit, peels, and beef jerky. However, most vegetables and dairy products require reconstitution to make them tasty.
How can I safely dehydrate?
Blanching, steaming, dipping are specific pretreatments and special preparations that some foods require. Humidity, time, and temperature all play a role in the success of dehydrating food, so purchasing a dehydration book to add to your survival library is an excellent idea!
Dehydration method
There are many ways to dehydrate food. Some methods work better and faster than others, but all of them are perfectly acceptable. Some of the most common ways food dehydrates include:
How to store dehydrated items
There are many ways to store dehydrated food. One of the most common methods is to use glass bottles. However, you can use something as simple as a plastic storage bag. Whatever you choose, store dehydrated foods in a cool, dark and dry place. Add an oxygen absorber if possible! oxygen absorber are small packets that contain iron powder to help keep food fresh without unhealthy additives.
________________________________________________________________________
This is an updated version of a post originally published on July 10, 2020.
The Grow Network is a participant in the Amazon Services LLC Associates Program, which is designed to provide a way for our team to earn fees for recommending our favorite products! If you purchase something after clicking one of our links, we may earn a small commission at no additional cost to you. Thank you for your support of TGN!
(5608 visits, 318 visits today)

