

These gluten-free cutout cookies are the perfect cookie to decorate this holiday season! They're so easy to make and can be rolled out and decorated immediately, or you can store them in the refrigerator for a few days before you're ready to decorate. These cut-out cookies are perfect for any holiday or celebration year-round.
Made with just five (5) ingredients (plus a pinch of salt!), these versatile cookies are perfect for making with the kids. We’ve got tips and tricks for decorating with powdered sugar so you can start your holiday baking now!

Gluten-free cut-out cookies
Seriously, how cute are these gluten-free cookies? Not only are these the cutest cookies you'll see this holiday season, but they taste delicious too, and we're sharing some different flavor options. These completely customizable cookies can be baked plain or dusted with colored powdered sugar, or they can be completely decorated to match the holiday you're celebrating!
Hot Tips:
The best part about these cookies is that you don’t have to wait until they cool before rolling them out!
Usually with cut-out sugar cookies, the dough has to sit for a few hours to get delicious cookies, but we rolled the dough out right away and it worked great. You can also make the dough and chill it for a few hours to a few days until you're ready to bake and frost.
Reader comments
“I've tried several paleo recipes and these are hands down the best! They have a nice chew but also a crispness that most other recipes lack. I used maple syrup for the honey and used a vegan buttercream to achieve A huge success! I rave about this recipe and the non-Paleo family members love them and had no idea they were a cleaner version of the classic!!”
Reader comments
“These are our favorite!! We used Pamela’s mix the other day and my son said he liked yours better. Perfect texture and so delicious. We love the ingredients ❤️”
Tips for rolling out dough
We may be biased, but we think this dough is easy to roll out! For us, it went straight from the mixing bowl to being rolled out!
We had no problem transferring the cut cookies from the rolled up place to the baking sheet.
But if you're new to cutting cookies, follow these tips for best results:
- Prepare a baking sheet lined with silpat or parchment paper.
- Roll out the dough between two pieces of baking paper or plastic wrap.
- Roll them to 1/4 inch thick.
- Cut the cookies as close together as possible to get the most out of the dough each time you roll it out.
- Using a small spatula or knife, lift and transfer cookies to baking sheet. If you can't move the cookies and keep their shape, chill them in the refrigerator for a few minutes until the dough firmes up slightly.
- You can re-roll the pieces as many times as you like, and since there is no gluten in these cookies, re-rolling them won't be difficult; however, if the dough starts to warm, you'll need to chill them in the refrigerator.

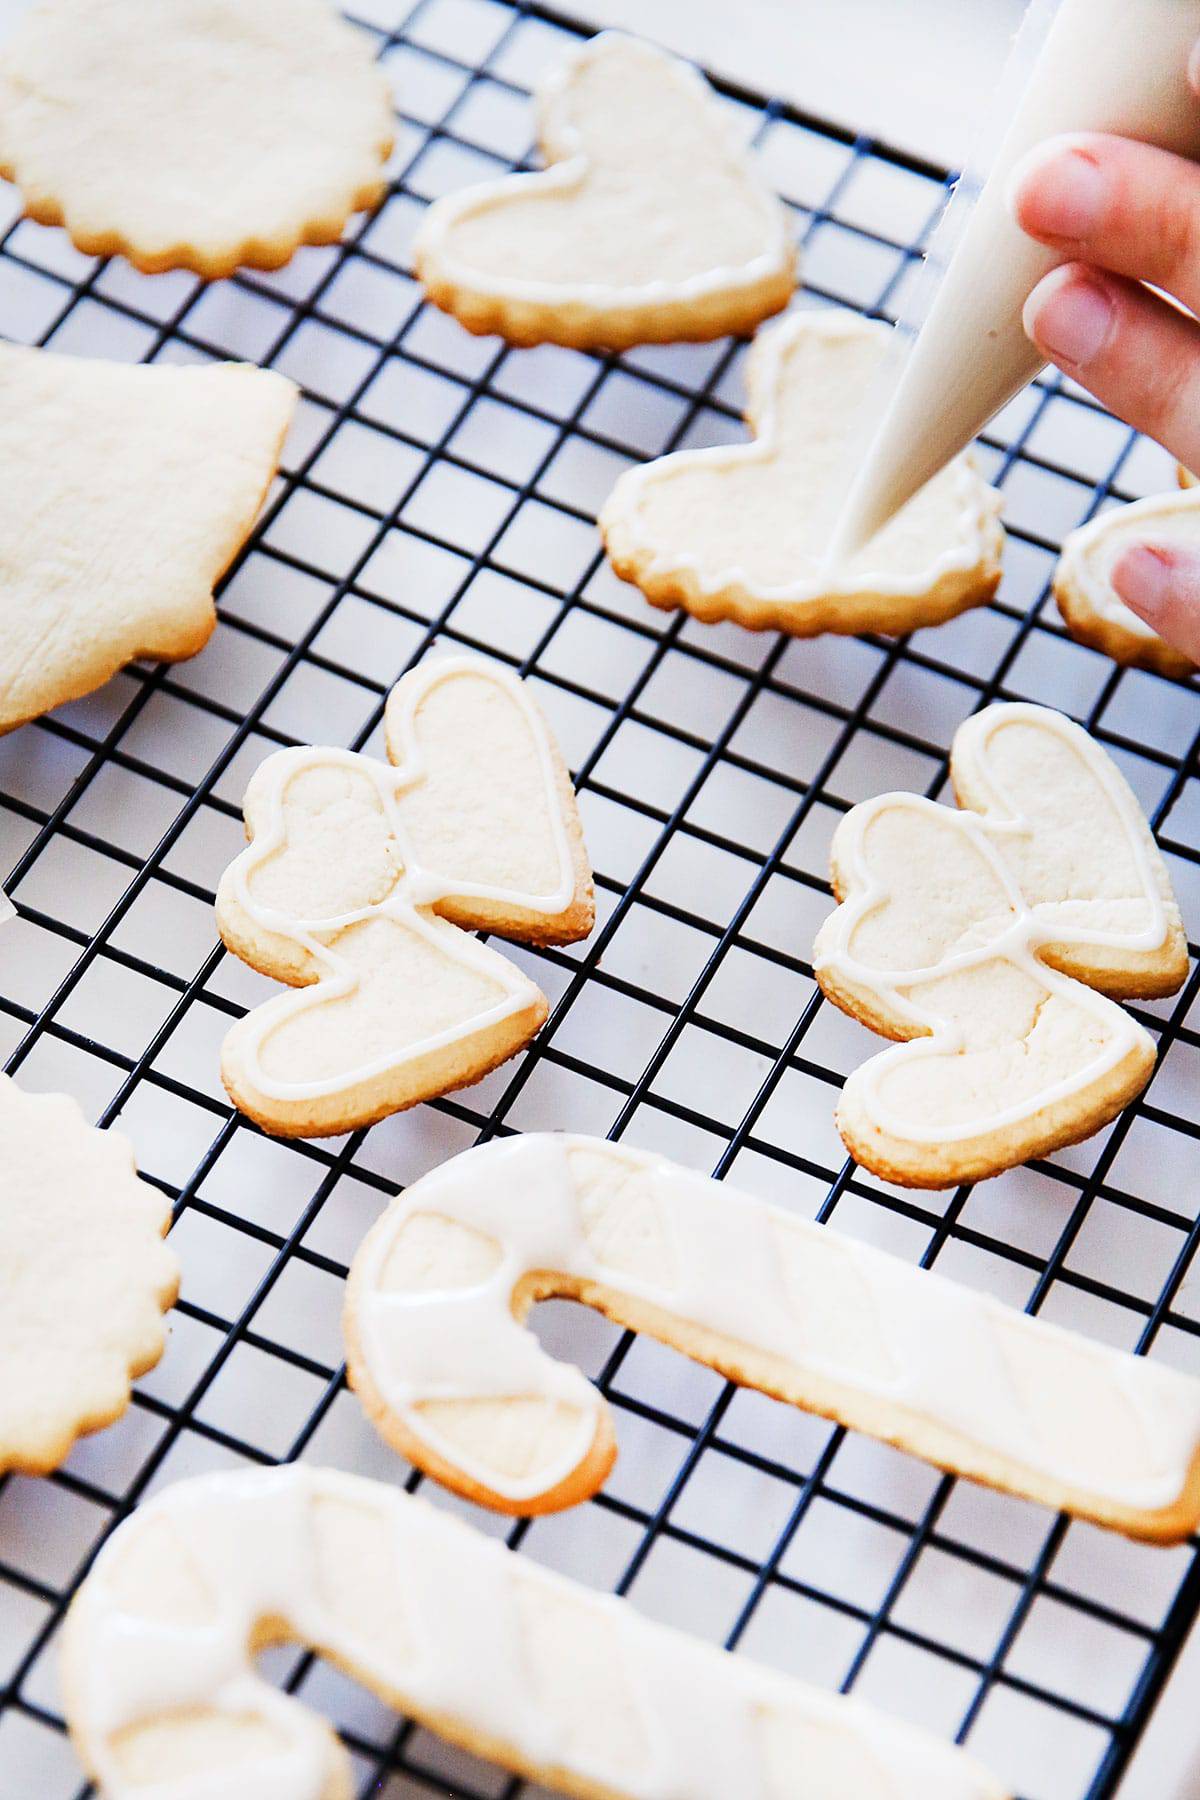
Tips for decorating with powdered sugar
As we said above, these cookies are inherently delicious! But when decorated, they do become noble. You can make these cut-out cookies any time of the year, and we've included a recipe for hard sugar icing to make your life easier with these delicious cookies.
We chose this icing sugar over royal icing because it's easier to make and the end result is basically the same. But if you like royal icing, use it! We were asked what the main difference between the two frostings was, and we found that royal icing dries very hard and is suitable for small piping tasks, while powdered sugar frosting is ready in minutes and is slightly softer, but you can use these Cut out cookies to handle plumbing tasks.
- You'll want to make two different concentrations of icing for more detailed decorations. Thicker frosting will be used for the piping and borders. Thinner frosting is suitable for wider cookie layers.
- We tested a few different types of artificial dye-free food coloring (see below) to create the most festive cookies. After mixing the base icings, you can divide them into smaller bowls and add natural food coloring.
- Pipe the edge details first and let dry briefly (10 minutes or so) before filling with thinner frosting.
- We used two piping bags for piping and also tried using a squeeze bottle. We did not use a tip in the piping bag. We just cut a small hole! Pro Tip: Squeeze bottles are great when decorating with kids!we use these Pastry bags And these mini squeeze bottle!
- Allow frosting to harden (at least a few hours or until dry) before storing.
- Have fun decorating!

Reader comments
“These are great! The cookies themselves are not too sweet, which is nice. I sprinkled the glaze with Christmas sugar and they were perfect. I haven't cut cookies in a long time!”
Let’s talk about natural dye options:
we talked Make your own food dye with food powder. These homemade dyes tend to work best with buttercream frosting. While it's totally possible to frost these cut-out cookies with buttercream frosting, it won't have the classic feel of the frosting we mentioned above. So we went ahead and tested a few brands that offer artificial food coloring, and here are the results:
We actually like them all, and they all come in different price points.
We tried:
- Whole Foods Market 365 Brands: This is the most economical and works well, except for the red, which has a more pinkish hue. This brand is most similar to traditional dye in that it comes in a small liquid squeeze bottle. Packs containing the core colors are available for less than $10, with instructions for mixing other colors on the pack.
- Colorful kitchen food: This dye-free colorant comes in powder form. You can mix it with the wet ingredients to hydrate, or add a small amount of water to hydrate before adding it to the frosting (which is the method we used). Surprisingly, this one is very effective, but more expensive. It comes in disposable packaging, which has both advantages and disadvantages.
- true color: The effect of this brand is amazing, but the price is very expensive. It's also available in powder form, but comes in small jars (depending on how much you order), so you can store any leftovers in a container. You must store this food coloring in the refrigerator. Any of the red colorings you see in this post use TruColor, and you'll see that it produces a perfectly vibrant red.
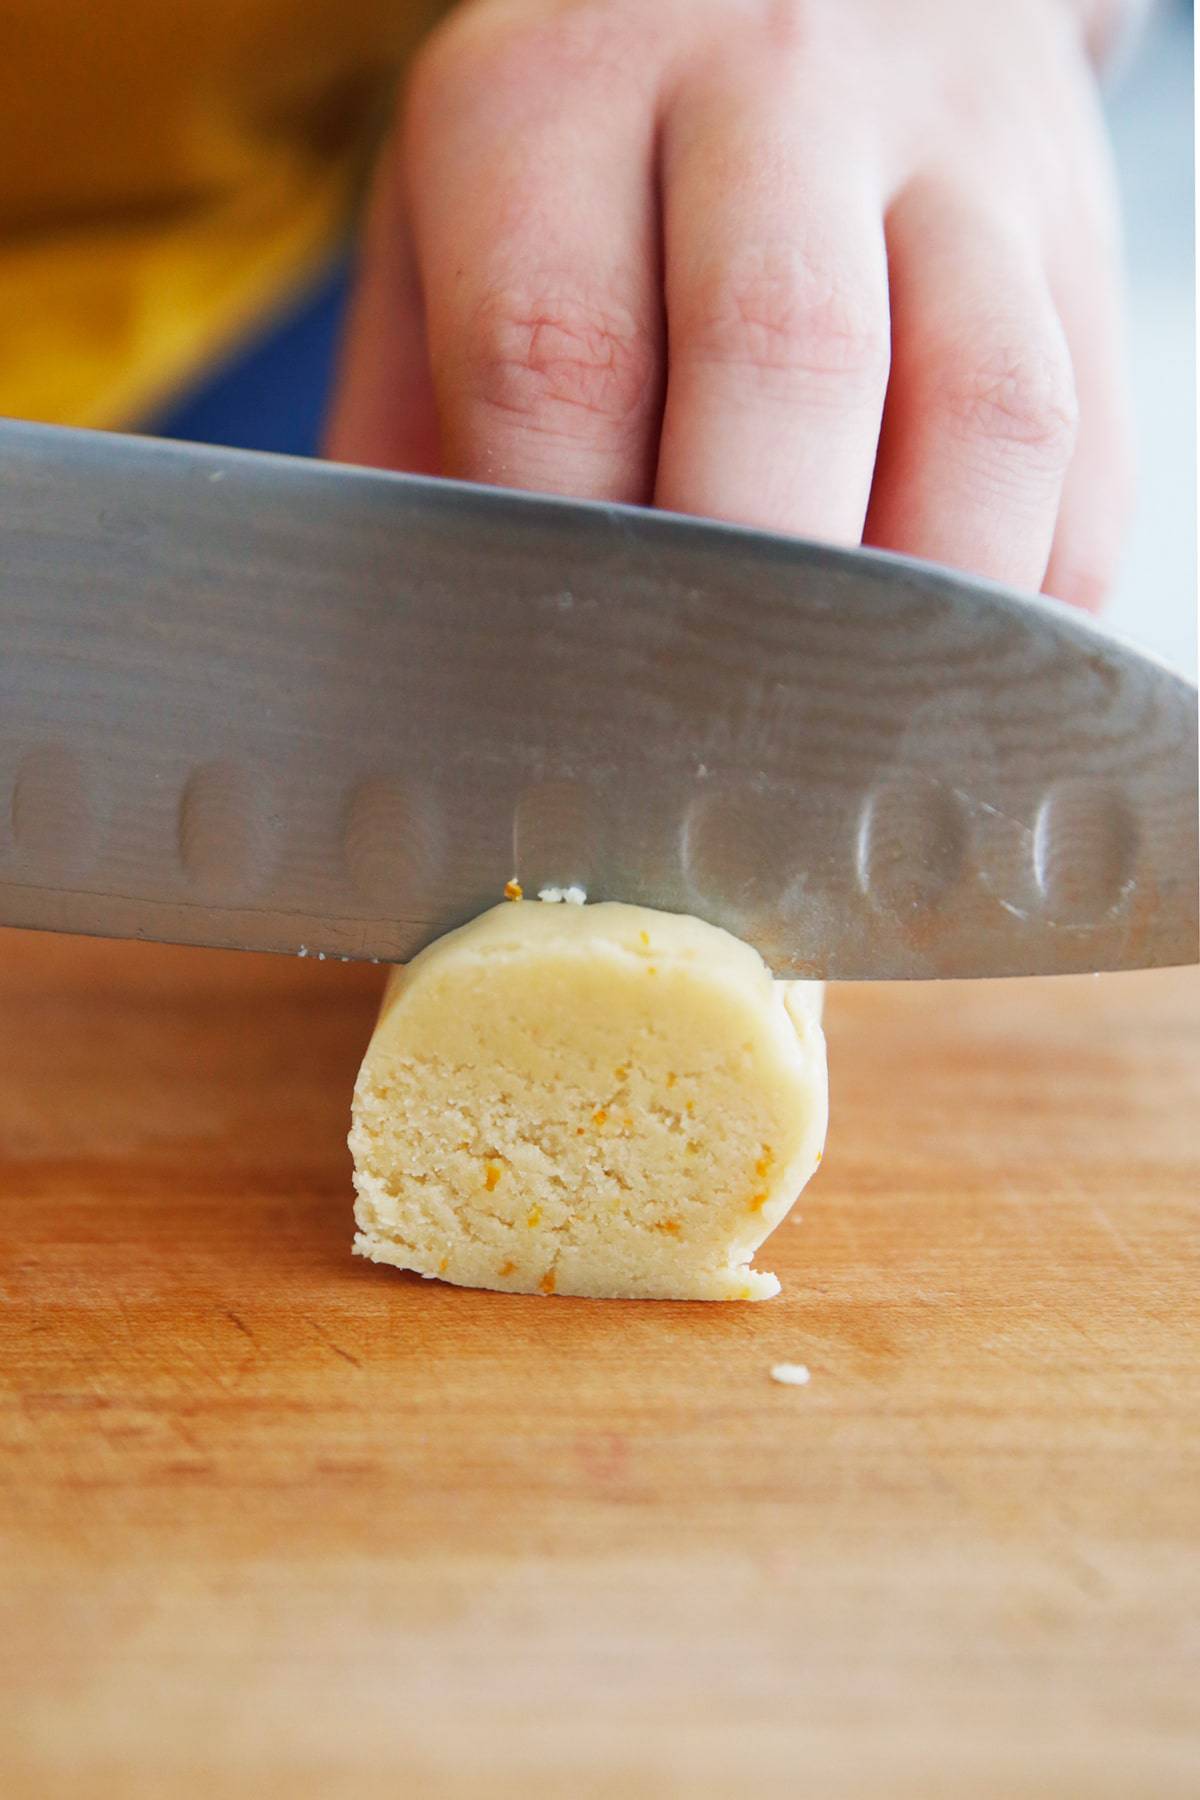
Don’t want to cut out a design with these cookies?
Wouldn’t you like to cut out a design with these cookies? no problem! You can also roll the dough into a log, place in the refrigerator for about 1 hour (or longer if you like), and then slice! You will follow the baking instructions we have listed below. We’ve included some flavor options in the post, including almond, citrus, and mint!
FAQ:
- How to store baked cookies? It can be stored at room temperature for 5-7 days, in the refrigerator for about 10 days, and in the freezer for 6 months.
- How to store dough? You can store the dough in the refrigerator for 2-3 days.
- How thick should I roll the dough out? Roll to 1/4 inch thick!
- Are there any flour substitutes? No – this was a test result of a combination of almond and coconut flour.
- Is there anything I can use instead of honey? Yes, maple syrup works!
- Can I use vegan buttercream? Yes – see comments below!
- Can I add other flavors? Absolutely! You can use any flavor you like. We only tested the three listed, so start with measurements.
- Do I have to use a piping bag? No! You can use any zipper style bag and snip off the tip!
Tools used:
More cookie recipes:
Watch the video:


- 1/4 cup butter Room temperature (or butter substitute)
- 1/4 cup Honey
- 1 teaspoon vanilla
- 1-1/2 cup 190g almond flour Use a food scale for precise measurements
- ½ cup 60g tapioca flour Use a food scale to ensure accuracy
- pinch fine sea salt
Available flavors (choose one):
- 1/2 teaspoon Mint
- 1 spoon orange peel
- 1/4 teaspoon almond extract
For decoration:
- 1 cup organic powdered sugar
- 1-1/2 to 2-1/2 spoon almond milk
- 1/4 teaspoon Vanilla extract
Make the cookie dough:
-
Cream butter, honey, and vanilla extract in a stand mixer or hand mixer until light and fluffy, about 3-5 minutes
-
Add almond flour, tapioca flour, and salt to a medium bowl and stir to combine.
-
Add the dry ingredients to the cream and mix. It may seem crumbly at first, but continue mixing until the dough comes together.
-
Roll out immediately (see instructions below) or wrap in plastic wrap and store in the refrigerator until ready to roll out, up to 3 days.
Roll out and bake the cookies:
-
Preheat the oven to 350 degrees and line a baking sheet with parchment paper or a silicone mat.
-
Roll out the dough between two pieces of baking paper or plastic wrap. Roll out to 1/4-inch thickness and cut out with cookie cutters. Carefully peel the cut cookies from the parchment paper and place on the lined baking sheet. They won't spread out, so you can space them as close as 1/4 inch apart.
-
If the dough gets too hot, you can re-roll the scraps, cooling in between.
-
Bake for 7 minutes, until edges are lightly golden.
-
Allow to cool before decorating.
decorate:
-
Whisk together 1-1/2 tablespoons almond milk, vanilla extract, and powdered sugar until smooth. You want it to be thick enough to pipe. If you plan on submerging the cookies, you can make two smaller batches and add more almond milk to make them thinner for spreading the cookies between the piping frosting. Add some food coloring depending on the color you want to make (see post for more info). Use a squeeze bottle or piping bag to decorate.
- Read this article for more information and tips on making these cut-out cookies.
- Save cookies:
- Baked cookies will keep for 5-7 days at room temperature.
- In the refrigerator – baked cookies will keep for 6 months.
- Cookie dough – can be kept in the refrigerator for 2-3 days.

