

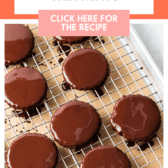
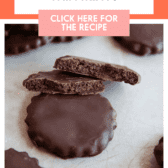

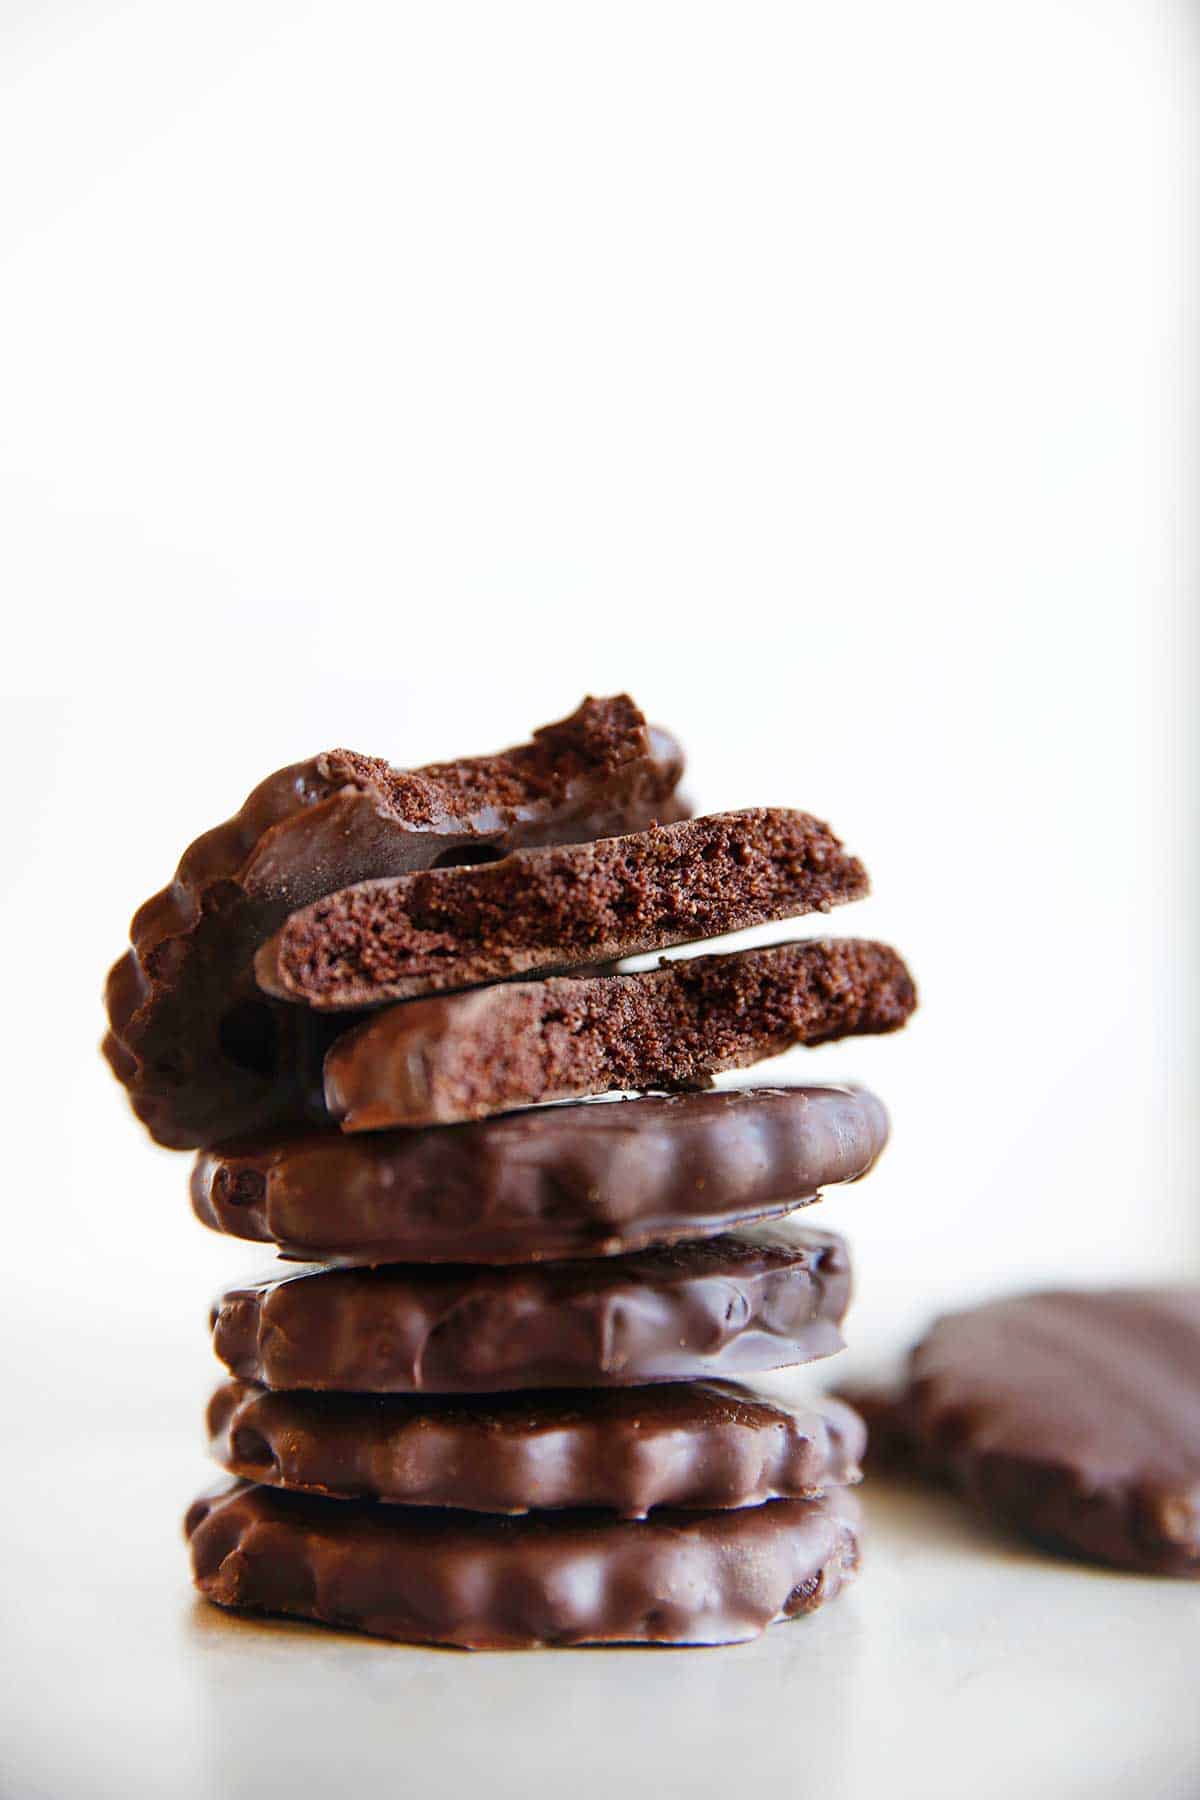
Looking for a healthier version of your favorite Girl Scout Cookies? These Gluten Free Thin Mints do just that! Crunchy, minty, chocolatey, and just the right amount of sweetness!
They’re the real deal, and they’re also gluten, grain and refined sugar free!
Homemade Healthy Thin Mint Cookies
Growing up, I was definitely more of a Samoan or Tagalog kind of girl. But in adulthood, my palette shifted to Thin Mints. So naturally, I had to recreate them. I love being able to make my favorite childhood favorites at home, but using real whole food ingredients! It’s not Girl Scout hits, I’m all for the cute kids, but sometimes you just want to indulge in a longtime favorite treat, but lighten it up a little! And this recipe definitely is.
These cookies are super easy to prepare, but if you’re new to using a gluten-free cookie recipe, we’ll share all the tips below on how to make it!
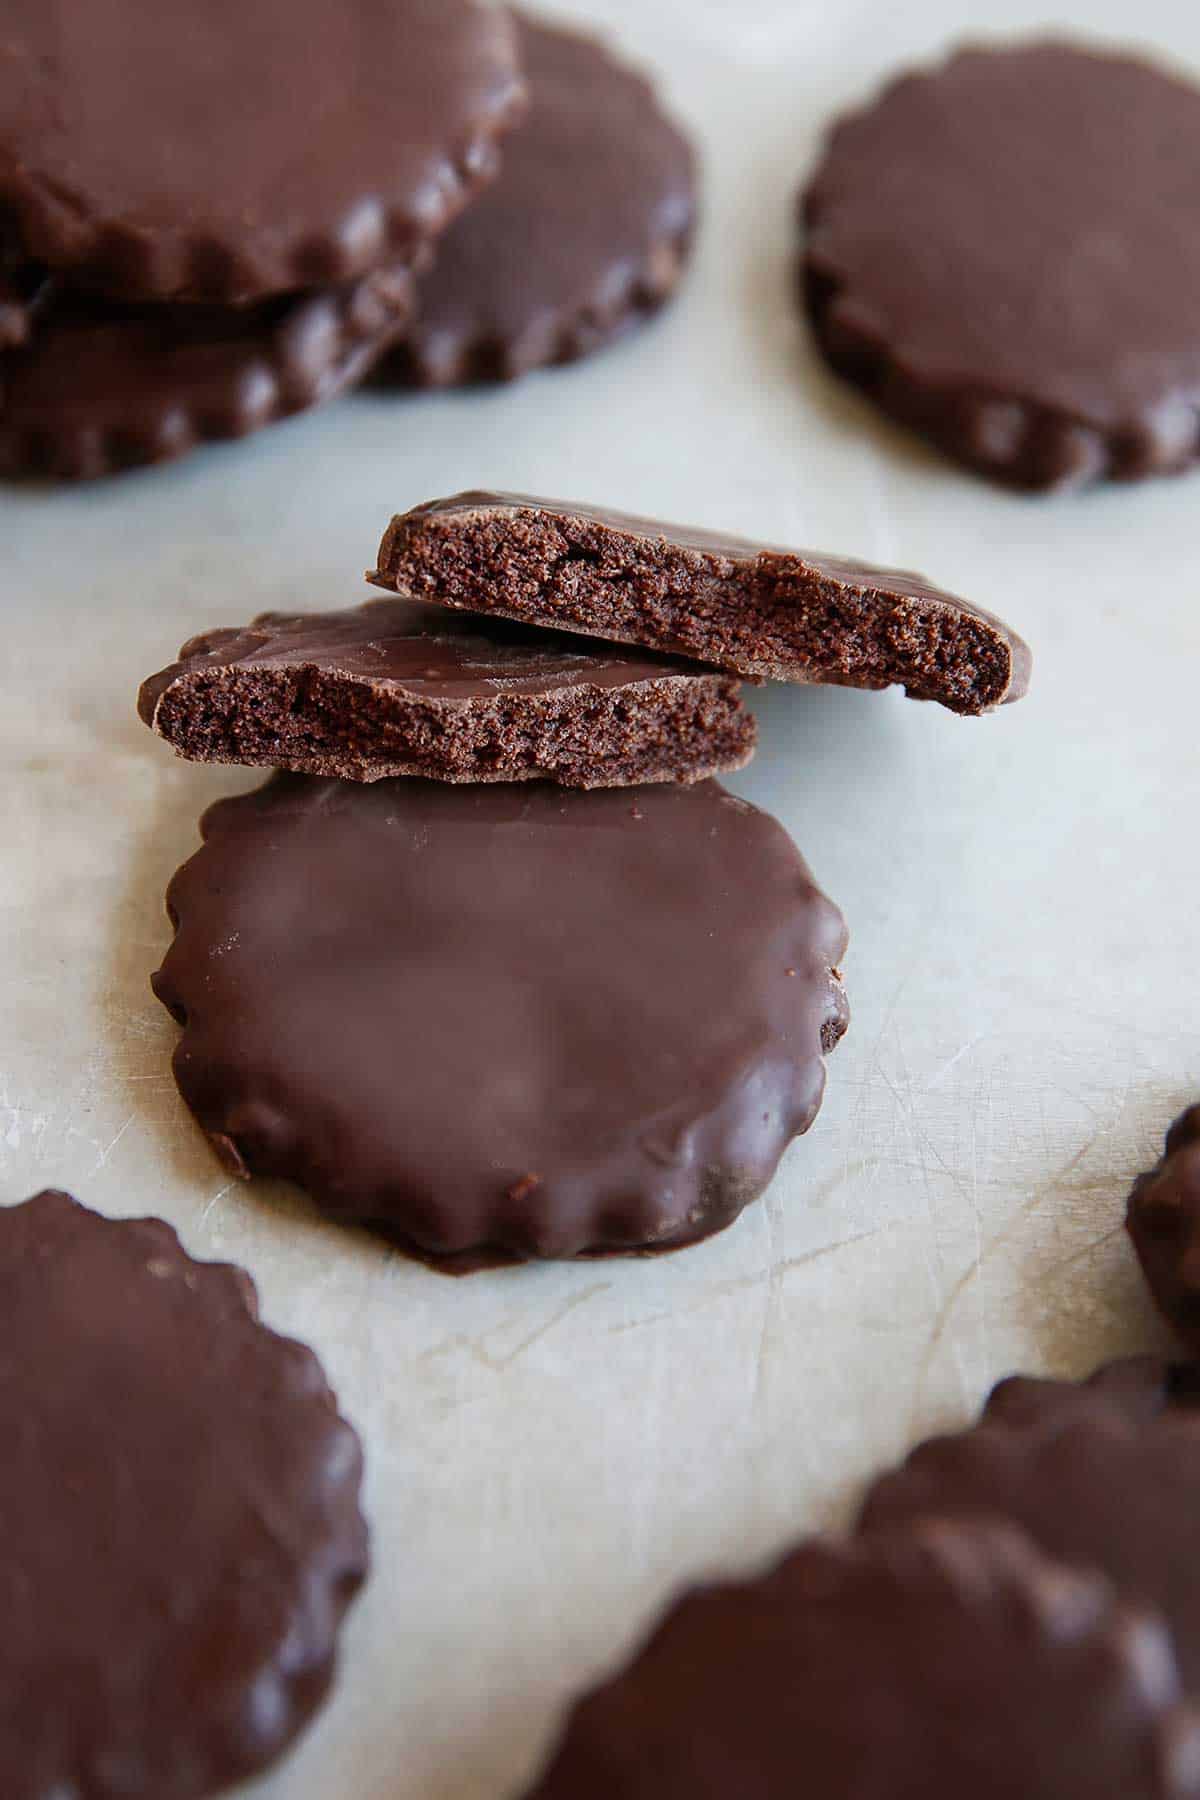
These crunchy chocolate chip cookies are delicious and the perfect treat to keep in the freezer for when you have a sweet tooth.
materials needed
Scroll down for the full recipe!
- Almond powder
- tapioca flour
- cocoa powder
- Salt
- butter
- vanilla extract
- peppermint extract
- Honey
- coconut candy
- dark chocolate
- coconut oil
Looking for an alternative to almond flour?
This is a common question we get. Unfortunately we are unable to offer a substitute as it is the main ingredient in this cookie.
If you do want to substitute another flour, please come back and comment/share how it worked for you!
required tools
Tips for Making Gluten-Free Thin Mints
Putting this dough together is easy, but you must have butter at the correct temperature! This recipe calls for softened butter. Others have had problems after trying to make dough with melted butter.
butter for reference only
Using melted butter will make the dough too soft. So take the butter out of the refrigerator at least two hours before you plan to make the dough.
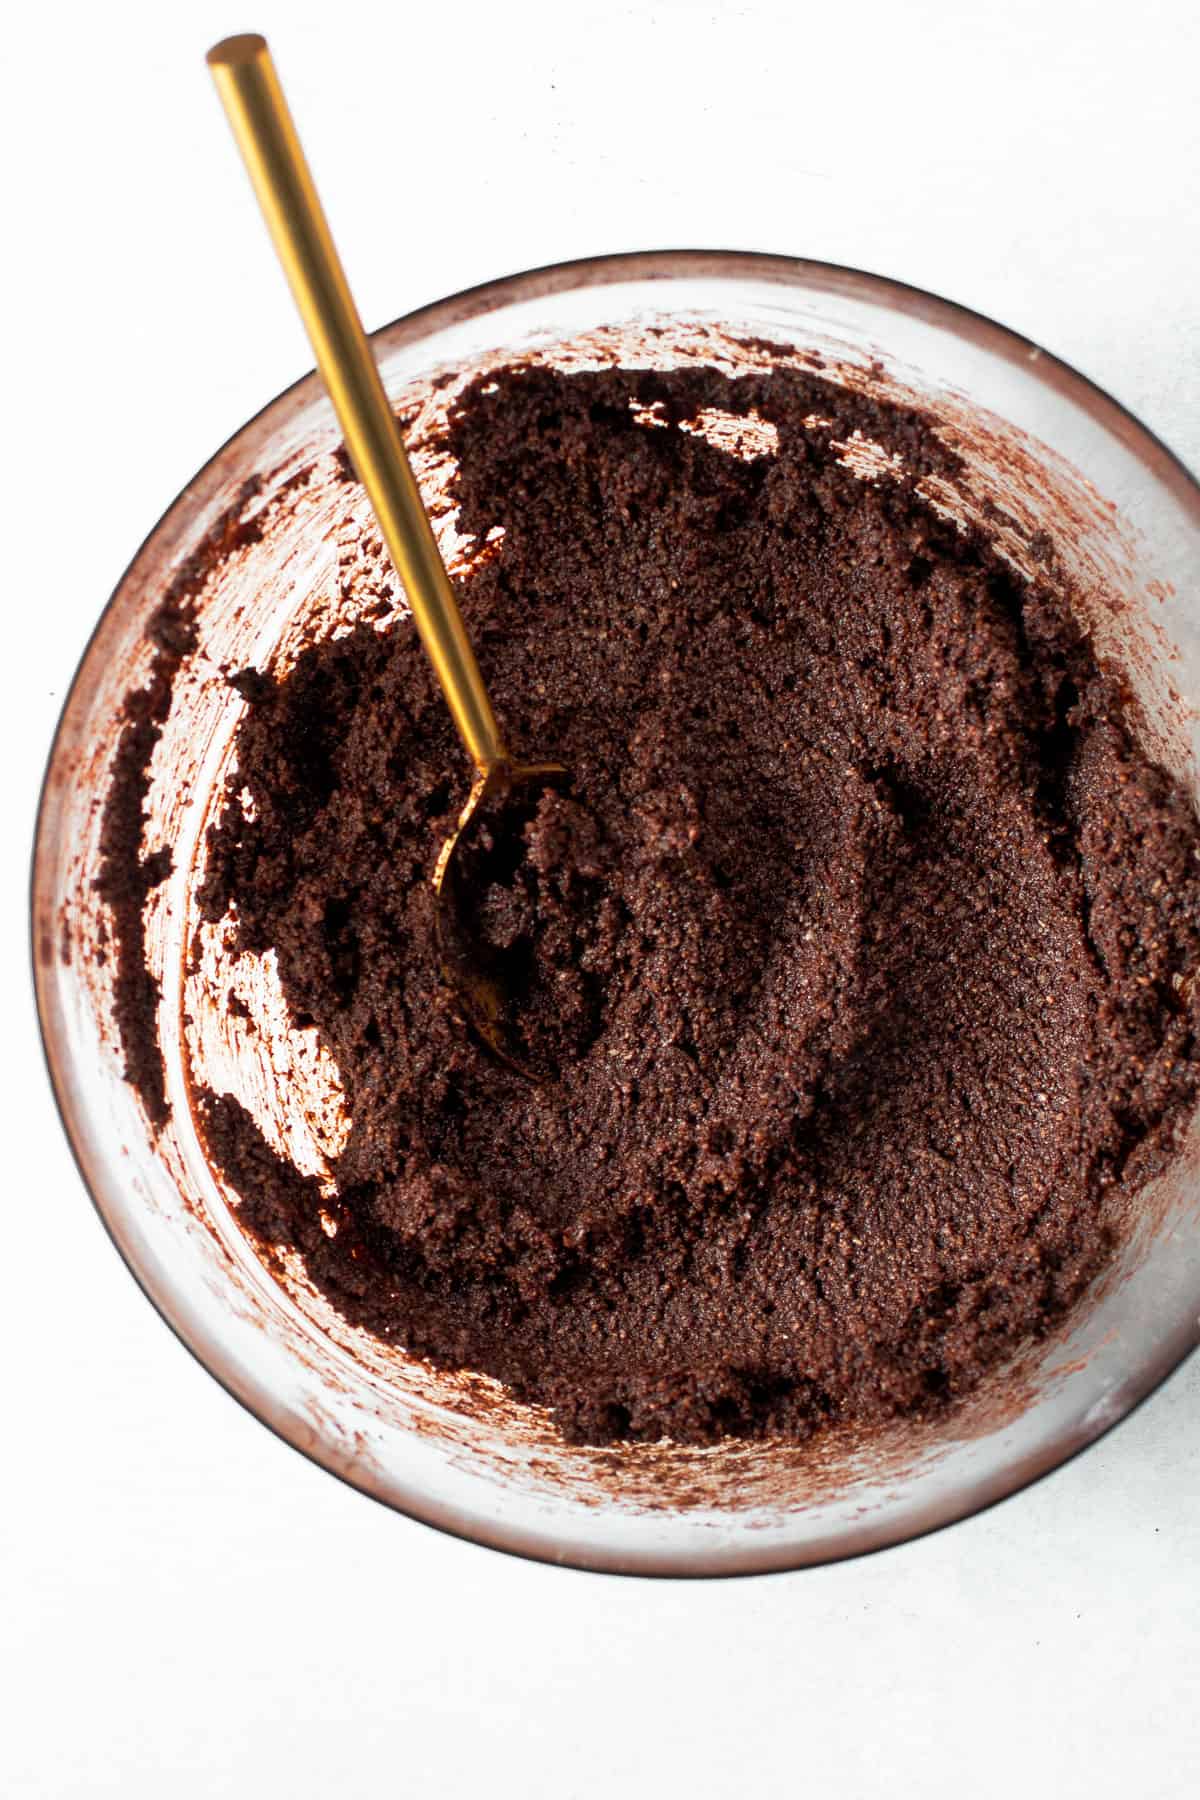
Once you have the correct temperature for your butter, all you have to do is add the ingredients to the bowl and mix together – it’s that easy! The dough should be thick but still sticky.
When the dough is thoroughly mixed, wrap it in a piece of parchment paper and put it in the refrigerator for at least an hour. Let it sit for 2 hours if possible. Once it’s completely firm, it’s ready to roll!
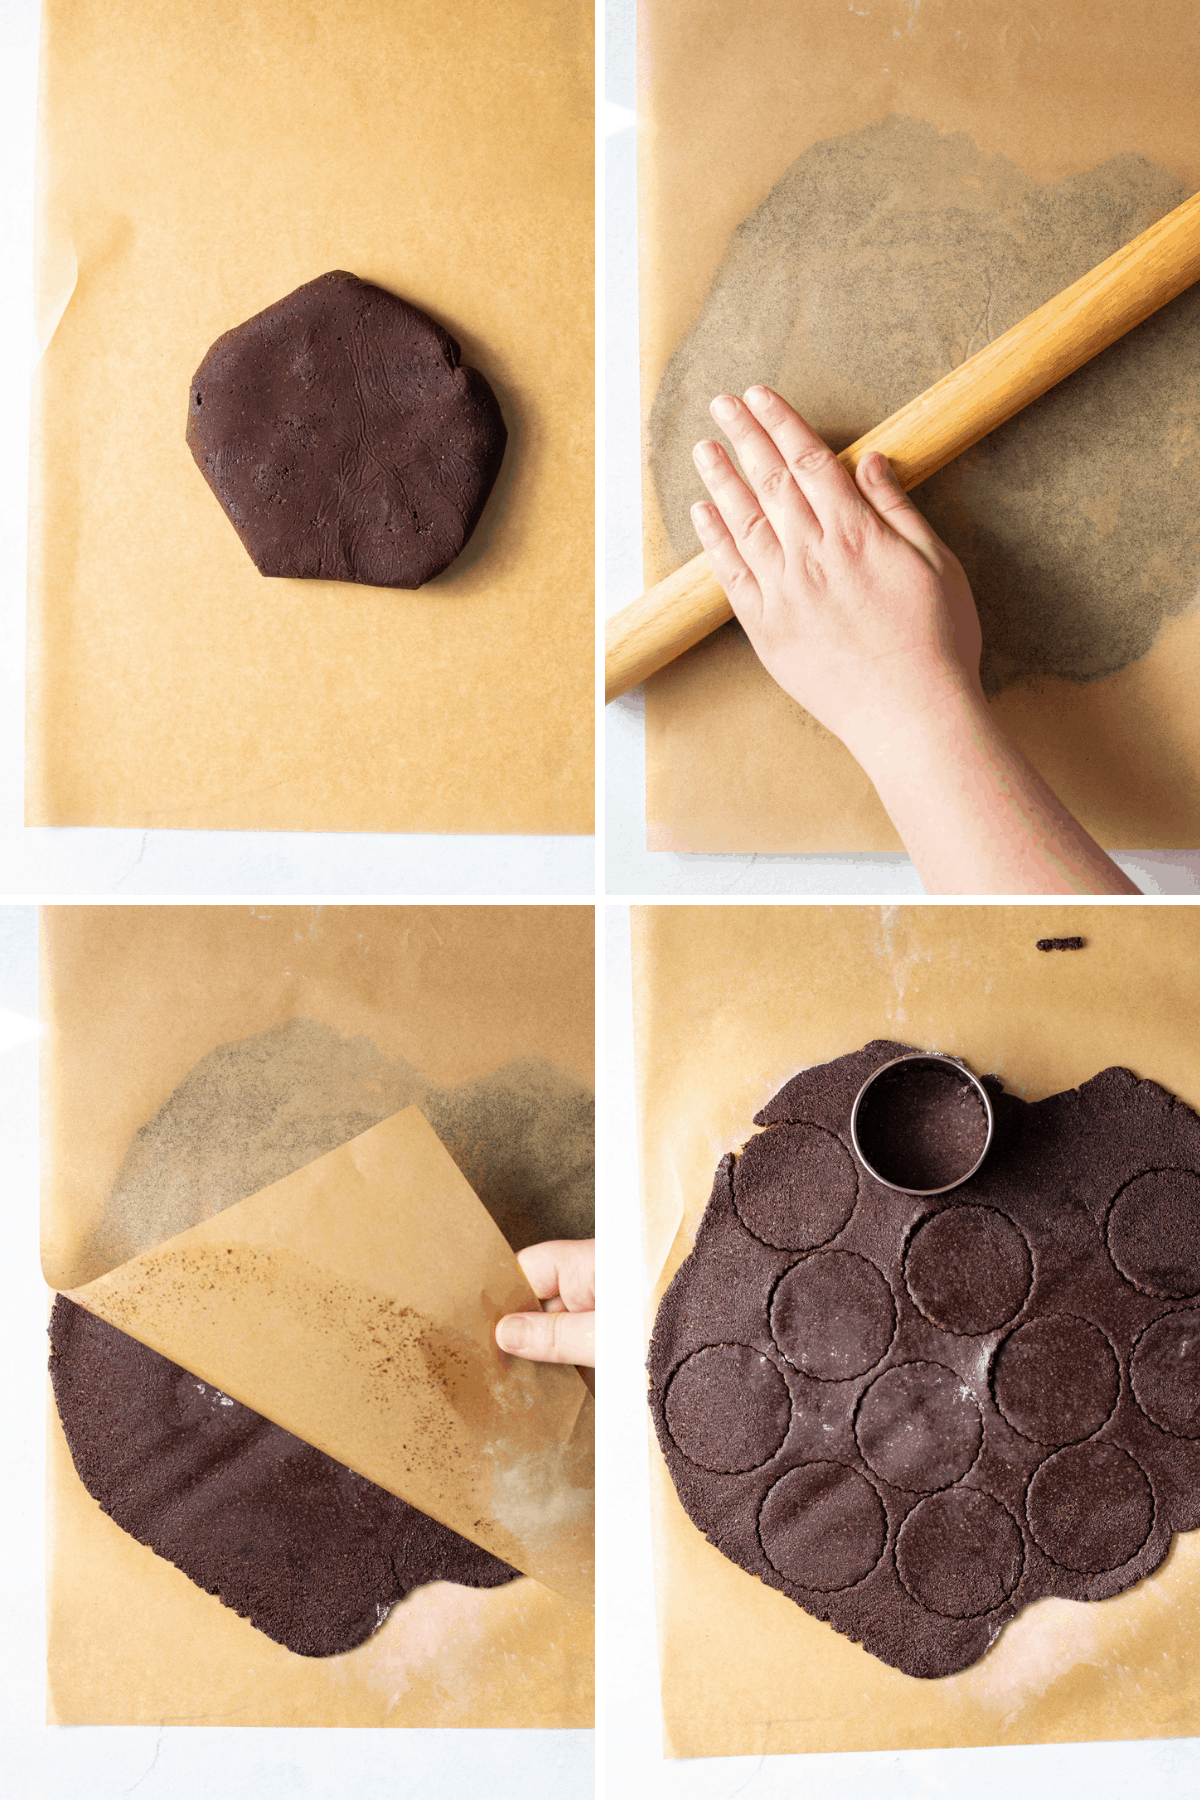
How to Roll Out the Dough
Here’s the tricky part of this recipe: rolling the dough and transferring it to a baking sheet. But don’t worry, I’m sharing my best tips for using this gluten-free dough.
- First, make sure your dough is refrigerated.
- Place dough on a sheet of parchment paper and sprinkle with tapioca starch. Turn the dough over and sprinkle tapioca starch on the other side. Then place another sheet of parchment over the dough. Now you’re ready to roll it out! The parchment paper is used because it comes off the cookie easily so you can transfer the dough onto it to keep the dough from getting too hot.
- Dough should be rolled out to a 1/4-inch thickness.
- Then, use your cookie cutter to cut out as many cookies as you can.
- Once you’ve stamped your cookies, it’s time to transfer them to a (new) parchment-lined baking sheet. If your dough is warm, I recommend putting it back in the fridge for 15 minutes before transferring the cookies. To do this, simply slide the dough directly onto the parchment, onto the pan, and place in the freezer. Once the dough has cooled, it will be much easier to successfully move the cookie pieces.
- To lift the cookies, sprinkle tapioca starch on the blade of a mini offset spatula and slide it under the cookies to loosen the cookies from the parchment. Use a spatula to transfer the cookies to the baking sheet.
There’s some skill to this, but if your cookie dough is the right consistency, it shouldn’t be easy to pull off.
to freeze or not to freeze
Many people, myself included, like to freeze thin mints and eat them straight from the freezer. Here’s a great way to enjoy this gluten-free version.
freezing: These cookies can be kept in the refrigerator for up to 3 months. Store them in an airtight container.
Don’t want to freeze them? That’s ok, but they need to be stored in the fridge because they’re coated with chocolate. Cookies will be kept for at least 5 days.
Watch the video:
More Cookie Recipes:

- 1-1/4 cup Almond powder
- 1/3 cup unsweetened cocoa powder
- 1 tablespoon tapioca flour plus more scrolling
- 2 teaspoon coconut candy
- loose sea salt
- 5 tablespoon butter soften
- 3 tablespoon honey or maple syrup
- 1 teaspoon vanilla extract
- 1/2 teaspoon peppermint extract
Chocolate coating:
- 1 cup dark chocolate chips
- 1/4 teaspoon peppermint extract
- 2 teaspoon coconut oil or more as needed
-
Add to Almond powdercocoa powder, tapioca flour, coconut candyand Salt into a bowl. Stir together until combined.
-
Stir in softened butter, honey, vanilla and peppermint extract. Using a large spoon, mix the dough together until well combined and no visible streaks of butter remain.
-
Transfer the dough to a piece of parchment paper or plastic wrap, and wrap it up. Place the dough in the refrigerator to chill for at least 1 hour or up to 1 day.
-
After the dough has cooled, preheat the oven and line a baking sheet with parchment paper.
-
Place dough on another sheet of parchment on the work surface and sprinkle with tapioca starch. Turn the dough over and sprinkle tapioca starch on the other side. Then place another sheet of parchment over the dough. Roll out dough to a 1/4-inch thickness. Then, use your cookie cutter to cut out as many cookies as you can. You can re-roll the pieces for more cookies.
-
Sprinkle a mini spatula with tapioca starch and slide it under the cookies to remove from the parchment and transfer to a baking sheet. If at any time the dough is too soft to handle, transfer it to the refrigerator to firm up for 10 minutes.
-
Bake cookies for 15 minutes. When done, transfer the cookies to a cooling rack.
-
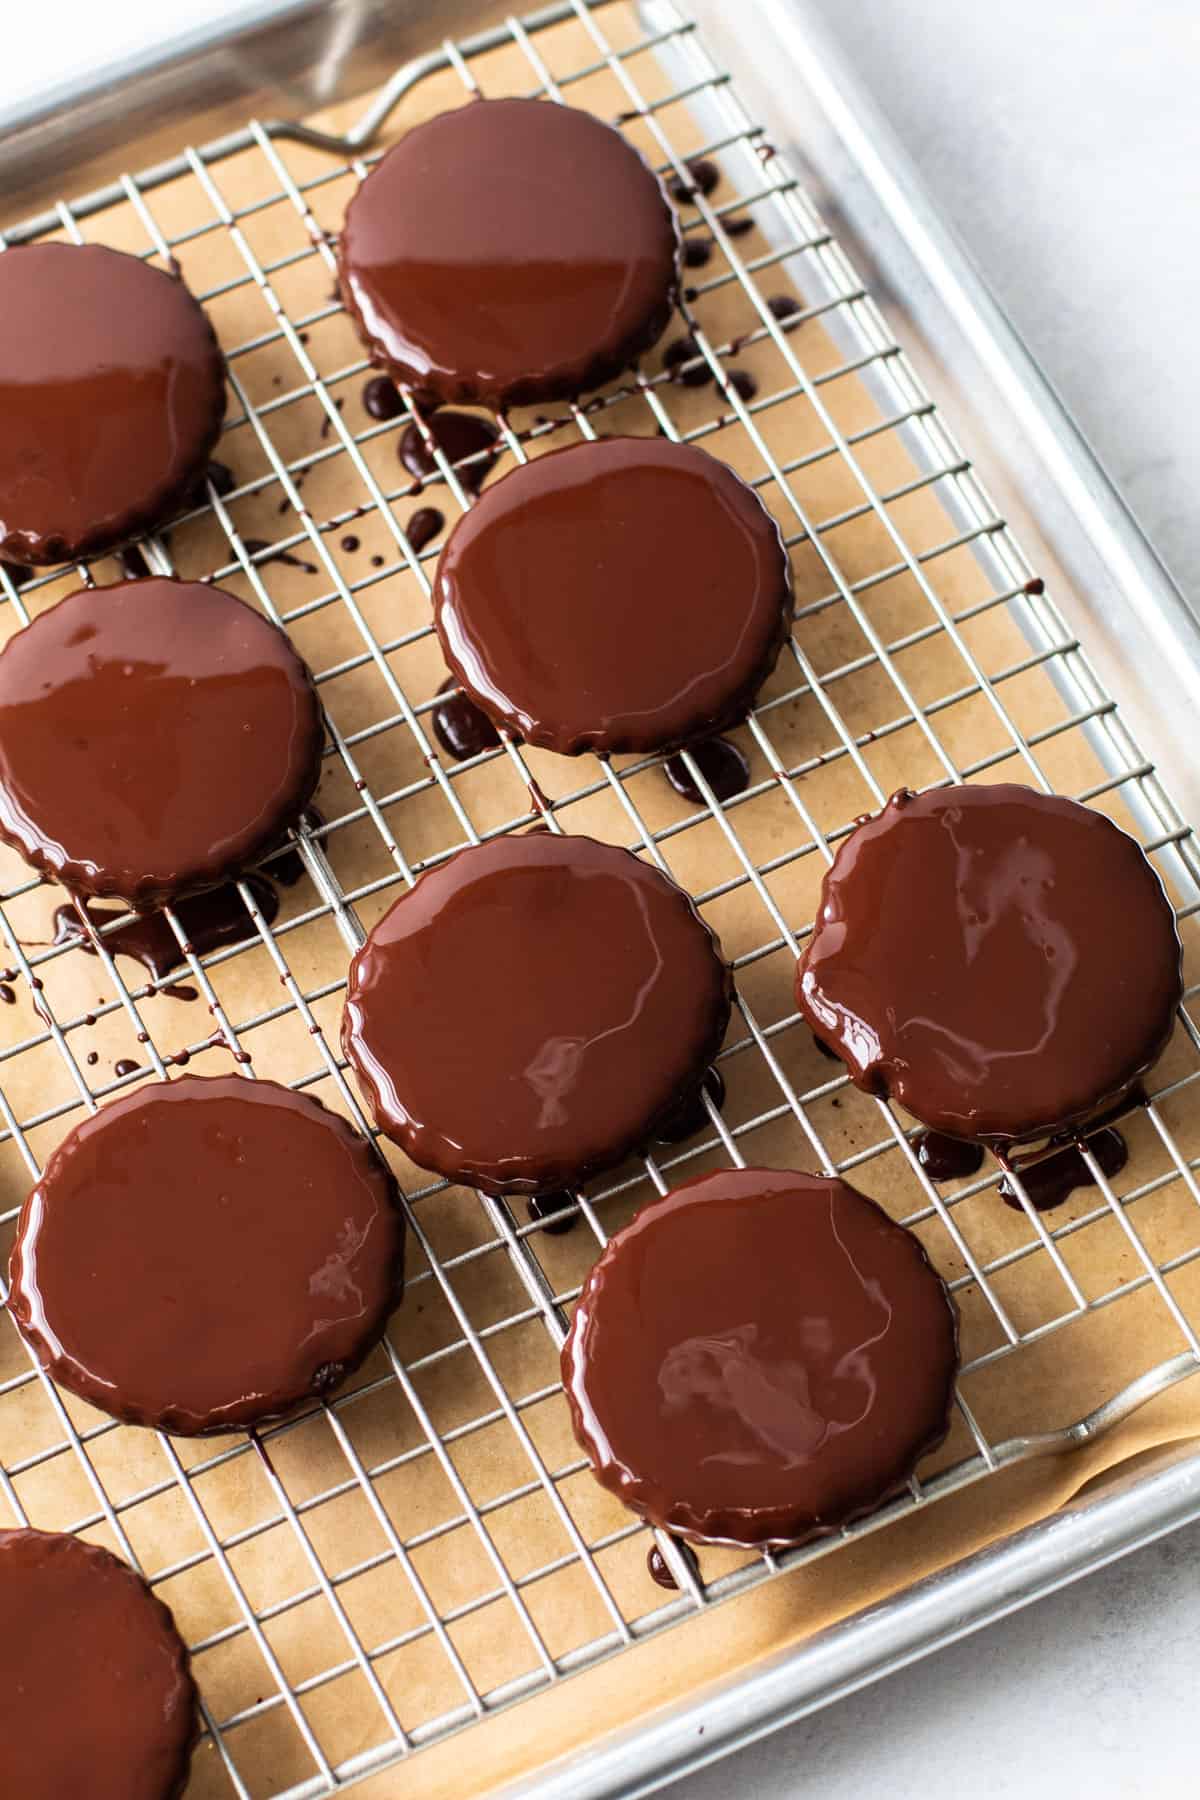
Meanwhile, on a bain-marie, melt and extract chocolate, coconut oil together. Dip cookies in melted chocolate until completely covered. Use a fork to lift the cookies out of the chocolate, letting the excess fall off. Transfer cookies to a piece of parchment paper. Repeat the above steps with the remaining cookies.
-
Chill in the refrigerator (or freezer) for at least 10 minutes, or until the chocolate is firm. Store in the refrigerator for up to 5 days, or in the freezer for up to 3 months.
This recipe was updated March 2017 with minor changes and new step-by-step photos added March 2021.
Serve: 1cookiesCalories: 195kcalcarbohydrate: 17.4Gprotein: 3.6Gfat: 14.1GSaturated fat: 6.4Gcholesterol: 11mgsodium: 46mgfiber: 1.7Gsugar: 11.8G

