

Premiering a video on Facebook allows your business to enter the world of live streaming without the stress of playing live footage.
You’ll get the same enhanced visibility that comes with Live on Facebookcombined with the control and production quality of creating pre-recorded videos.
In this article, you’ll learn everything you need to know about Facebook Premiere and how to premiere a video on Facebook with step-by-step instructions.
What is a Facebook Premiere?
Facebook Premiere allows business pages to publish pre-recorded videos as “live” content.
The advantage of using Facebook Premiere, rather than uploading the video as a regular feed post, is the benefits of live streaming.
Some of these benefits include being highlighted in the news feed of people who like your page, and real-time feedback from your audience.
Additionally, you can hype for the video In a way that regular posts cannot.
What are the advantages of using Facebook Premiere?
When you schedule a Facebook premiere, your page will automatically send an announcement post, make your audience like itshare and add comments before content is published.
People can choose to subscribe to premieres and be notified before upcoming videos “go live.”
Unlike regular live broadcasts, you don’t need to be present during the Facebook premiere.
When the premiere ends, the content is automatically converted into a video post on the homepage.
All likes, shares and comments received during the broadcast are transferred to the video post.
When new viewers discover a video for the first time, they can see all the engagement from the live audience and contribute their own likes, shares, or comments.
Facebook Premiere Eligibility Requirements
All new Facebook videos are eligible for the premiere.
Videos you previously uploaded to Facebook could not be premiered – this feature can only be used for fresh content.
In order for your videos to be eligible for the premiere, they must meet the following requirements:
- Premiere videos must be at least 30 seconds long.
- The maximum length of a premiere video is 4 hours.
- Video must be 30 frames per second or less.
- MP4 is the recommended video format for Premieres.
- Video codec must be H264.
- Audio codec must be AAC.
- Videos must be no larger than 1920 x 1080p.
- The maximum file size for Premiere is 10 GB.
Finally, premieres must be scheduled at least 10 minutes in advance.
How to Schedule a Facebook Premiere
The process of setting up a Facebook premiere is just like uploading a normal video, with a few extra steps added.
Follow the instructions below to schedule a premiere from your Facebook page.
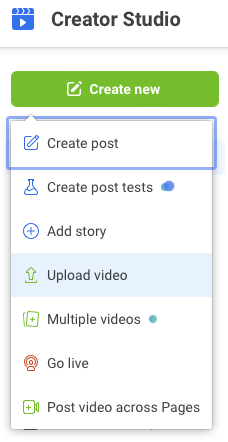
Step 1: Navigate to Creator Studio
First navigate to creator studio at business.facebook.com/creatorstudio.
click create new and select upload video.
From there, select the video you want to premiere.
Step 2: Add a Title and Description
After uploading your video, add a title and description to let viewers know what it’s about.
You can choose to set the thumbnail by selecting a frame from the video or uploading your own image.
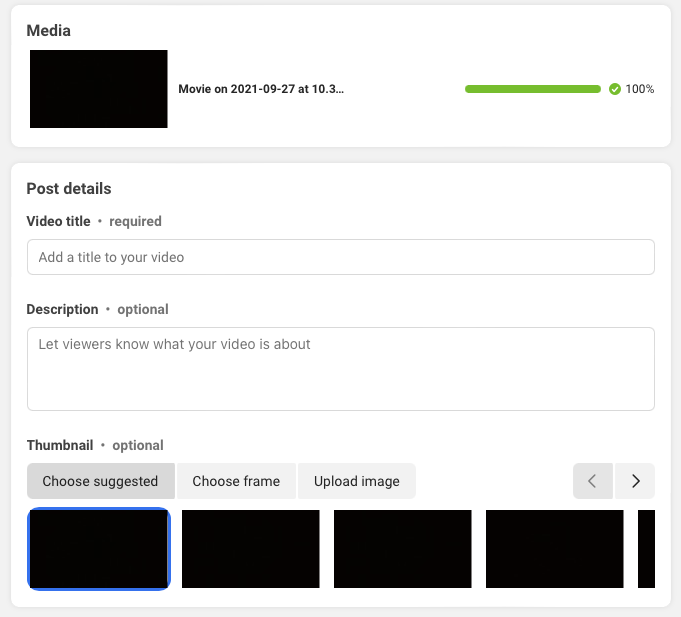 Screenshot via business.facebook.com/creatorstudio, December 2021
The recommended aspect ratio for video thumbnails is 1.91:1. The minimum size required is 400 x 150p.
Images uploaded in other aspect ratios are automatically resized or automatically cropped to fit.
Before moving on to the next step, you can choose to add relevant tags to your videos to improve discoverability.
Step 3: Choose Premiere
On the next screen, you can choose your publishing options.Make sure to choose premiereotherwise the video will be published as a regular post.
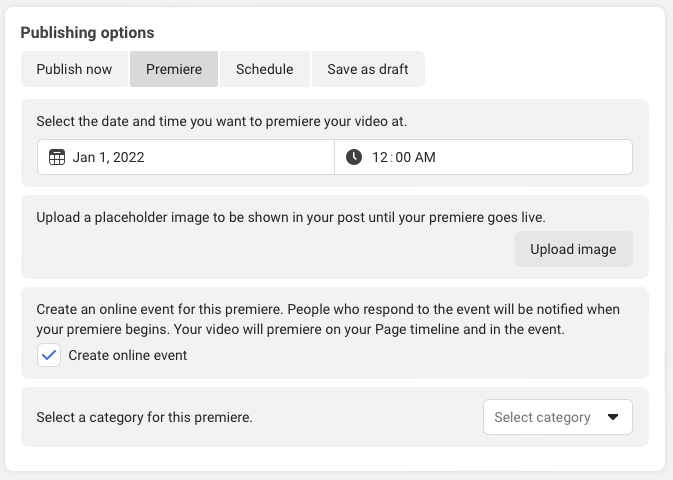 Screenshot via business.facebook.com/creatorstudio, December 2021
Set a date and time for your video to premiere and upload another image to use as a placeholder until the video goes live.
You can also take advantage of optional settings on this screen, including:
- Indicate where your posts will appear on Facebook.
- Allow other pages to share your premiere.
- Add premieres to playlists.
- Add tracking code.
- Add a button to raise money for a nonprofit or fundraiser.
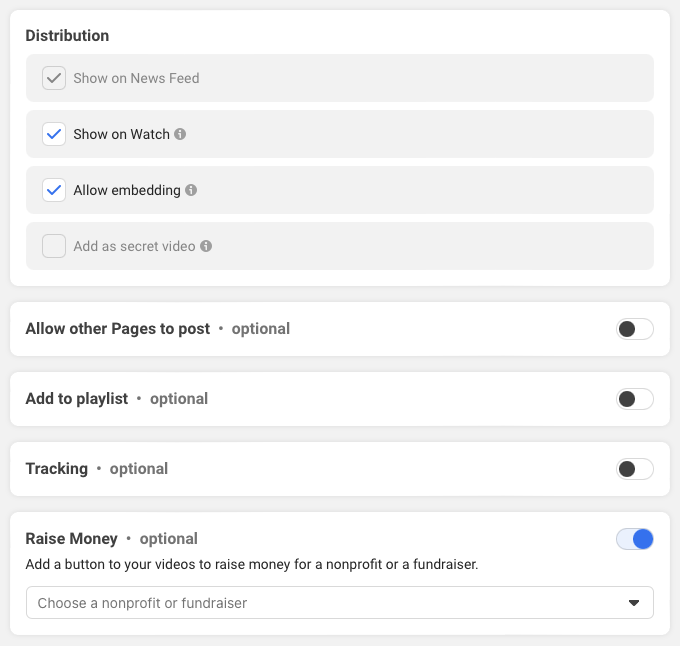 Screenshot via business.facebook.com/creatorstudio, December 2021
Step 4: Create an event
Complete your premiere with a click Create an event button in the lower right corner.
After that, the rest is up to you. You can build anticipation by sharing the post widely, or just sit back and let Facebook handle it with automated notifications.
in conclusion
Facebook Premiere can help you get more out of your video content, and Take advantage of Facebook’s live streaming capabilities without actually being online.
It’s free to use and available to everyone facebook page.
If your Page is eligible for monetization, you can also run monetization ads during broadcasts.
The only potential downside to premieres is that they must be scheduled at least 10 minutes in advance. This means you can’t upload a video and immediately publish it as a premiere.
Other than that, there’s no reason why you can’t use Premieres for all new video content you upload to your Facebook page.
More resources:
Featured image: Cosmin Sava/Shutterstock
All screenshots taken by author, December 2021

