

Review – Technology has made great strides in the past five years. When it first came out, 3D printers were far beyond the price range of most laboratories, let alone ordinary citizens. Now anyone with a few hundred dollars in spare money can buy one. The question is always which one to get.This Voxelab Aquila 3D printer It is an excellent first 3D printer, suitable for anyone who is studying this hobby. It is easy to assemble and comes with its own custom software to compile 3D files for printing, which means nothing is needed to start printing outside of the machine itself.
What is it?
This Somatosensory laboratory Aquila is a 3D printer, very suitable for entry-level 3D printing enthusiasts.
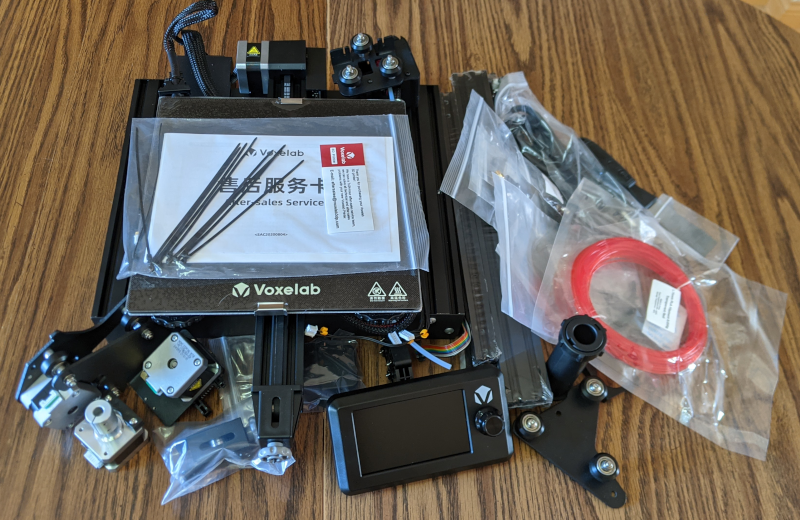
What’s in the box?
- Voxelab Aquila 3D printer
- M6 pneumatic connector 2x
- nozzle
- 50g filament
- Screw kit
- Wrench and screwdriver
- Spool holder
- power cable
- Disassembly tool
- Memory card and card reader
- Cable tie
- Nozzle needle
- User manual
Hardware specifications
- Number of extruders: 1
- Extruder diameter: 0.4 mm
- Maximum set temperature extruder temperature: 250℃
- The highest setting temperature platform temperature: 100℃
- Printing speed: ≤180mm/s, generally 30-60mm/s
- Filament types: PLA, ABS and PETG
- Printing bed: 220*220*250mm
- Layer resolution: 0.1-0.4 mm
- Printing resolution: ±0.2 mm
- Printer size: 475*480*473(620)mm
- Screen: 4.3 inch screen
- Net weight: 8.2 kg
- Input: AC 115/230V 50/60Hz
- Output: DC 24V
- Power: 350 watts
- Working mode: offline printing or online printing of the memory card
- Software: Cura / Simplify 3D / VoxelMaker
- Output: gcode
- Input: 3mf/stl/obj/fpp/bmp/png/jpg/jpeg file
- Operating noise: 50dB
- Working environment: 15-30℃
- Resume printing function: Yes
- Filament sensor: none
- Language switch: English/Chinese
Design and features
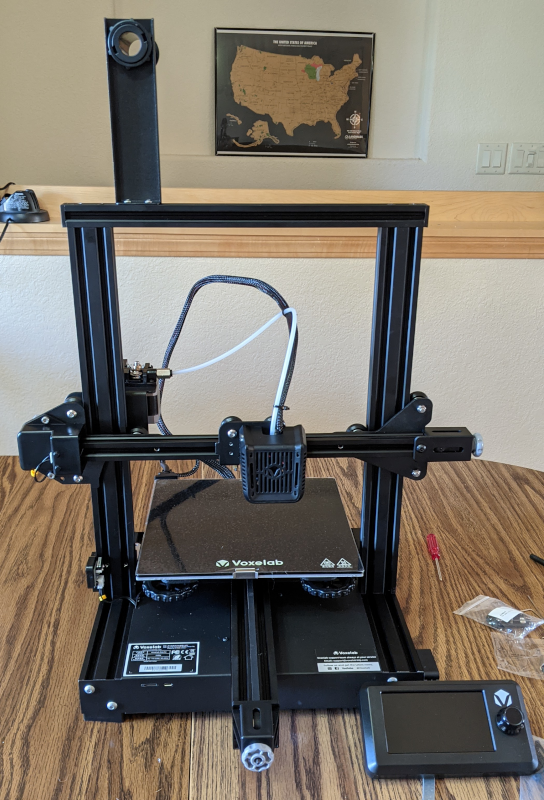
Since the bottom of the printer is pre-assembled, the only part that needs to be assembled is the z-axis. The instructions are easy to follow and the parts are easy to screw together. Be careful when installing the x or z shaft, as it may scratch the frame. Unfortunately, when I tried to screw on the rod, I ended up scratching my frame. The professional tip for installing the z-axis rod is to put the printer on its side and screw it into the suspended side, not the side lying flat on the table. Also make sure you have a towel or something soft to flip the base to the side, so as not to damage the base and the table you are working on.
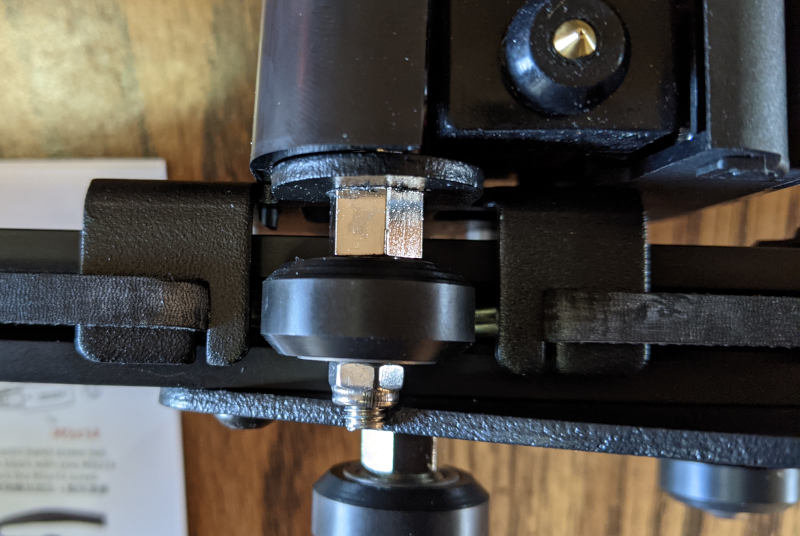
The x-axis rubber strap looks a bit old, and it turns white when I stretch it to install it. I was a little worried about it, but after my initial worry, it was well supported and did not stretch or break. The build is simple, I spent about an hour and a half from start to finish to build it. That’s because a 3D printer has been built before, but the instructions are very easy to follow, so I think anyone can assemble the printer together. English translation is a bit rough, but as long as you have a basic understanding of how things are combined and can use drawings to clarify bad translations, it will be easy to understand.
The way the screen connects to the printer is a bit strange. I really can’t figure out how to feed the screen cable from the base to the screen. I pressed it between the back of the screen and the mounting bracket, and it seemed to work. I know that there are many different prints that can be used to solve this problem, but this review only focuses on the out-of-the-box printers, without any additional printable upgrades.
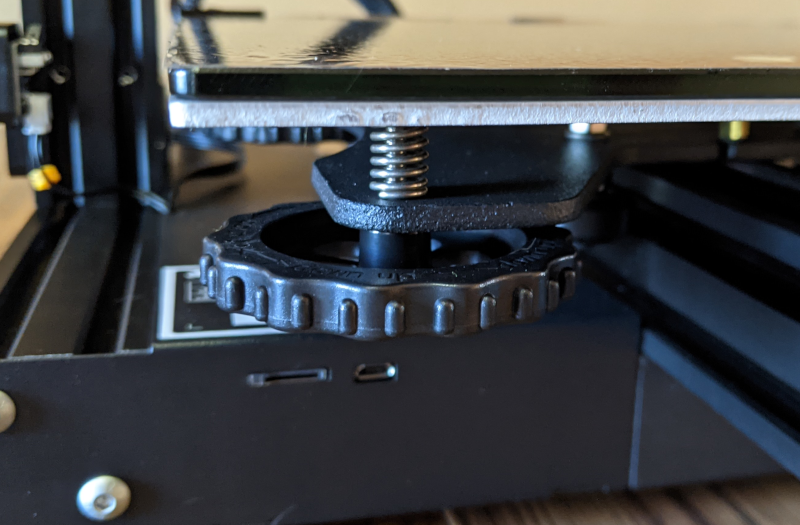
You really need to know how to level the print bed, and the instructions do not fully explain how to do this, so I suggest you look up and watch the tutorial online. However, once I leveled the bed, the first photo I printed from the machine went very smoothly. It adheres very well to the glass carbon fiber printing bed, and the extrusion quality is good and clear. There are two ways to import files for printing, micro SD card slot and micro USB port.I used the provided micro SD card Store files for printing, but you can use If you prefer, a micro USB port.
The Voxelab Aquila 3D printer itself is a bit louder, but it is nothing compared to my other printers. The processor fan is the most noisy part, and the motor is almost silent. The extruder fan is the next loudest thing, but it can really be tolerated if it is behind a closed door. I find that sitting next to it is a bit too loud, so if you plan to be in the same room as you, I will consider building a fence for it.
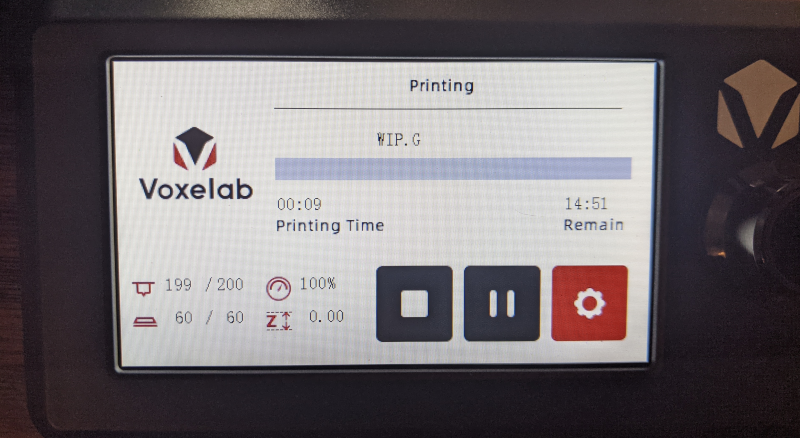
Use the rotary dial to make a selection on the screen, and then press to make a selection. The lower left corner displays the printing temperature, bed temperature, printing speed and x-axis offset. The name of the file currently being printed, the printing time and the remaining time to finish printing are displayed above the progress bar. The remaining time seems very inaccurate. In the above photo, it shows that it takes 14 hours and 51 minutes to print, but it actually only took about 1 hour and 45 minutes.
Using the spatula provided, the prints are ejected from the bed nicely. Be careful not to scratch the bed. There is very slight wire drawing at the beginning and end of nozzle printing, but there is nothing easy to clean up after printing.
When I switched to my own filament, I did experience bed adhesion problems. I’m not sure if my filament is of lower quality than the sample filament, but it is really difficult for me to stop the print from moving immediately. I ended up raising the printing temperature by 20 degrees and the bed temperature by 10 degrees, which seemed to help bonding. I have used painter’s tape to glue the bed in the past, but I want to try to use the printer as directly as possible.
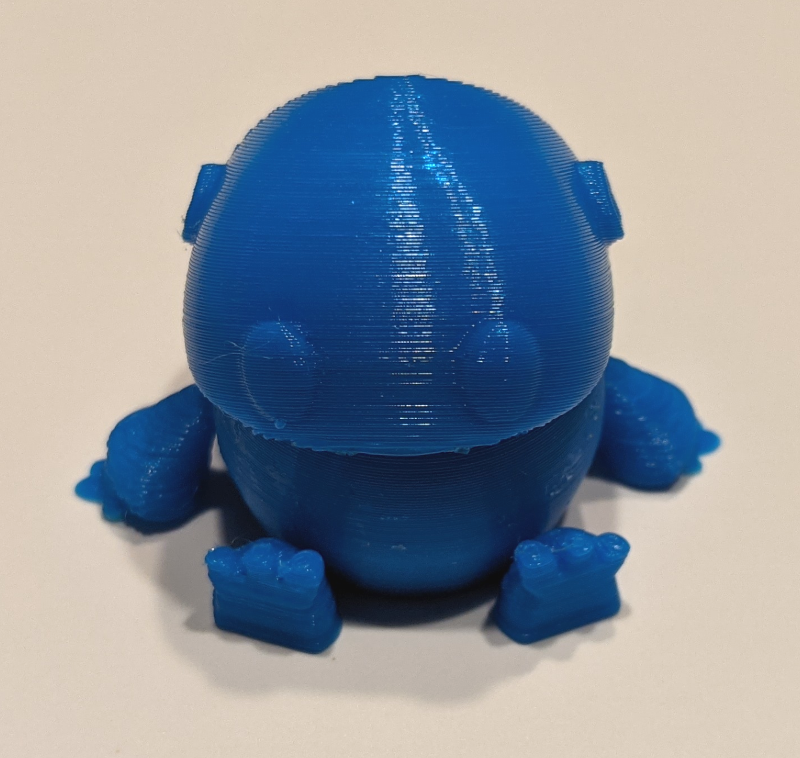
This one-and-a-half inch robot is a good test for the printer. It has a large and smooth print head, well-printed joints and small finger and toe details, everything is something a high-quality printer should be able to handle. You can see the slight pull on the left eye in the photo above.
As you can see in the image above, it does have some print sagging on its overhanging part, especially around the hand joints. The details of the fingers perform well because of how small they are.
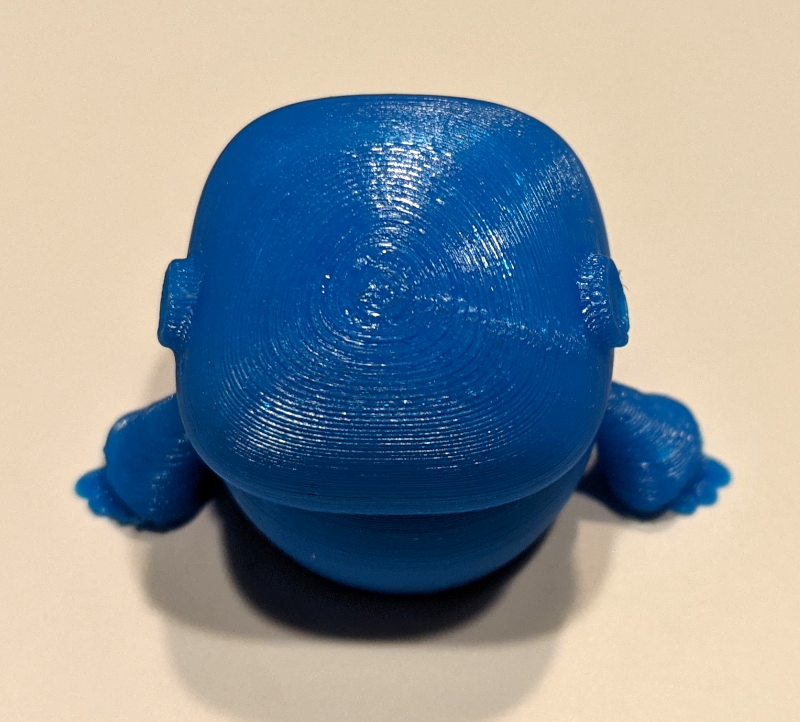
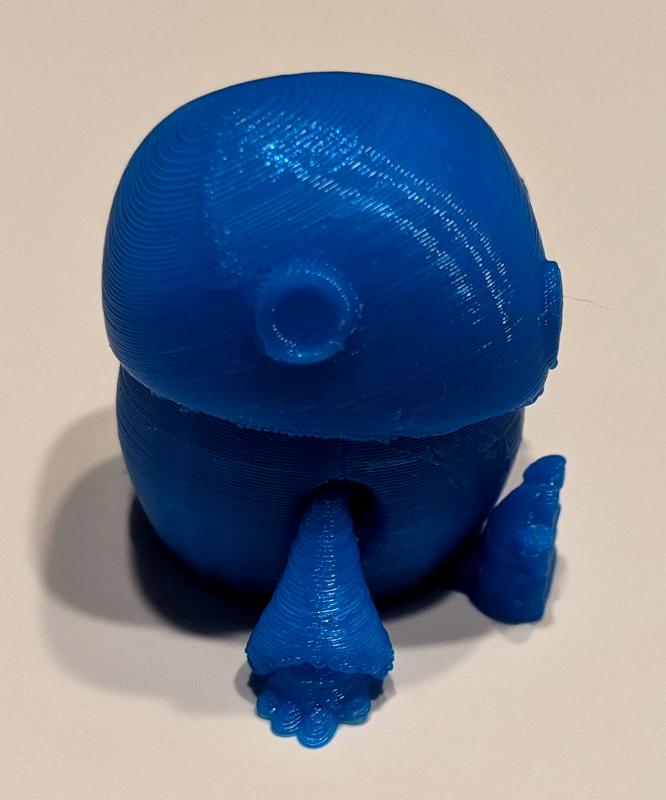
The top of the head is nice and smooth, but you can see that the layers on the right side behind the ear overlap each other.
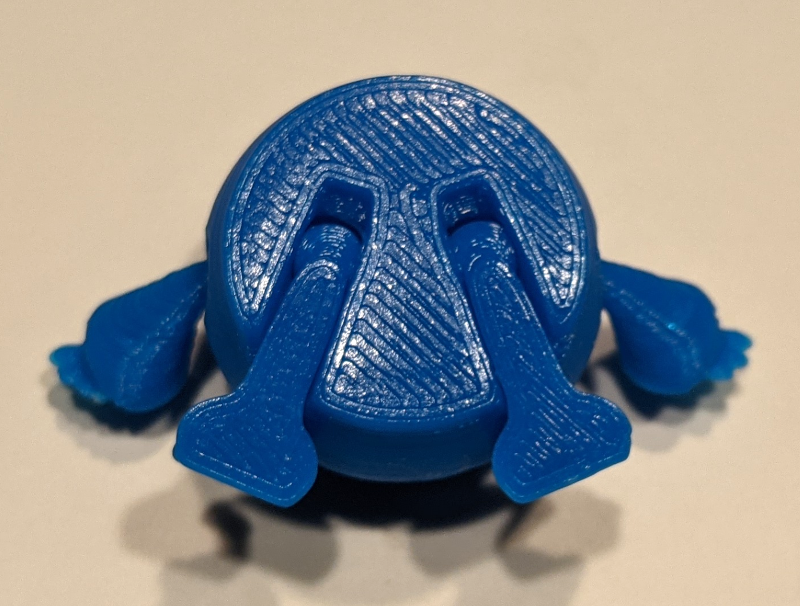
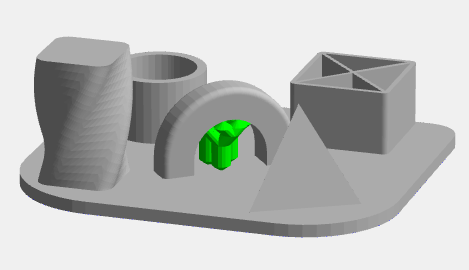
The dock shows how the printer prints the first layer. It first prints the outline and then fills it. It also allows you to clearly see the ball joints printed on the inside of the robot’s body. The fact that the printer can do this means that it prints very accurately with very little deviation. If it has a greater deviation, the joints will be printed on both sides of the body and cannot move.
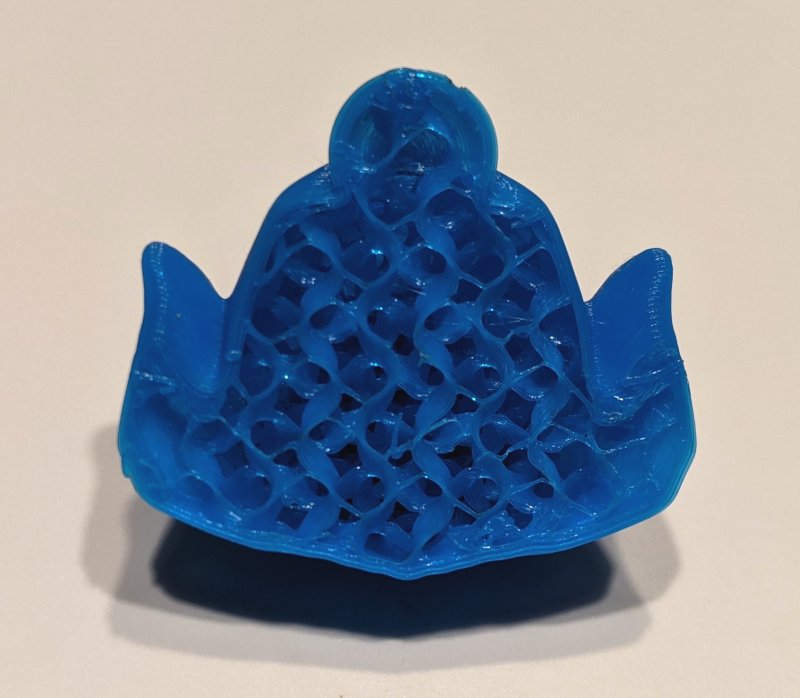
This is a failed print. I tried to print a dog’s head, and it broke free from the printing bed. It shows what the 3D filler looks like and how to support the shell of the print without making it completely solid.
software
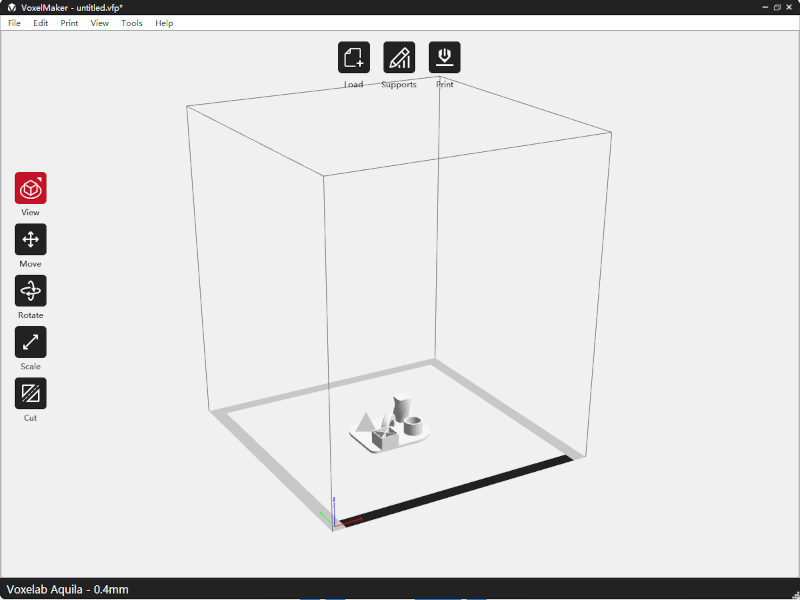
The provided compiler software is very simple, but it can get the job done. After loading the 3D file, you can use the options on the left to operate it.
For prints with large overhangs, the software can help by adding supports. There are two options for support, tree or linear. The above is an example of tree support. The support will break off after printing, which helps prevent the print from sagging during printing.
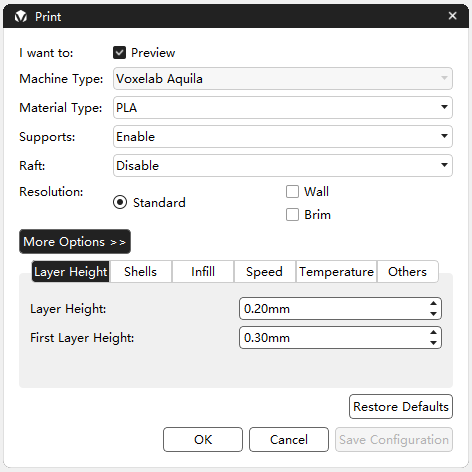
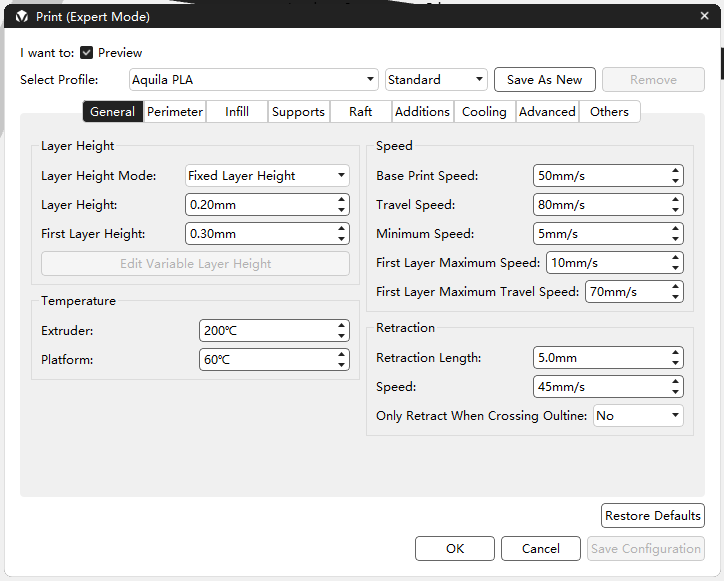
There are two printing modes, simple and expert. Simple mode reduces the available options to prevent confusion and is very suitable for beginners. Expert mode allows users to adjust almost any printer settings you wish. All you need to do is to save the configuration to a micro SD card or connect the printer to the computer and start printing.
what do I like
- Super easy to assemble
- Start printing easily out of the box
- Wonderful first 3D printer
- Provide software to prepare 3D files
What will i change
Final thoughts
Voxelab Aquila is an excellent entry-level 3D printer. It is simple and easy to assemble, and comes with software specially designed for it, so anyone can easily use it regardless of the level of knowledge. It is easy to use for beginners, but there is still a lot of room for improvement for more experienced people. This means that even for those with more 3D printing experience, this printer is a good choice. I would definitely recommend Voxelab Aquila to anyone I know who plans to buy a 3D printer in the future.
Price: USD 168
Where to buy: Somatosensory laboratory
source: The sample for this review is made by Somatosensory laboratory

