

Sharing is caring!
Following on from my previous Insteon post Set up Home Assistant for Windows Portable (HassWP) and Cheap PC running as a server for Docker/Insteon.
This article is a guide for anyone who wants to use the Home Assistant Windows Portable on a PC running Windows Home.
In my original HassWP post, I installed Home Assistant on my work PC, and I didn’t even think I was running Windows 11 Pro. A reader pointed out that you need Hyper-V, which is not available on Windows Home.
However, it’s possible to get this to work, and it’s not too hard.
If you’re looking for a permanent solution to keep your Insteon devices up and running, I highly recommend purchasing dedicated hardware to run as a server and have Home Assistant running 24/7.I would avoid large desktops, especially with current electricity bills; instead use small/mini PCs (or RPi4 If/when they are available again.
These are easy to hide, low noise and low power consumption. They’re also cheap enough to pick up and use.
However, if you absolutely must get Home Assistant up and running on your Windows 10/11 Home installation, this guide may help.
Check if your system supports virtualization

Many PCs may have virtualization disabled in the BIOS. You can check by:
- Click the Windows icon
- Type CMD and click the program icon
- Type systeminfo and hit enter
- This should display the Hyper-V requirements and select “Yes” for the various options.
- If not, you need to restart the PC, go into the BIOS and find where it says virtualization support and enable it.
Enable Hyper-V in Windows 10 or 11 Home
I am in my Huawei Matebook 13currently running Windows 11 Home.
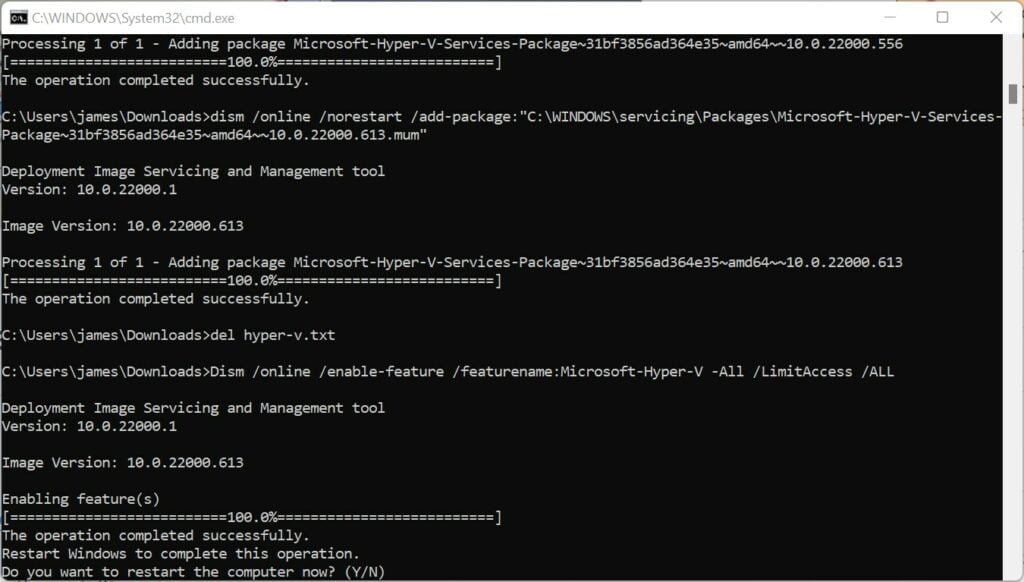
If you save the following code to a .bat file and then run as administrator (right click, run as administrator), Windows will install the various components required by Hyper-V.
pushd "%~dp0"
dir /b %SystemRoot%servicingPackages*Hyper-V*.mum >hyper-v.txt
for /f %%i in ('findstr /i . hyper-v.txt 2^>nul') do dism /online /norestart /add-package:"%SystemRoot%servicingPackages%%i"
del hyper-v.txt
Dism /online /enable-feature /featurename:Microsoft-Hyper-V -All /LimitAccess /ALL
pause
For your convenience, I have uploaded the bat file and I got the code for the bat file from bottom of this thread. To be on the safe side, I recommend opening the bat file in notepad to confirm that I have included the same content as on this page.
You can download the Hyper-V installer bat file here.
When you run the script, the installation will take a while, and when it’s done, Windows will ask you to restart.
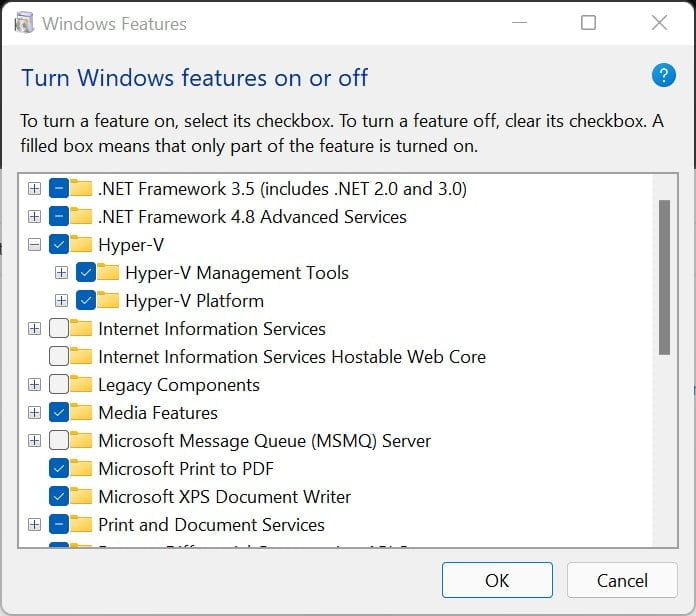
After rebooting, you can check if Hyper-V options are visible in Windows Optional Features. To check, go to Run > Type Control, press Enter > Programs > Turn Windows features on or off
Here, both options under Hyper-V should be ticked.
Install Home Assistant for Windows Portable
With Hyper-V, I can easily set up Home Assistant Windows Portable (HassWP).
I wrote more info here, including adding your Insteon device
Basically, to install HassWP you just need:
- download HaasWP.zip
- unpack
- Run Hass.cmd (if you don’t have a visible extension, it’s too much trouble)

