

Review – A monitor calibration tool is something I’ve wanted for years, but I’ve never spent my money on one. Over the years, I’ve owned great monitors and terrible monitors, and a line of photo printers. As far as what gets printed out vs what I edit on screen, it’s always been a piece of crap. Fortunately, Datacolor offers their Studio kit for review, which includes the SpyderX Elite monitor calibration tool, SpyderCUBE, and SpyderPRINT. This combination is designed to allow me to calibrate multiple monitors and then get color accurate prints from my printer.
what is it?
The Datacolor SpyderX Studio kit includes a monitor calibration tool, a printer calibration tool, and a photo reference cube. The SpyderX Elite monitor calibration tool allows you to test and adjust color accuracy on monitors/projectors/laptops. SpyderCUBE has a pure black and white side that can be used as a reference for calibrating various settings in the photo. Finally, Spyder Print can be used to color match different printers (even different inks and paper/media types) to match the colors to the newly calibrated screen. This powerful combination promises to give photographers the tools they need to achieve color consistency and accuracy throughout their workflow.
What’s in the box?
- Metal carrying case with custom foam cutouts for everything in the kit
- SpyderX Elite Monitor Calibration Tool
- Welcome card with software information and serial number
- Links to guides, videos and support
- Spider Cube
- protective bag
- Quick Start Guide
- SpyderPRINT Printer Calibration Tool
- SpyderPRINT Spectrophotometer and Base
- Quick Start Guide
- 6′ USB cable
- 1 year warranty (EU 2 years)
Hardware Specifications
SpyderX Elite Monitor Calibration Tool:
- Support for multi-monitor calibration
- Ambient light sensor
- Video and photo calibration modes
- Compatible with digital projector calibration
- Compatible with all the latest computer monitor types
- StudioMatch: Define studio standards to match multiple monitors
- USB 1.1/2.x/3.x, USB-A plug with USB-C adapter
Spider Cube:
- Designed to be placed in photos as a reference for white balance, exposure, black level and brightness
Spider print:
- Calibrate multiple printer, ink and media combinations to match screen calibration
- USB 1.1/2.x/3.x, USB-A plug (6ft cable)
Design and Features
After opening the cardboard shipping box, I was delighted to find a very nice metal carrying case for the entire datacolor SpyderX Studio kit.
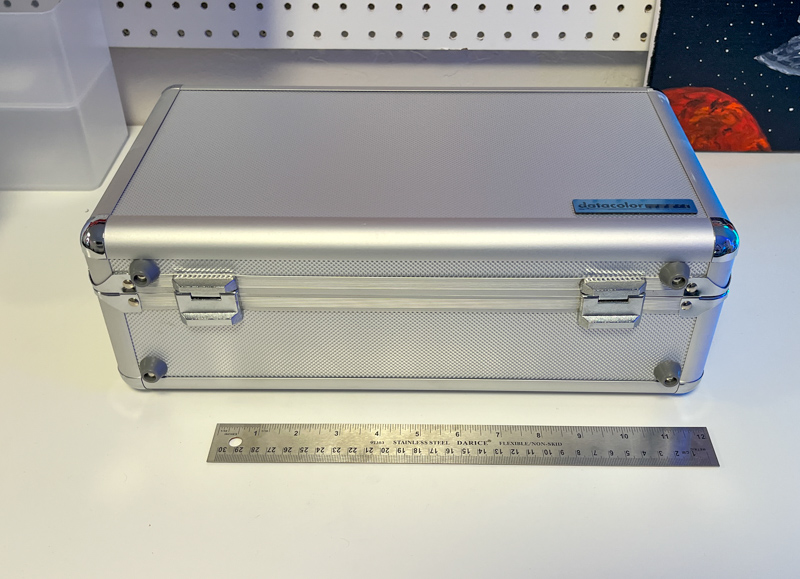
The case appears to be designed for travel, and I didn’t notice any major flexing or obvious points of failure.
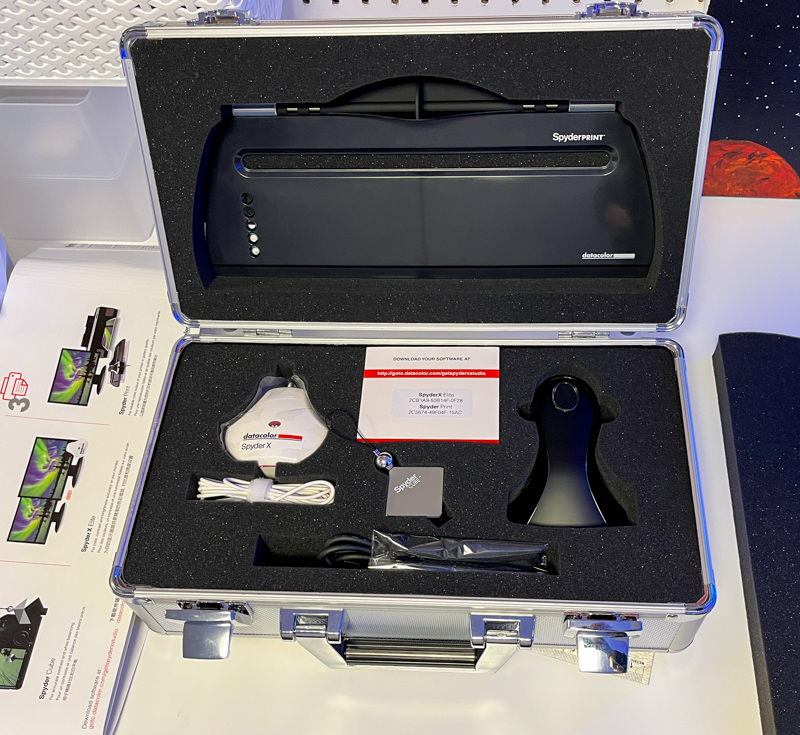
Inside the case are all the components of the kit, with custom foam for extra protection.
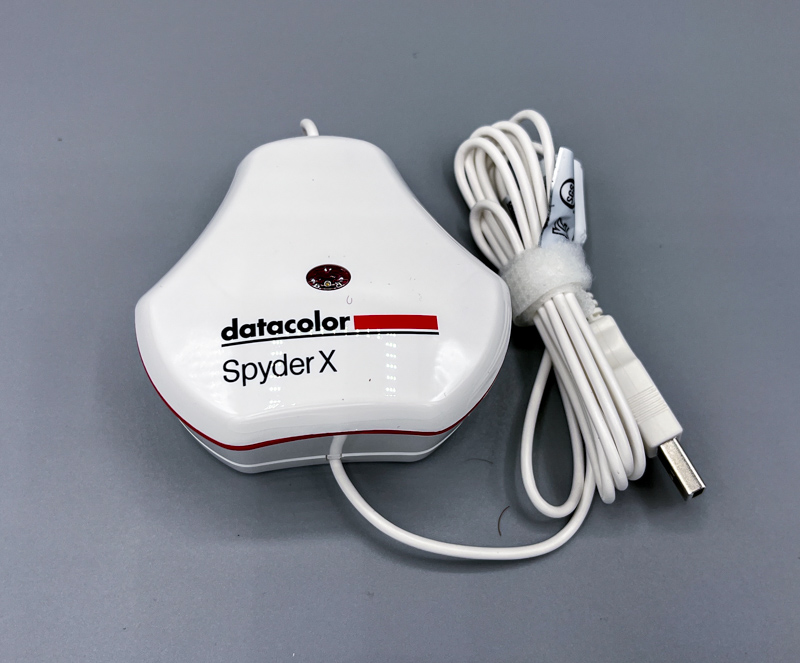
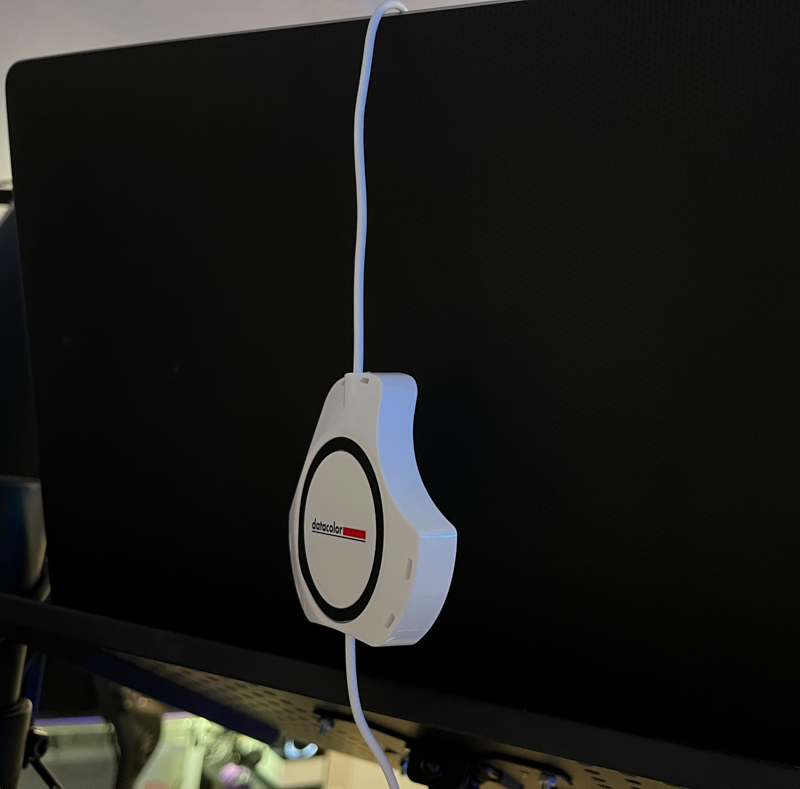
The datacolor SpyderX Elite is a monitor calibration tool that has a protective case and weight that share a single USB cable. Visible on top of the SpyderX Elite is the Ambient Environment Sensor, which helps calibrate the display by measuring room lighting conditions.
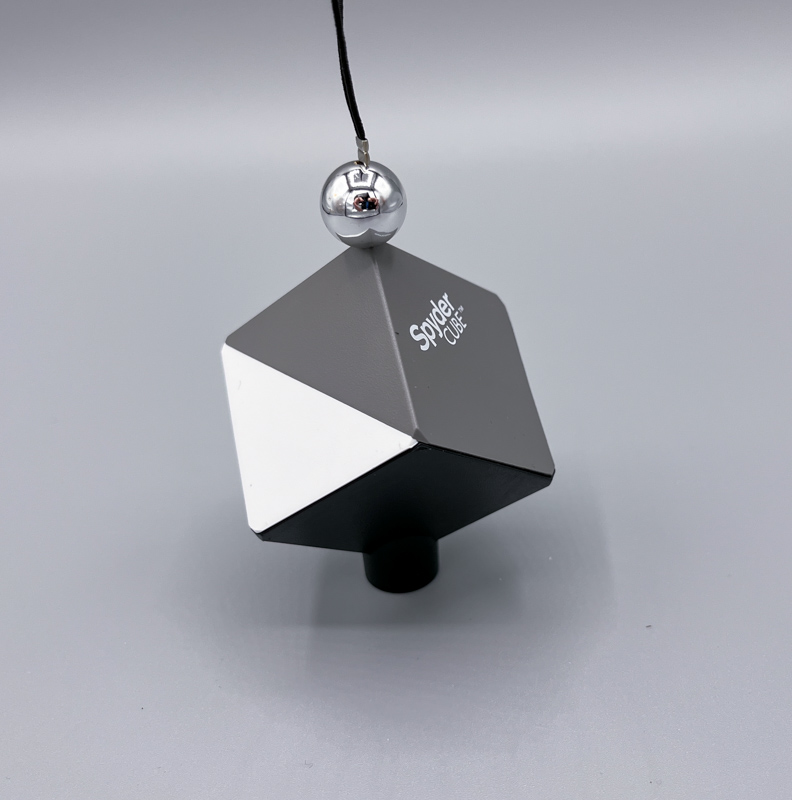
SpyderCUBE is a cube with white, grey and black sides. It has a stand on the bottom so it can rest on a flat surface, and a small lanyard/loop to hang from hooks or branches.

Above is the included screen cleaner and SypderCUBE tote bag.
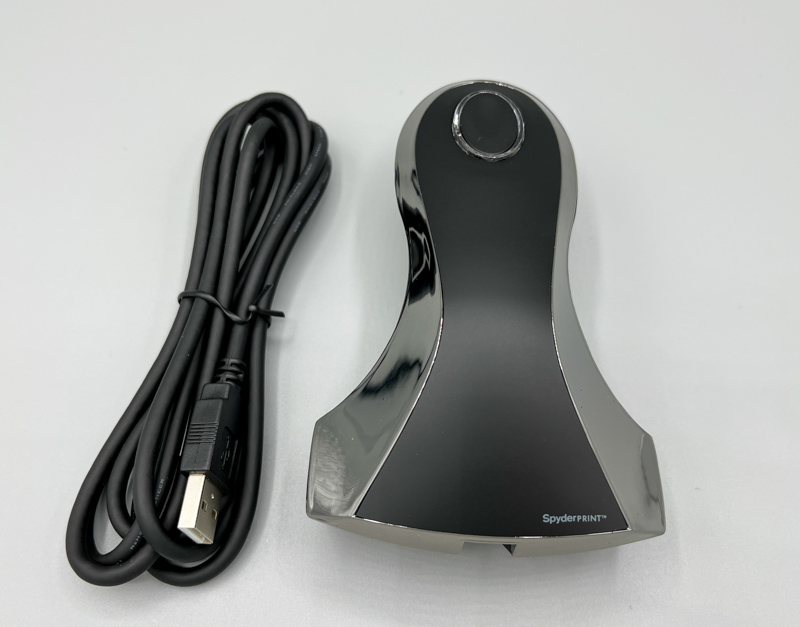
Above is the SpyderPRINT Printer Calibration Tool itself and its 6ft USB cable.
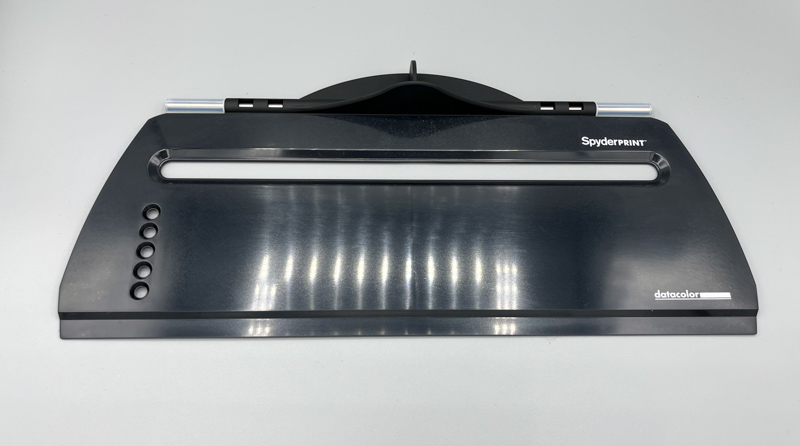
The SpyderPRINT can be used handheld by scanning on printed calibration paper, but the included plastic guide base makes scanning easier.
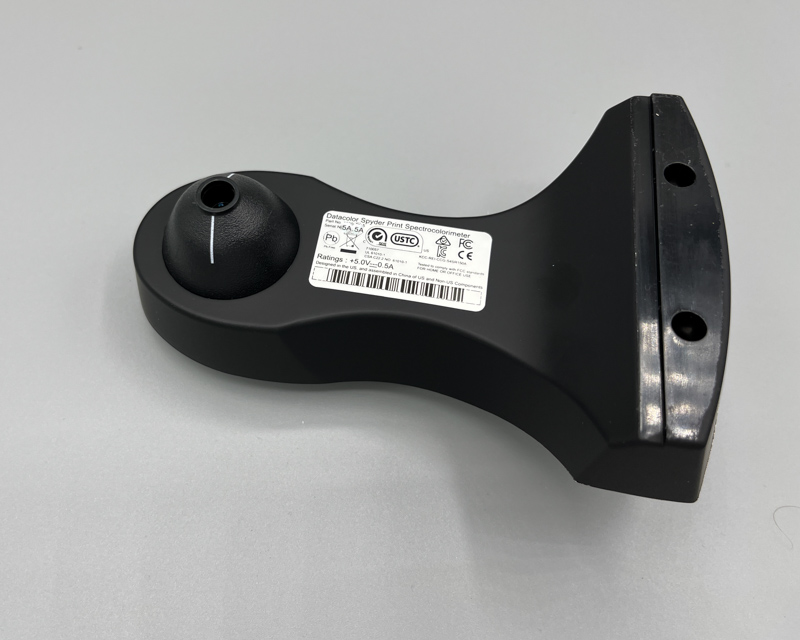
Flip it over, the SpyderPRINT has an optical sensor for calibration (left side of the picture) and a white line to help you keep it aligned on the test table while calibrating.
installation and setup
SpyderXElite and SpyderX Print software are compatible with Mac OS (10.10+) and Windows (7 and newer). I tested on Mac OS (2019 Macbook Pro).
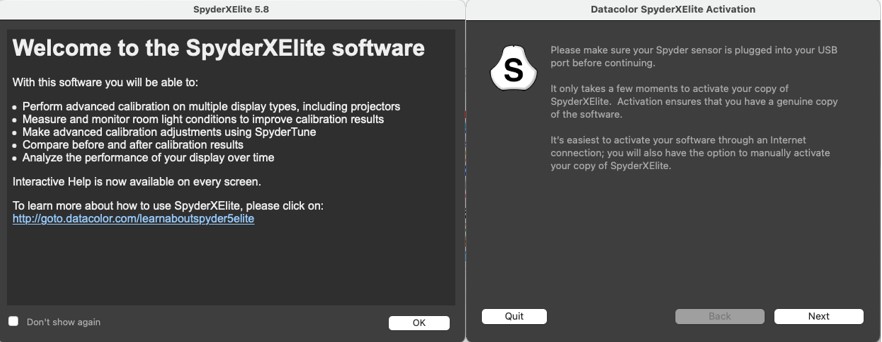
After installation, you need to activate the software (this process is almost the same for the bot SpyderXElite and SpyderPRINT software).
I found every screen and step informative and easy to understand. Datacolor has done a great job of simplifying the workflow in logical steps.
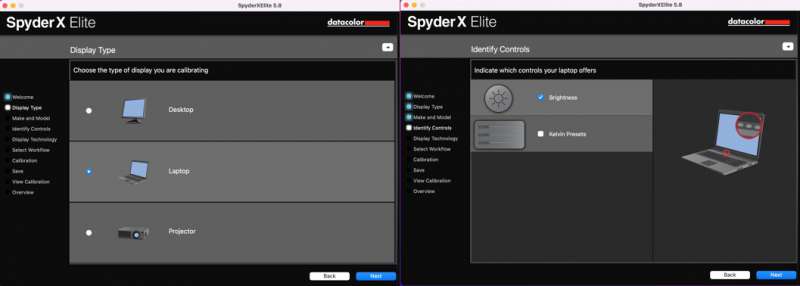
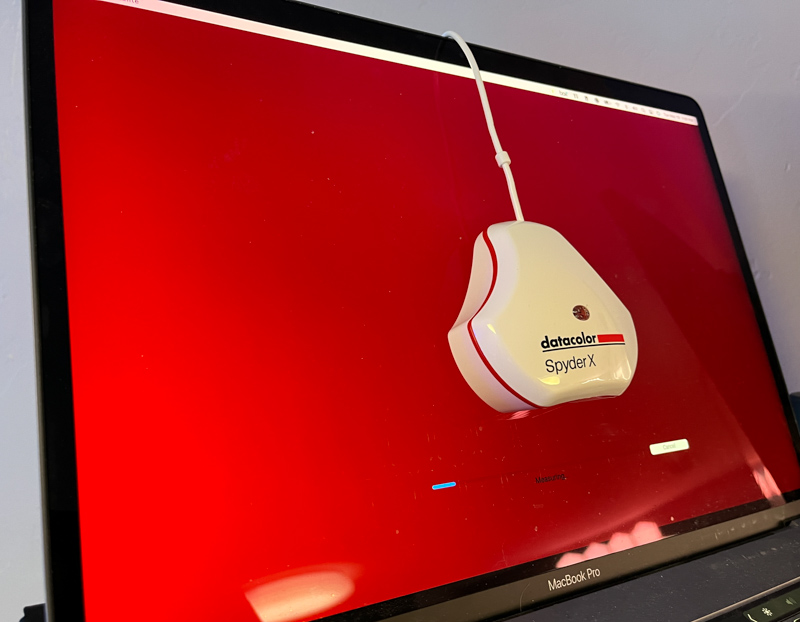
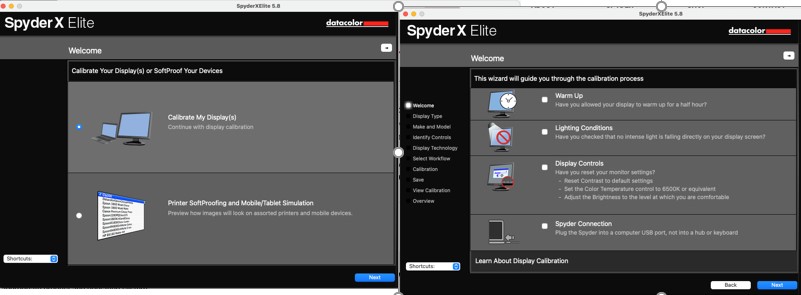
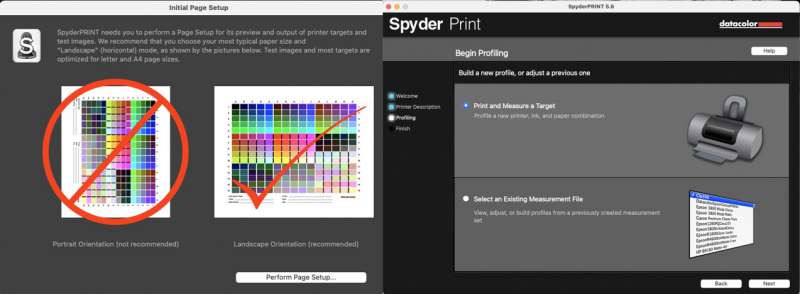
At the beginning of the screen/monitor calibration process, you will be asked to choose what to calibrate, and then given clear instructions on how to set up the monitor and room lighting.
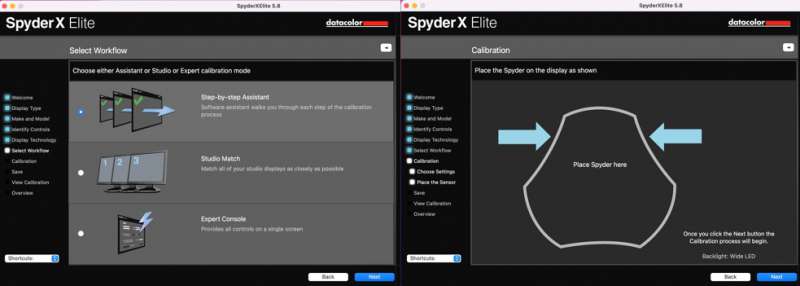
For the first calibration, I chose Step-by-step Assistant. This makes the steps easy to follow, but for later calibrations you can choose “Studio Match” which means standardize multiple screens in a studio to a consistent standard, or an expert console where professionals can have more Many controls and options for their calibration. As you continue, you’ll notice in the screenshot above that it shows a place to put the SpyderX calibration tool.
First, slide the base of the SpyderX down the USB cable about 12 inches so it acts as a counterweight.
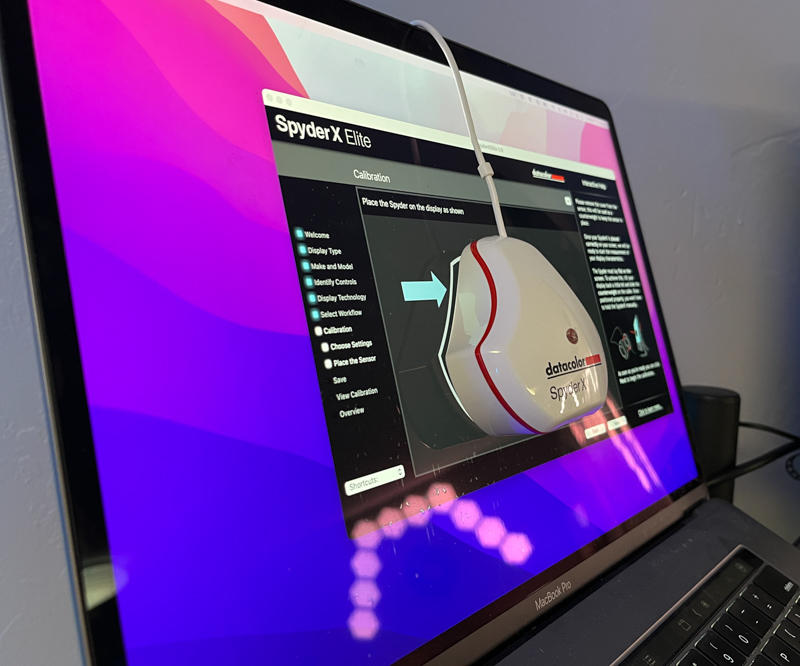
This allows SpyderX to stop at the desired location on the screen.
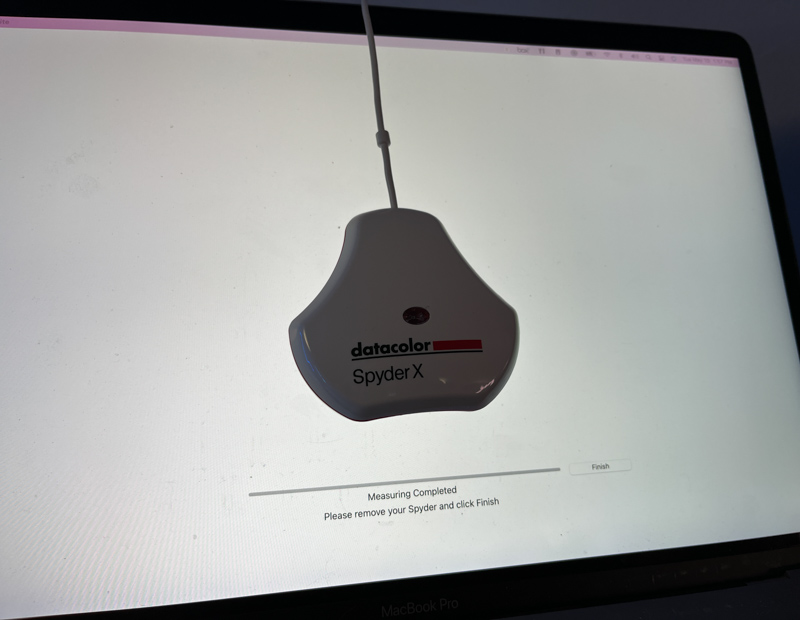
Next, the software runs a series of colors on the screen, which are measured by a calibration tool. Datacolor states that the calibration of the SpyderX Elite is 4 times faster than the previous model, and I believe the calibration is done in under 2 minutes.
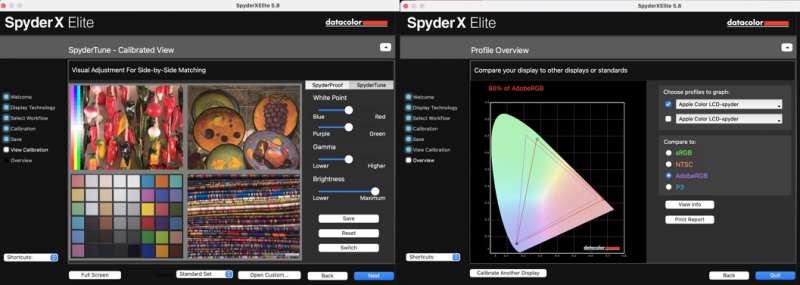
Once you’re done, you can adjust the calibration as needed, and you can also view the monitor’s color gamut capabilities (in this case, datacolor SpyderX reports the Macbook Pro’s Adobe RGB as 86%). The software gives you the option to remind you to recalibrate on a schedule, which is recommended as the monitor may deviate from its calibrated values over time.
Next, I tested the SpyderPRINT software. After a very similar installation and activation process to the SpyderX software, the actual calibration is a bit different.
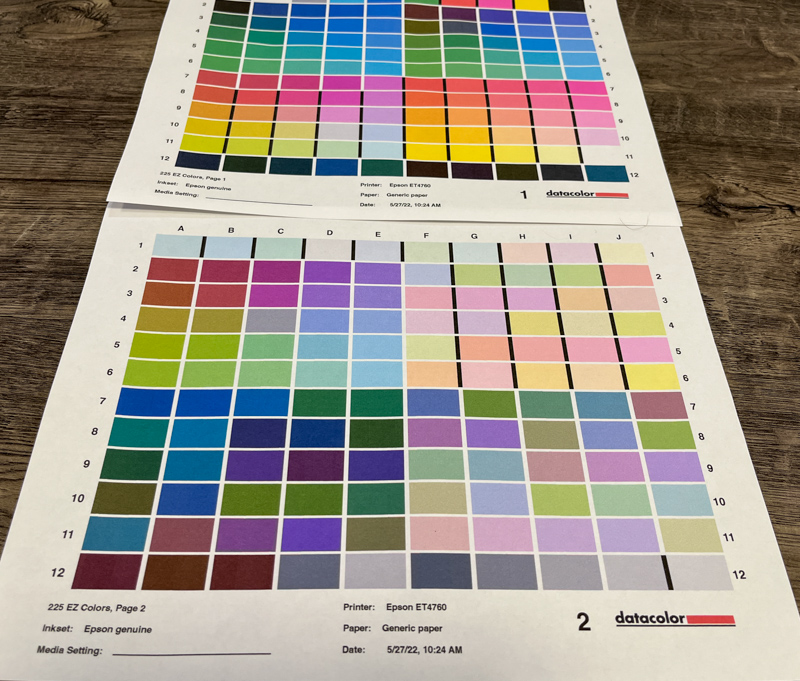
First, it lets you print test sheets (you can choose up to 9 sheets from the basic 2 sheet option for finer calibration).
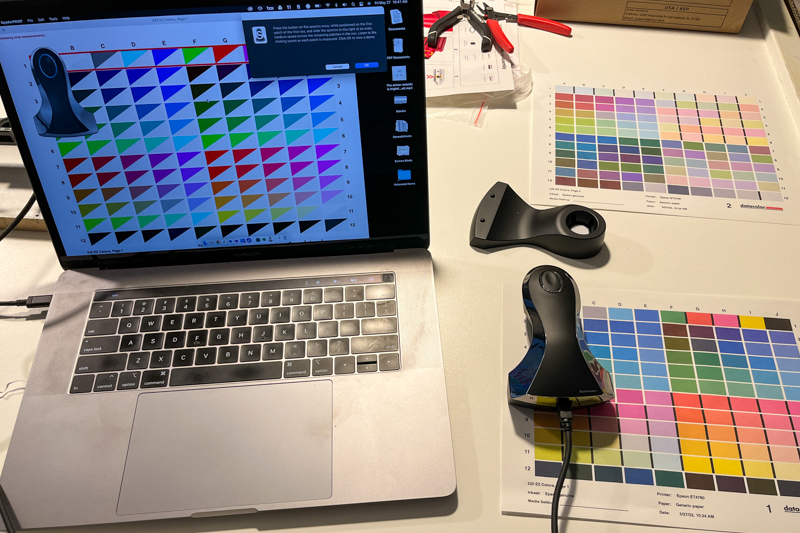
After printing, the software guides you to scan the SpyderPRINT calibration tool, one line at a time, on the newly printed paper. It’s a lot easier if you use the included plastic guide – but this covers most of the test paper except for the line you’re scanning, so I opted for a freehand photo:
After all lines have been scanned, the printer’s color calibration profile is automatically updated and you can print out a proof to check. The photo below is hard to tell because the LCD screen is backlit and the paper needs light to see, changing the colors in the photo.
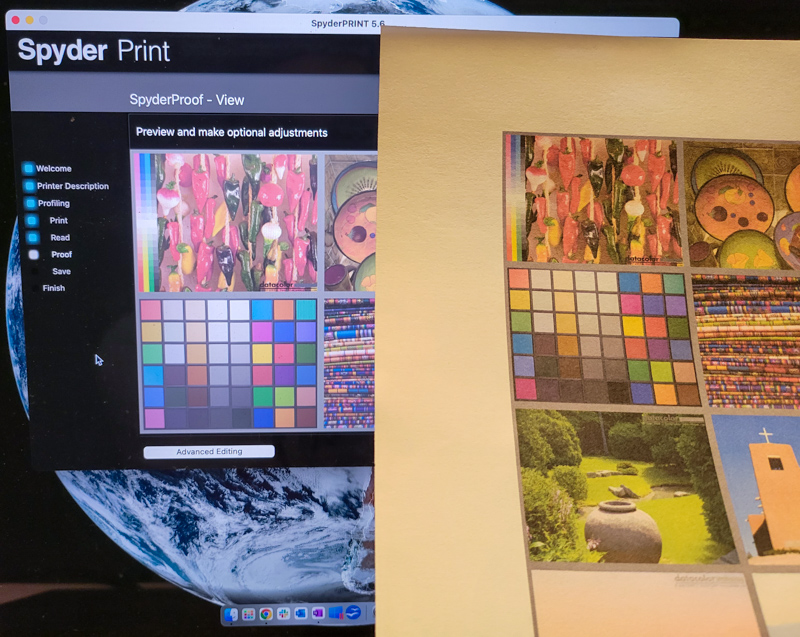
I was amazed by the results, I was able to print a photo that almost exactly matched what I saw on the screen. I’ve been taking photos for years (amateur and semi-professional), and I’m just getting used to getting photos that look different than the ones I edited. It feels like a whole new world and I can expect my colors to stay consistent. Is this a good point to mention in the comments that I’m colorblind? (I feel like I have to clarify that I’m not actually colorblind, the previous sentence was a joke).
what do I like
- Easy to follow instructions, even someone who has never calibrated something can do it.
- The resulting calibration is accurate from camera to screen to printed colors
what would i change
- there is nothing! – The whole kit made calibration of my monitor and printer very easy, even for the first time.
- On second thought, maybe cost – but if you just want monitor calibration, datacolor offers a lot of different kit options at different price points. If I were buying it for myself, I’d probably just go for the monitor calibration tool. However, if I want to get into professional photography, I can see this kit as a must-have.
final thoughts
I’m not quite sure what to expect from the Datacolor SpyderX Studio Monitor and Printer Calibration Kit. After using it, I was pleasantly surprised by the results and how easy it was for non-professionals to use it. I can say that there are more complex layers and settings than I could have imagined, but datacolor provides an easy way to accomplish a basic task throughout the software: make screen colors accurate and consistent, then print matching photos or design those colors.
price: $494.95
where to buy (this: data color or Amazon
resource: Samples for this review are provided by data color

