

Thinking about switching hosts but not sure how to migrate your WordPress site from one host to another?
They say moving, getting married and changing jobs are the three most stressful things in life…but I think there is another strong contender for the top three.
Migrate your WordPress site from one host to another!
Well, I have some good news and some bad news.
Bad news first… migrating a website to a new host will always make your heart beat and your palms sweaty, no matter how many times you do it.
Good news: Migrating your WordPress site to a new host is essentially a series of steps that you can repeat each time.
It’s pretty much the same for every website you migrate.
This step-by-step guide to seamlessly migrating your WordPress site will make the whole process a little less stressful.
3 Options for Migrating Your WordPress Site to New Hosting
There are three main options for migrating a WordPress site from one hosting provider to a new hosting provider.
- get your master do it for you.
- Use the WordPress migration plugin.
- Go old school and use SFTP/FTP.
Your best option depends on your current and new hosting provider and the size of the WordPress site you’re migrating.
1. Let your host do the WordPress site migration for you
The first option for migrating a WordPress site is by far the easiest (and least stressful!), but whether it’s an option will depend on the hosting provider you’re migrating to.
Many managed WordPress hosting providers such as flywheel or Venue groundeither do a free migration, or provide a plugin to install on your site to perform the migration (more on that later).
Flywheel provides a DIY plugin for you to complete the migration, or they will do it for free.
All you have to do is fill out a short form on their website with current hosting details and ask them to migrate.
This may take one to three days, but will save you a lot of time (and stress).
2. Use the WordPress Migration Plugin to move to a new host
As I mentioned above, if your fully managed hosting won’t perform the migration for you, they will usually provide a plugin that you can install on your site to perform the migration.
Using this migration plugin is easy.
These plugins are often used as installation wizards to guide you seamlessly through the process of moving WordPress files and databases from one location to another.
They also automatically install WordPress on the new site in preparation for the files and database to be uploaded.
There is another plugin option if you are not using fully managed hosting.
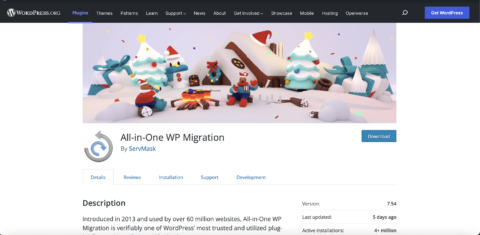
enter All-in-one WP Migration Plugin.
To migrate your WordPress site using this plugin, follow these steps:
step 1: Login to the backend of the WordPress site you want to migrate.
Step 2: From the WordPress dashboard, navigate to Plugins and click install new.
Step 3: search All-in-One WP Migration And install ServMask’s All-In-One WP Migration plugin.
the fourth step: Activate the plugin.
Step 5: Repeat steps 1 through 4 on the new WordPress site (the one you are migrating to) so that you have the plugin installed on both the old and new sites.
Step 6: install plugin Alex Mills Regenerate Thumbnails (Viper007Bond) to the site you want to migrate to.
Step 7: Update all plugins, themes, and WordPress core files on the new and old sites (Note: WordPress versions must be the same on both sites).
Step 8:use “All-in-One WP Migration“ insert
Step 9: optional: add rules to “Find“ your new site database prefix and “replace“ Use your old site database prefix (only if necessary)
Step 10: Export to file and download the file to your computer.
Step 11: On the new site, open the “All-in-One Migration” plugin and import the file from the previous step.
Step 12: After the file is uploaded, apply the uploaded export file to the new site when prompted.
Step 13: go environment > permalink and save multiple times.
Step 14: Check all plugins and make sure they are activated.
Step 15: Check the media library. If the images do not exist, use the Regenerate Thumbnails plugin to reactivate them if necessary.
Step 16: Check all pages/posts/etc. to make sure everything looks the way it should. You can then refresh your newly migrated WordPress site to see how it all works.
Step 17: Install Better search and replace plugin Published on new website by Delicious Brains.
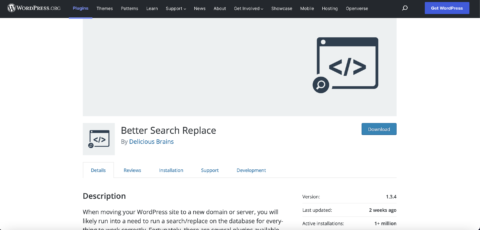 Screenshot from WordPress.org, February 2022
Step 18: In the WordPress dashboard, go to tool > better search and replace.
Step 19: add your old site URL (ie oldwebsite.com) to “search“ site.
Step 20: Add your new site URL (i.e. newwebsite.com) to “use. . .to replace“ site.
Step 21: Test run. If you’re happy with the trial run, actually run the plugin.
Step 22: Browse theme files (mainly style.css, but possibly PHP files too) to make sure all instances “oldwebsite.com“ is replaced with “new site.com.“
Step 23: Check your new website. Clear your browser’s cache if the changes haven’t taken effect yet. If the changes still do not take effect, clear the server cache.
The All-In-One WP Migration plugin has a limit (128MB) on the size of the site it can migrate.
If you have a very large site, these alternative plugins can help you migrate your WordPress site from one host to another:
Be sure to read all the instructions for the plugin of your choice to make sure it is suitable for the type of migration you want to perform.
3. Legacy WordPress Site Migration Using SFTP/FTP
For many migrations, using the plugin should work fine.
However, for more complex migrations, you may need to migrate your WordPress site manually.
This can be done using the file manager in the hosting provider’s cPanel or using an FTP or SFTP connection.
Use an SFTP/FTP client such as file or Cyber Duckyou should consult your hosting provider for proper configuration of this connection, but you will usually need your hosting account’s username and password, FTP or SFTP address, and the correct port number.
Once you have this information, follow these steps:
step 1: Using the file manager or SFTP/FTP connection in cPanel, navigate to the root folder of the site you want to migrate to (public_html is the usual location). If you are not sure where the root folder is, you may need to contact your hosting provider as it may be in a differently named folder for security reasons.
Step 2: If you are using a file manager located in cPanel, select public_html and download it to your computer.
If you are using an SFTP/FTP client, select public_html folder and download it to your computer. For easier migration, you can create a zip file for the downloaded folder.
Step 3: You now need to download your WordPress database. Log in to phpMyAdmin on the host the site is currently on.
the fourth step: Export the database. (Note: If you see multiple databases in phpMyAdmin, you may need to contact your hosting provider to find out which database to use).
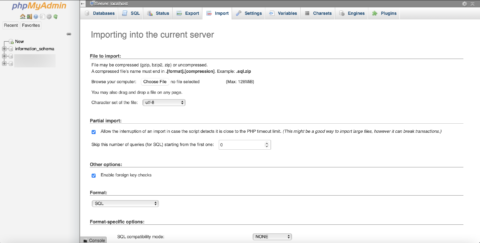
Step 5: Select the database to export.click Export Then Fast for export type, and SQL as the file type.click go.
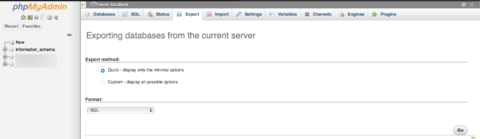 phpMyAdmin screenshot, February 2022
- Step 6: If you plan to use phpMyAdmin to import the site, you can create a zip file after downloading the database to your computer. Alternatively, you can select Compress in phpMyAdmin to compress the database before downloading it.
Step 7: Make sure nothing is installed on the site you’re migrating to.
Step 8: Go to the new hosting provider and create a new empty database.In cPanel, navigate to MySQL Databases and click on it, name the new database appropriately and click create database.
Step 9: exist MySQL user part.Create a username and password and choose create user. Note all usernames and passwords you used to create databases and users. You will need to update the content in the wp-config.php file.
Step 10: add the user to the database Add user to the databaseselect the new user and database, and click Add to.
Step 11: You next need to edit the wp-config.php file from the WordPress file you downloaded.Make sure, if you create a new database name “DB_NAME“username “DB_USER and/or password “DB_PASSWORD“you need to update them here and save the file.
-
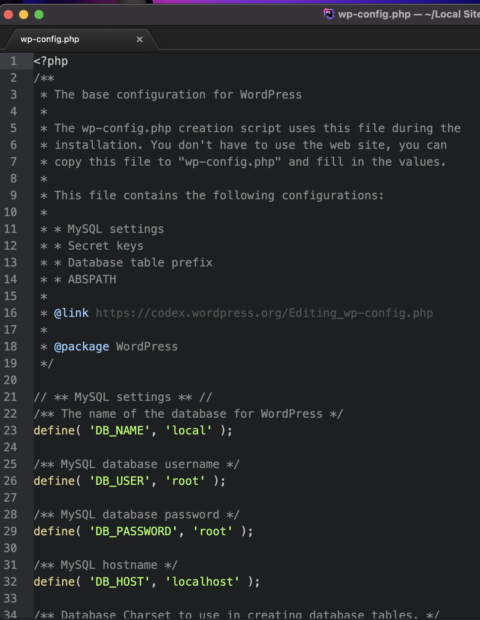 Screenshot of PhpStorm by JetBrains, February 2022
It is wise to first create a copy of the original wp-config.php and store it elsewhere on your computer.
This is a precaution in case something happens and you need database information from the current site location.
Step 12: Log in to phpMyAdmin for the new site. Select the new empty database you just created.Import the SQL database exported from the current location by selecting the new database in the left window and clicking Import tabselect the file to import, and click go.
Select your exported database zip file and make sure it is ready to import as a SQL file and click start import.
 phpMyAdmin screenshot, February 2022
Step 13: Next, you need to upload the WordPress files to the new installation. Log in to the new site’s cPanel’s file manager or connect to SFTP/FTP to get the new site location. Upload the public_html folder to the new location.
Step 14: If you are migrating from a staging site, subdomain or other domain name, install a plugin like Better Search Replace on the migrated site to switch all old site URLs to the new domain URLs.
Point your domain name to the new website
After migrating your WordPress site to the new hosting, you need to connect the new site to your domain name.
Update the DNS records with the new IP addresses, or if you wish to maintain DNS records on your web hosting, you can update the nameservers on your domain hosting account.
step 1: Log in to your domain hosting account. (I’m using Namecheap for this demo.)
Step 2: Select the domain you will use for the new site.
Step 3: Click Manage Domains and Advanced DNS.
the fourth step: In the A record, use @ for Host and under Value add the new IP address provided by the new web hosting provider. TTL should be automatic.
Step 5: In the CNAME record, use www for the host, put your new domain name under Value, and use Automatic for the TTL.
Step 6: save Changes.
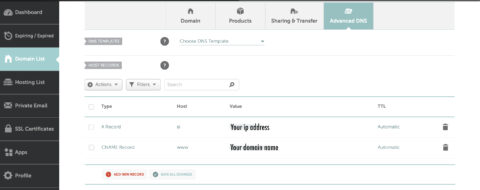 Screenshot via namecheap.com, February 2022
- Follow your specific domain hosting provider’s instructions to make sure all DNS records exist and are updated to point to your new website location.
Allow 24 to 72 hours for full Internet dissemination.
The stress-free way to migrate your WordPress site
Migrating a WordPress site doesn’t have to be stressful.
If your host can’t do this for you, there are plugins that can make the migration process stress-free.
In rare cases, you may have to Using SFTP/FTP Migrate more complex sites.
Having said that, when it comes to WordPress migrations, the steps are always similar.
Allow enough time for the migration process.
With enough practice, you’ll become an expert at moving your WordPress site from one host to another!
More resources:
Featured Image: stockovari/Shutterstock

