


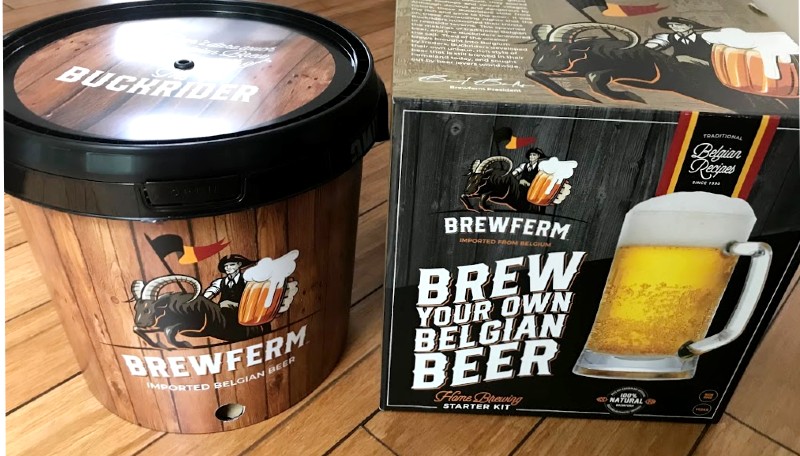
Review – The Brewferm Home Brew Starter Kit is neatly packaged in its own fermentation barrel with ingredients, instructions and equipment. My husband and I have always wanted to try brewing beer on our own, and it’s great to have a toolkit to get us to work.
What is it?
A homemade kit containing almost all the key ingredients and tools that can be used to make 2.5 gallons of beer in your own kitchen without boiling, and includes step-by-step instructions.
What’s in the box?
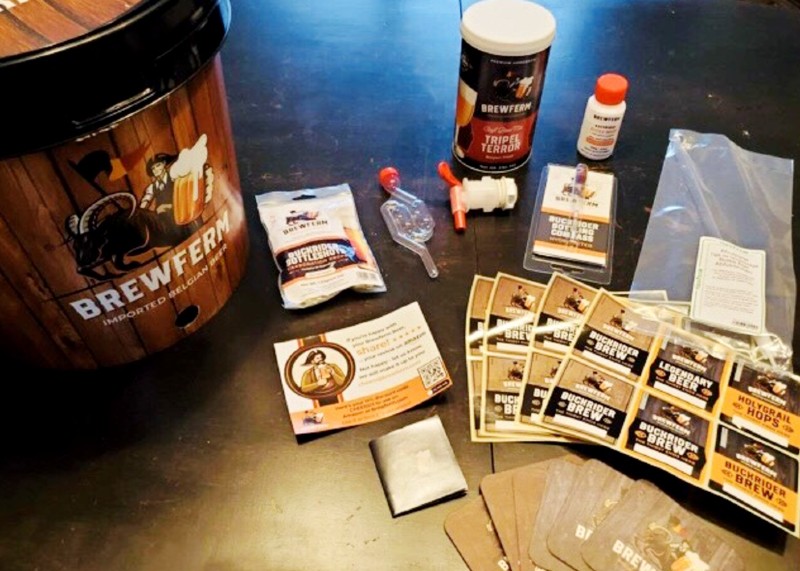
- Buckrider fermentation tank
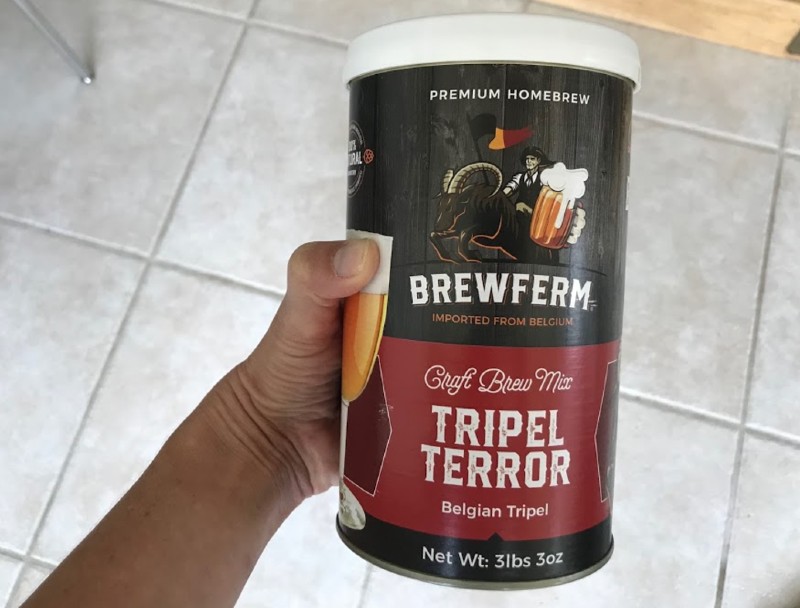
- Brewing mix (ours is Tripel Terror, but they offer 11 flavors)
- Airlock
- Bottling tube
- Bottling hydrometer
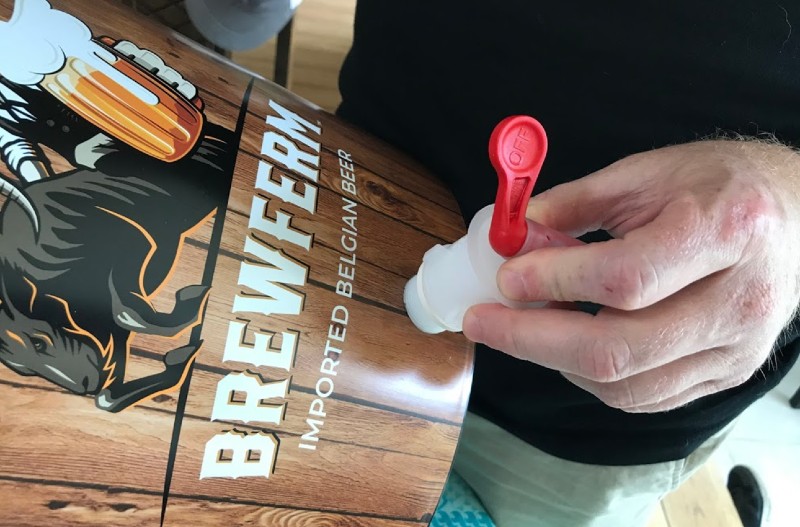
- Fermentation barrel tap (with back nut and 2 seals)
- Buckrider super wash
- Carbonated drops (60)
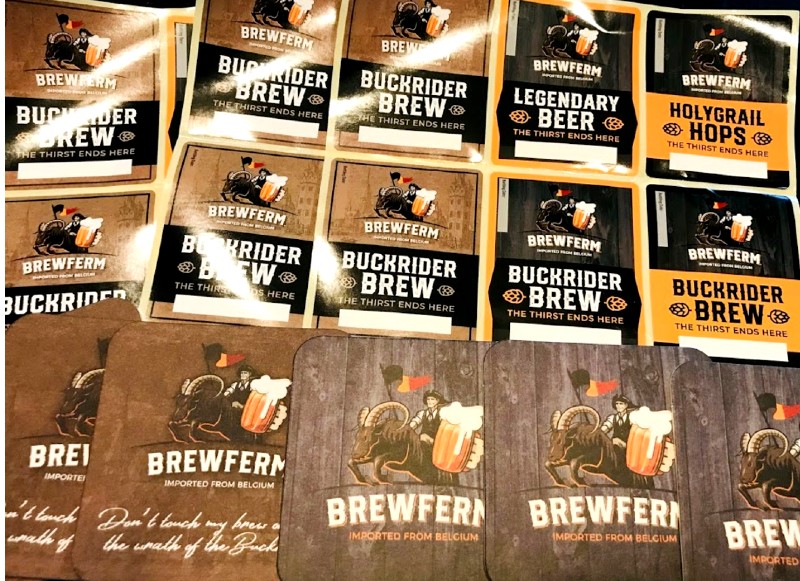
- Bottle label (24)
- Coaster (6)
Hardware specifications
- Product size: 13.5 x 13.31 x 13.7 inches
- Item weight: 3.52 ounces
- Manufacturer: BREWFERM
- ASIN: B08MBCC3YR
- Yield: 2.5 or 9 liters of beer (for this particular kit, Triple Terror)
 Design and features
set up
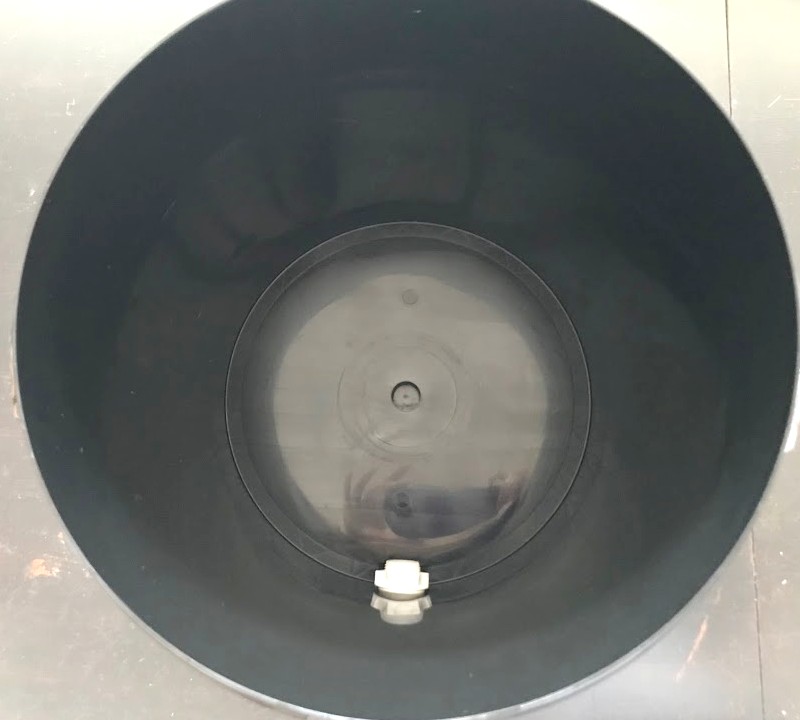
To set it, you need to press the tap into the fermentation vat. You leave a seal on the tap, press it in, then install the seal on the other side and tighten it. Both pressing in the tap and especially tightening the seal require a lot of force. My husband did this part; I don’t think I can do it alone. This tapping device later caused some additional problems.
The initial setup also involves a lot of cleaning work. You need to clean the fermentation tank, lid and all instruments. You can use the special cleaning fluid provided according to the instructions on the bottle (we used 1 ounce of cleaning particles dissolved in 1 gallon of warm water). Follow the instructions, we scrub and then soak for 30 minutes.
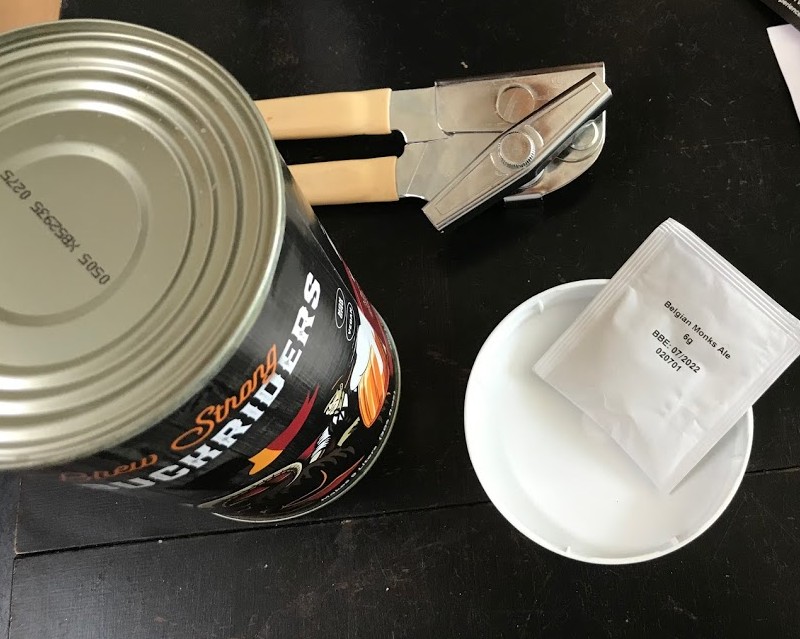
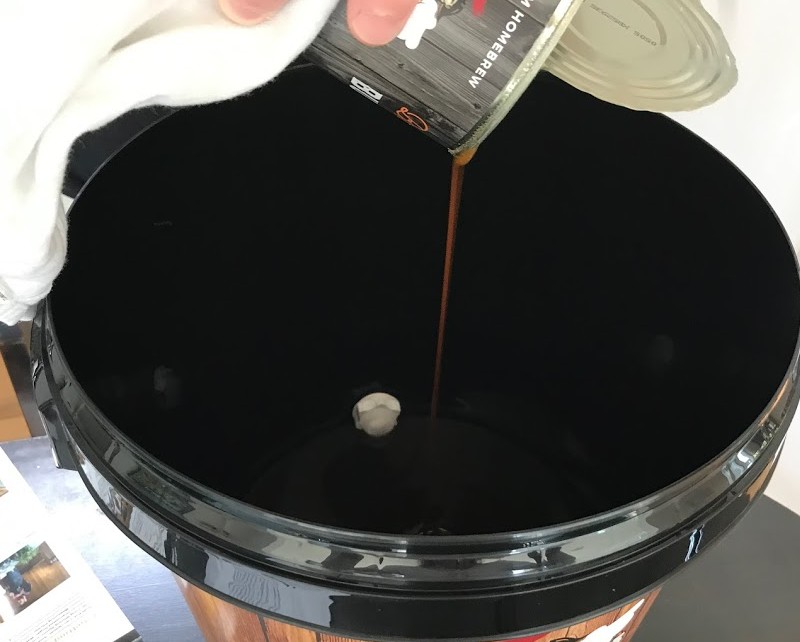
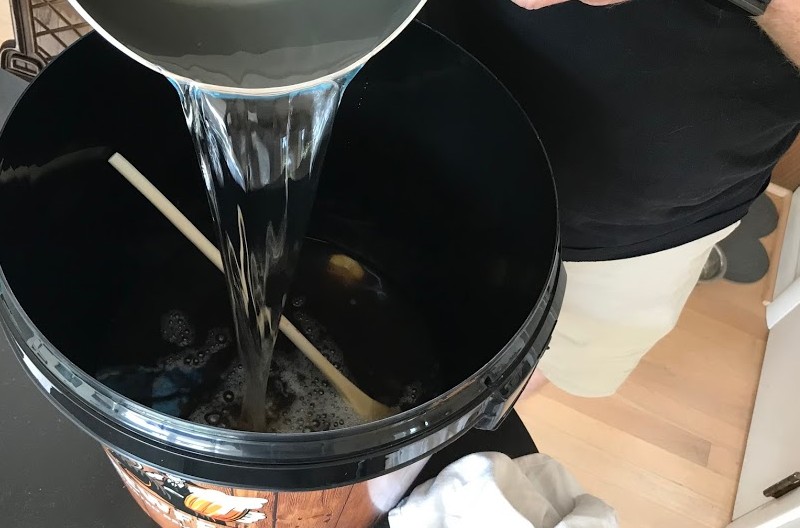
Then you make a “wort” beer aperitif. You heat a quart of water to 104 to 122 degrees Fahrenheit (our water is 118 degrees Fahrenheit). You open the brewing mixture, remove the yeast from the lid, and then open the can with a can opener. You put a can of mixed drink in warm water; we remove the pan from the burner and monitor the temperature from here. We let it sit for 15 minutes, then take it out (the water is 104, so it’s still in range) and pour the thick, dark liquid (a bit like maple syrup) into the fermentation vat. Then you fill the empty jar with another 1 warm water to remove anything left in the jar and stir it.
Then, after dissolving 2.5 cups of sugar, we added 2 liters (68 ounces) of warm water (follow the chart on the instructions; the amount of sugar varies according to the recipe). Then add 2 liters of cold water again following our specific recipe instructions.
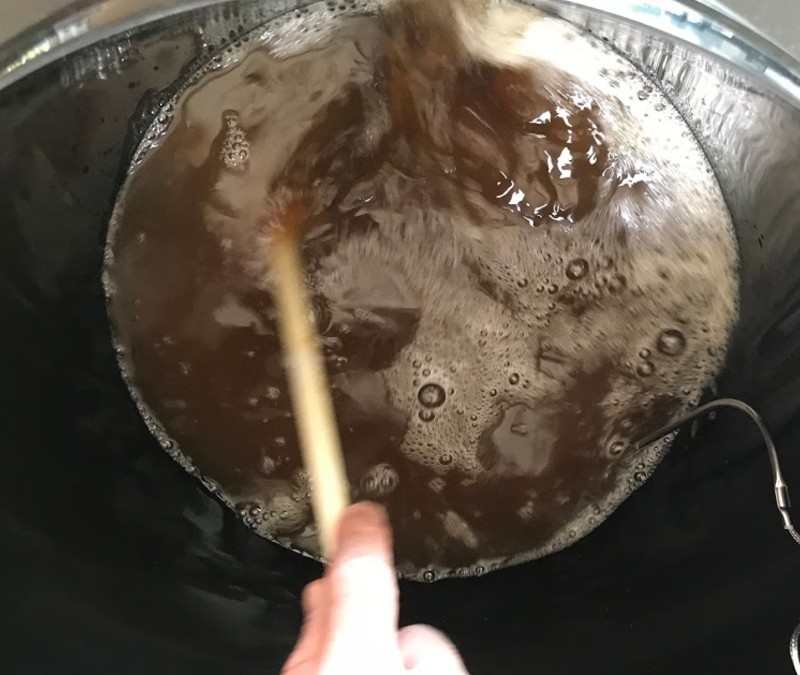
We had to wait until the temperature of the mixture dropped to 68 degrees before adding the yeast and sealing the bucket. At this point, we noticed a very obvious smell. I think it smells a little yeasty. Not bad, just different. My husband said it smelled “very beautiful”.
To seal the bucket, press down on the lid to make sure it clicks into place. Then put the S-shaped air lock on it and fill it half with water.
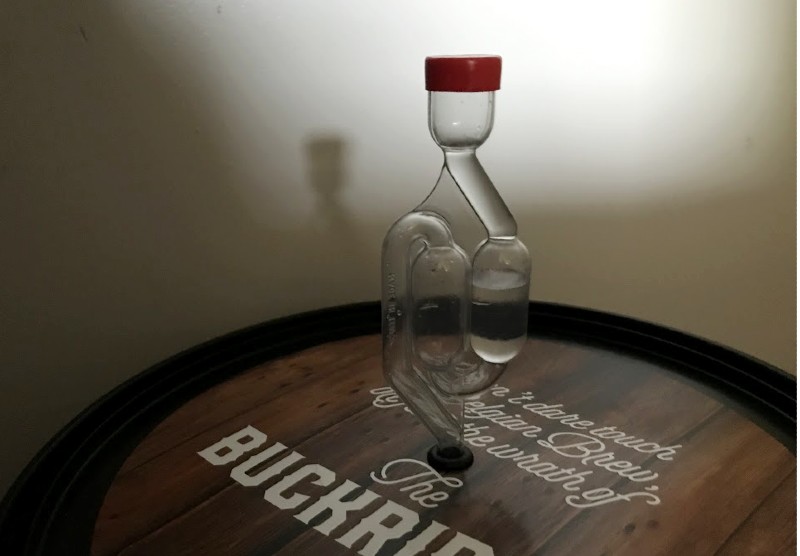
Now we wait 7-10 days for the sugar in the starter to ferment. We will leave it in our basement closet because it needs 66-73 degrees Fahrenheit.
Then we need to bottle it and wait another 6 to 8 weeks for it to mature. Then I will write an update and will give you our taste test notes.
Performance
Since we have not completed this process, I cannot comment on the overall performance. However, the brewing instructions are easy to follow. Most of the content we need is included.
Excludes: 2 gallons of filtered water (we buy water because we are worried that chlorine in tap water will destroy fermentation; we don’t have a water filter in our house), can opener, measuring cup, pot/pan, granulated sugar, bottle, lid, thermometer .
We plan to use the growler, growler, and pop-up Grolsch bottles we have at home to bottle beer, so we don’t need to buy anything extra. I will let you know what is going on.
Our biggest complaint is the leaking tap. I noticed that some Amazon reviewers also commented on this. When we poured the liquid into the fermentation tank, we noticed a slow dripping sound from the tap. My husband uses a wrench to tighten it tighter, but over time we will see how it lasts.

After an inspection one day later, there was no leakage at all from the tapping device, which is a good sign. But a better sign is that we saw air bubbles in the airlock, which also made a very satisfying “grunt” sound. This means that fermentation has begun. It is working!
what do I like
- No need to boil, simple recipe
- Almost everything you need
What will i change
- A knocker that will not leak, or at least have troubleshooting instructions on how to manage this issue (because others have also noticed this)
Final thoughts
This is an interesting afternoon project. Although not everything is included in our kit, we are able to improvise around the house. We will have to wait for the real test: tasting!
Price: $89.99
Where to buy: Amazon
source: The sample of this product is made by Brewery.

