

Review – My husband and I were fortunate enough to adopt a puppy from the humanitarian society in July 2020. Since March 2020, I have been working from home and have a lot of time to accompany him. On the downside, he didn’t have the opportunity to socialize as we hoped, and he never had time to be alone. In the past 6 months or so, we have left him alone for a long time as we go out to eat dinner and do other things more and more times. When he is at home alone, he will not spoil anything, but when we get home, he is the most excited dog I have ever seen. I have always wanted to try a pet snack dispensing camera that allows me to see the dog and interact with him when I am not at home. So when the Cengcen Pet-treat camera was taken out for review, I jumped in. Let’s see how it is done.
What is it?
Cengcen Pet Snack Camera is a camera with a built-in microphone, speaker and snack distribution system. It has an app that you can install on your phone, allowing you to turn on the camera and interact with pets.
What’s in the box?
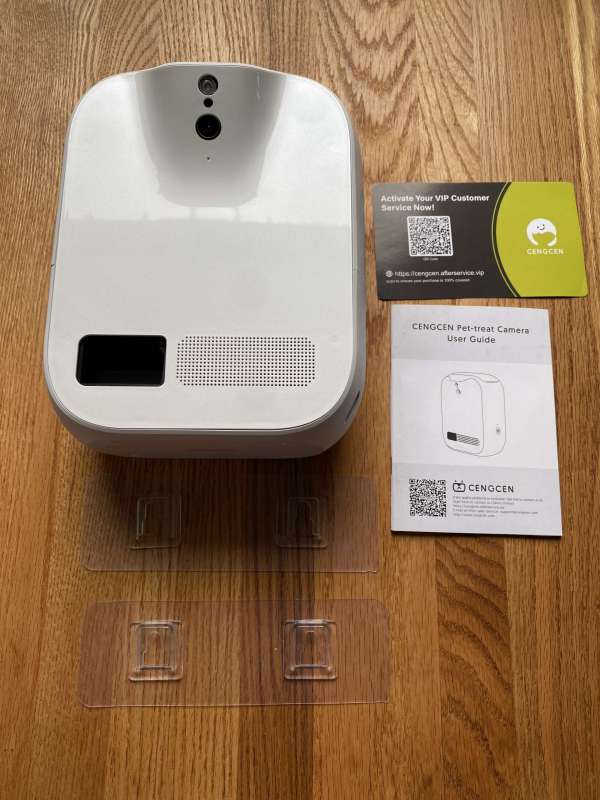
- Zeng Cen Pet Snacks Distribution Camera
- User manual
- Welcome Card/Registration Card
- Two wall mounts
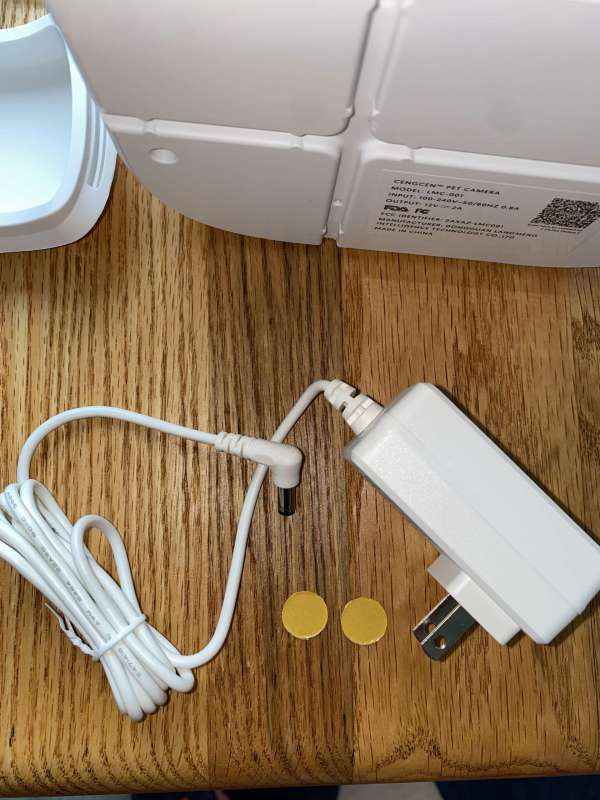
- Power cord with built-in power adapter
- If you want, the two cardboard buttons have tape on one side to cover the LED.
Hardware specifications
- Can connect to 2.4 GHz and 5 GHz Wifi
- Dual speakers and 2 audio channels
- Wall mounting option without the need to punch holes in the wall
- 130-degree field of view, 1080p video recording. Focal length 2.8mm
- Allows you to take snapshots and record videos
- Optional cloud-based payment system that can automatically record when motion is detected
- Night vision camera
- You can share the camera with others by adding their phone number to the sharing list
- Requires IOS 10.2 or higher or Android 4.2 or higher
- 10.83 inches high, 8.66 inches wide, and 5.31 inches deep
- Empty weight 1.98 pounds
Design and features
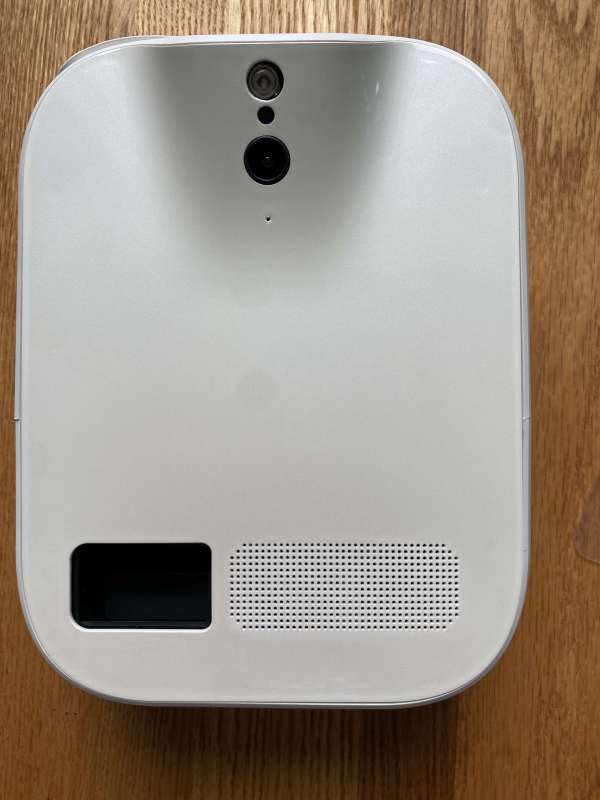
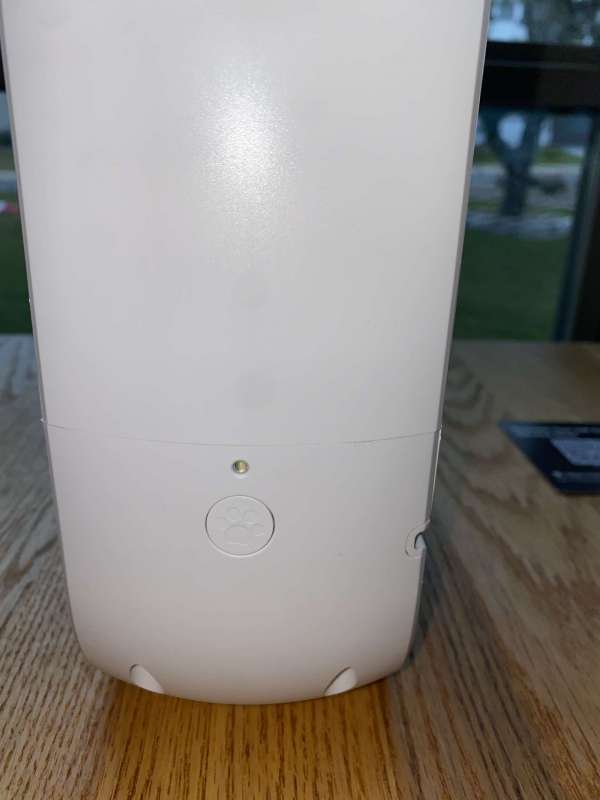
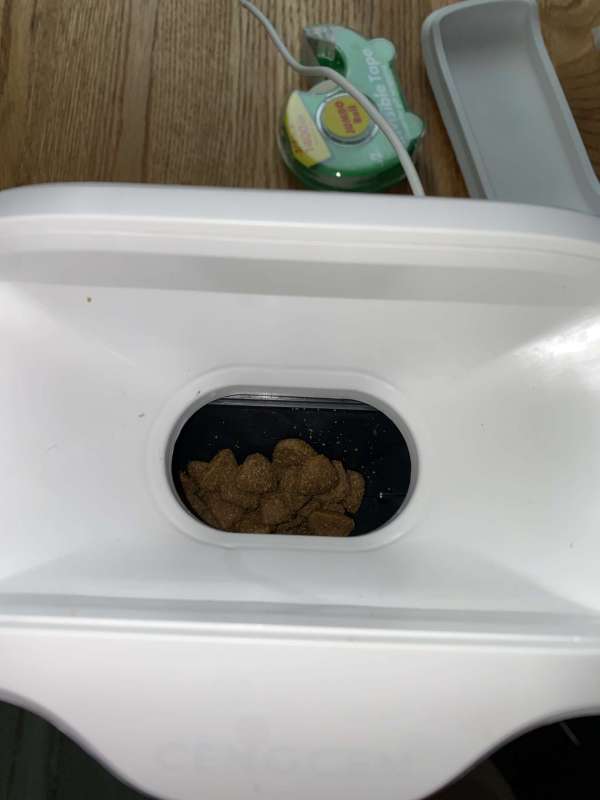
The Cengcen Pet-treat camera is made of shiny white plastic material. I have a picture of the front of the device below. At the bottom of the device on the left, you will find a hole for distributing snacks. On the right side of it, you will find a two-way speaker where you can talk to your pet and hear them talk to you.
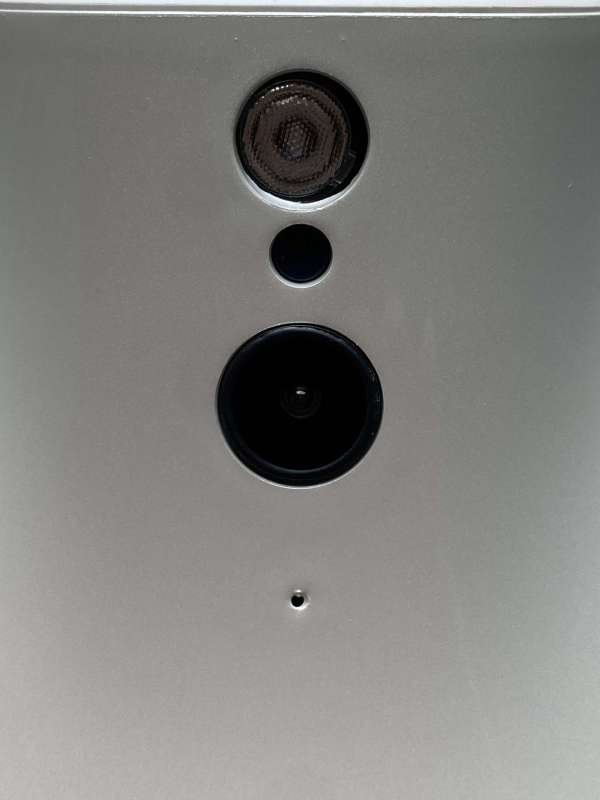
At the top of the device, you will see infrared night vision lights, photoresistors, cameras, and microphone holes. The camera is at the top, tilted slightly downward. The dispenser is designed to be placed on a shelf, tabletop or hung on the wall to get the best view of the pet and the surrounding area. Cengcen recommends installing the camera at a height of about 4 feet or high enough to keep it away from pets. You don’t want them to open the top of the device and steal all the snacks!
When you face the camera, there is a power button with an LED light on the right side of the device, indicating that it is turned on and connected. If you don’t want bright light in the room, the two circular paper circles shown in the “What’s in the box” section can be used to cover the LED.
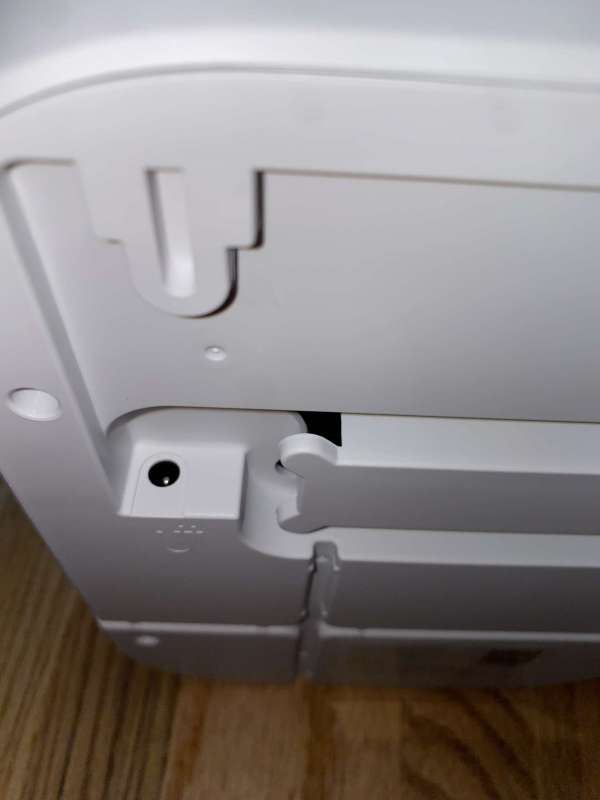
The top of the device is a silicone cover with grooves on the left and right sides, allowing you to pry it off the paper feeder.

This is a photo of the paper feeder with the lid closed. The power adapter is stored in the treatment area.
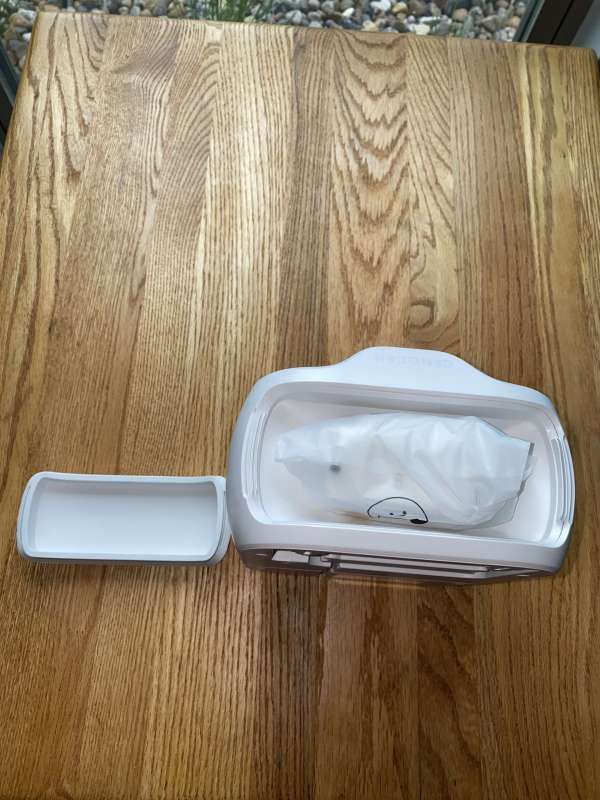
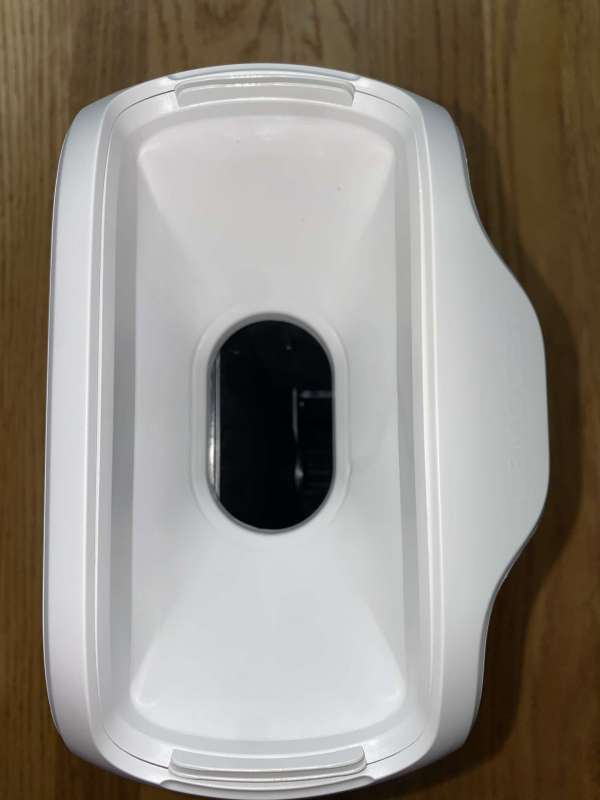
This is what the inside of the treatment area looks like.
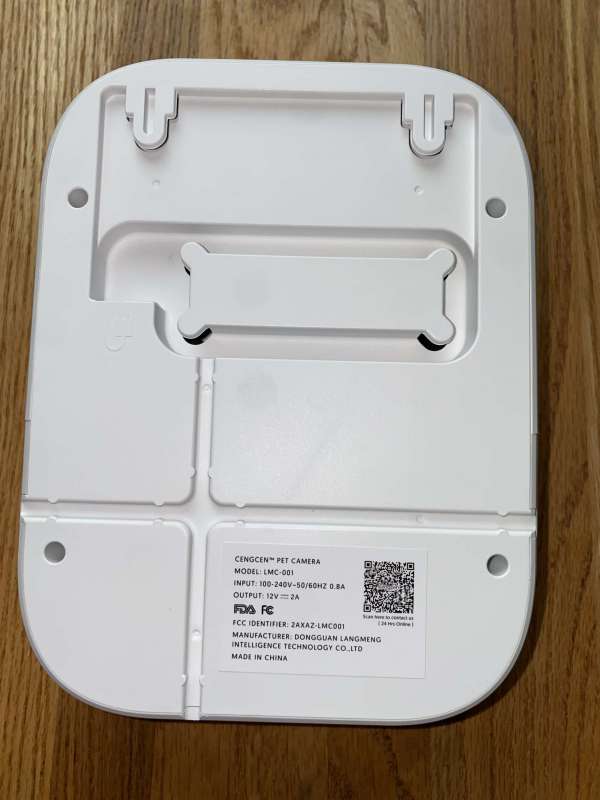
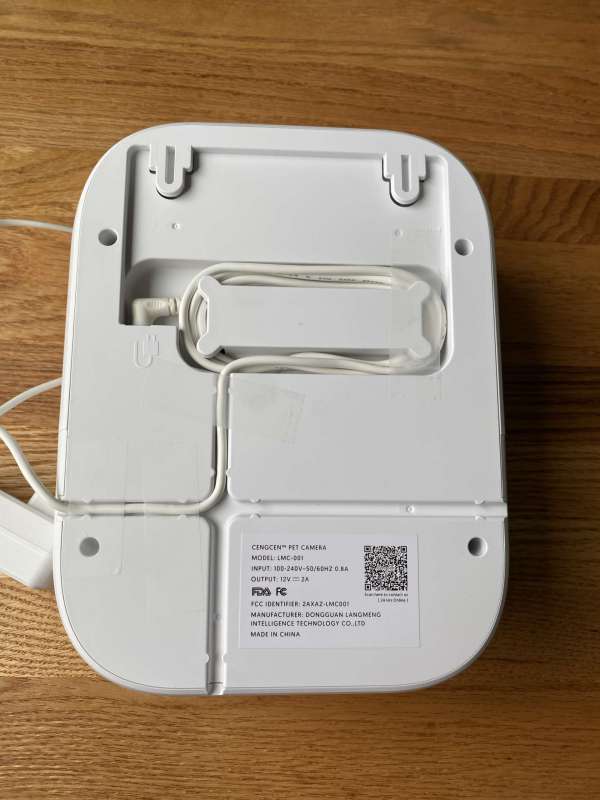
The back of the device contains a power plug and a power cord management port. If you want to hang it on the wall, this is a great system. It allows you to run the power cord in almost any direction to connect to a wall outlet.
I twisted the power cord several times and let it come out of the right side of the device, thinking I was going to put the pet feeder on the floor. What I want to point out is that when it feeds down the side of the device, I do have to use some scotch tape to hold the power cord in place. After connecting it and checking the camera view, I quickly realized that the pet camera needs to sit higher to get the best viewing angle. In addition, as stated in the manual, I believe my smart puppy Peanut will quickly figure out how to snack on his own.
set up
The setup is very simple. I downloaded the Cengcen app on iPhone 11 Pro. I pressed the power button and within a minute the LED light started to flash, and I heard a voice saying “Ready to connect”. There is a QR code on the back of the device, which I scanned through the app after allowing access to the camera. The device made a beep and I entered my network information.
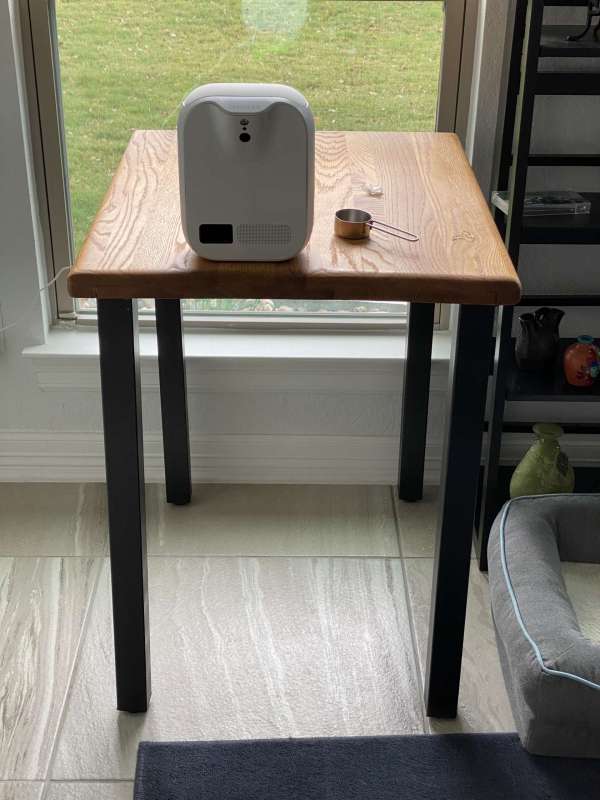
At this point, I loaded some coarse ground food for my dog peanuts. The picture below is his quarter cup of snacks.
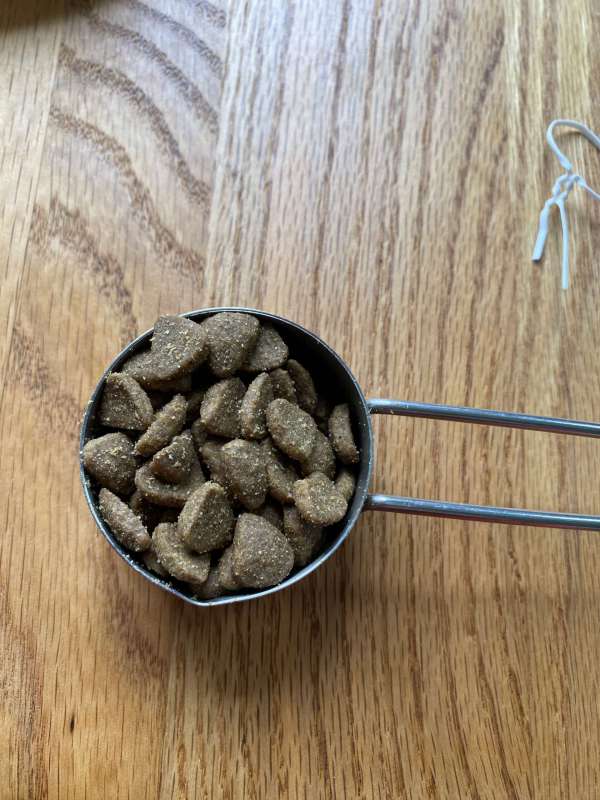
Pour a quarter cup into the dispenser without even filling the initial hole in the dispenser. I can easily put a cup and a half of coarsely ground food into the snack dispenser.
Then I put the camera on a table about 32 inches above the ground.
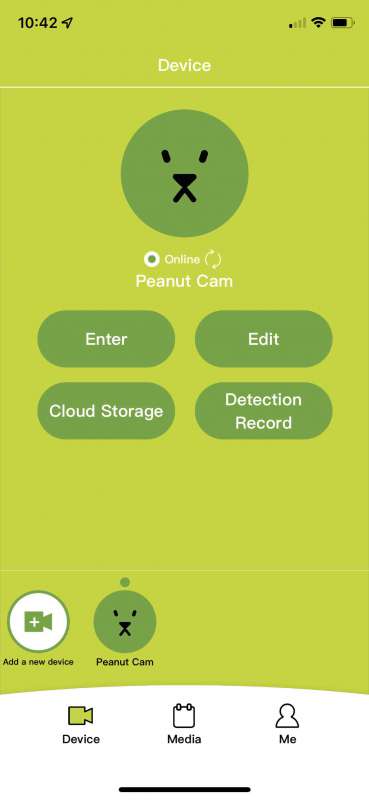
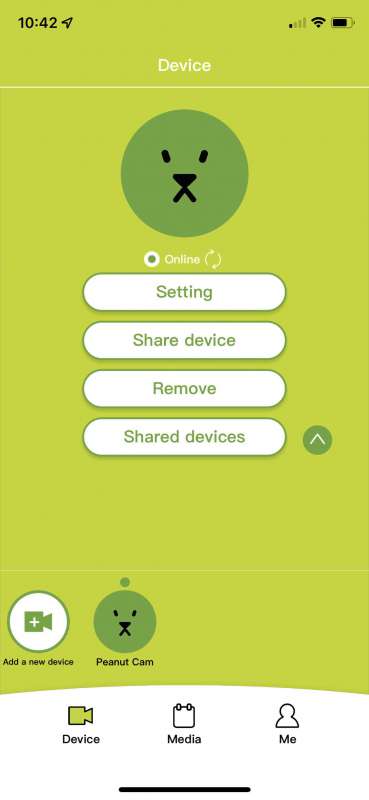
Next, I will show you some screenshots of the application. This is the main screen of the camera you are connected to. You can see that I renamed it to “Peanut Cam”. There is an input button, if you click this button, you will enter a real-time view of what the camera sees.
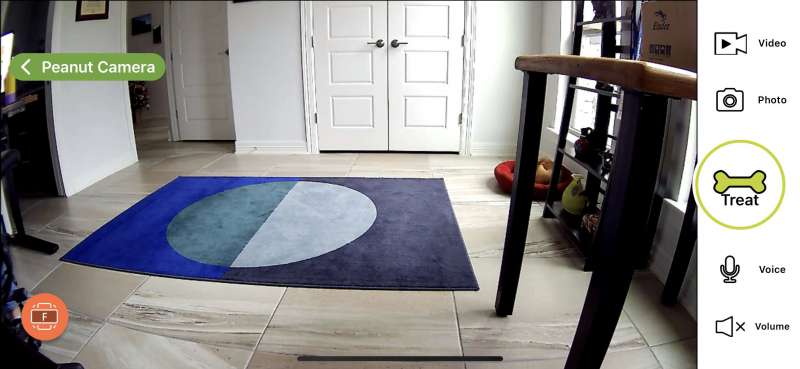
This is the picture that the application displays when you click the Enter button. In the upper left corner, you can see a left arrow and the words “Peanut Camera”. You can click it and return to the main screen. In the lower left corner, you can click the orange button to lock the display in horizontal view. You can rotate the phone and get a vertical view, but it limits what you can see. The camera is located on the top of the file cabinet about 26 inches from the ground. On the right side of the video, you can see some buttons. The top button is the video button. You click it once and it will start recording video. Press it again and it will stop recording and save the clip to the media area of the app and your phone. The next button will allow you to take a picture of what the camera is displaying at the time. It will also save the picture to the media area in the app and on your phone. The big “Treat” button will distribute snacks after ringing. There is also an option to replace the ringtone with your own voice, which I will talk about later. The next button labeled Voice allows you to talk to your pet. You hold down the voice button and it will turn green. This means you can now use the microphone on your phone to talk to your pet through the device. The last button is the volume or sound button. Pressing it will turn on the sound, allowing you to hear what is happening in your pet and the house.
Click the edit button on the main screen to enter the device settings. From there you can enter more settings, share the device with other friends and family, remove the device, and see who is sharing the device with. In order to share the device with others, you only need to enter a phone number or email address. They will receive a link to the camera and application.
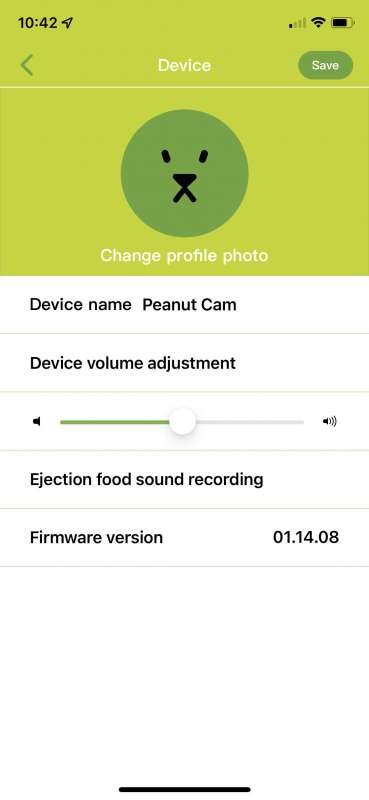
The next picture below is a screenshot of the settings. Here you can change the device name, change the device volume, create a new pop-up recording, and check the firmware version.
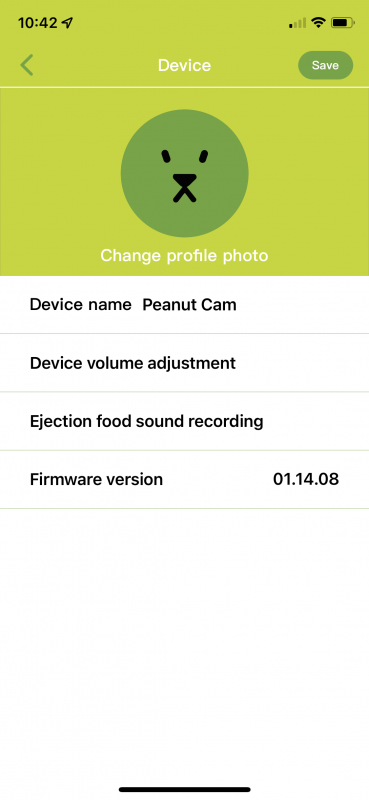
I immediately had to increase the volume of the device. It is almost set to off and you can hardly hear it.
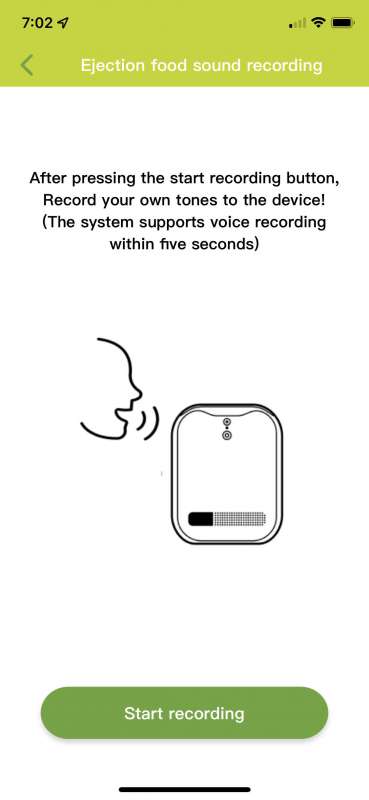
To record a new sound other than the ringtone (by the way, it scared my dog!), you enter the “Exhaust Food Recording” and the following screen is displayed. You press the start recording button and talk directly to the device. I initially thought that I was speaking into the phone to record, but you were speaking into the microphone of the camera. This is the source of one of my questions about this product. No matter what I do (increase the volume of the device, speak into the microphone on the device, speak into my phone) I cannot record new pop-up sounds. Since then, I have opened a ticket with support and they are very sensitive. I received about five different emails with suggestions and methods to solve my problem. It seems to boil down to the fact that I need to use firmware version 1.14.09. However, every time I try to update to a new version, I am told that I am using the latest version. I will update this comment when I get a solution from the supplier.
Performance
The first thing I want to show is the speed and distance at which snacks are distributed. They did go very far. Part of the reason is that they were sitting on a 32-inch table when the snacks were distributed. I was also surprised how much coarse ground powder was sprayed out. After overcoming the initial shock, I began to realize that it was actually very good. If they are shipped out of the dispenser or left there, it will only encourage my dog to approach the camera.
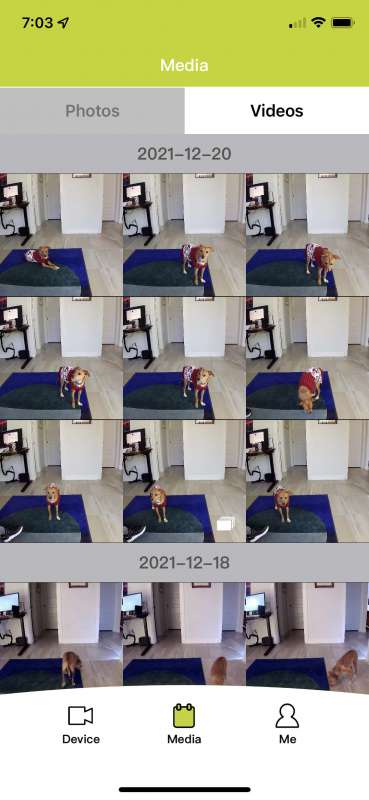
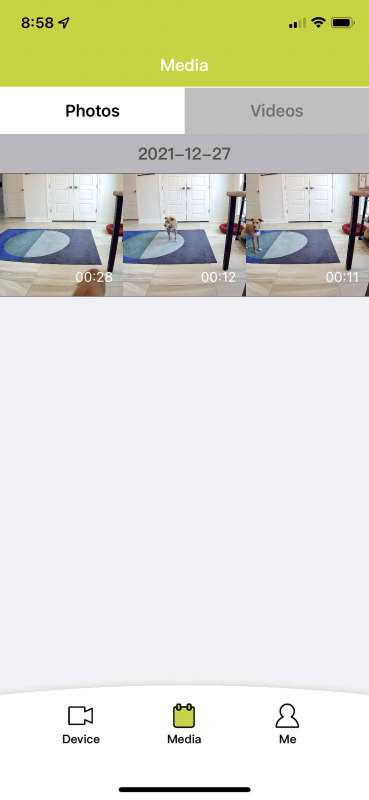
Next I want to show you the media area of the application. These pictures and videos are also stored directly on your phone. I saw them in my Google Photos app and Apple Photos app. The screenshot below shows the photo section of the app.
 Next, I pulled a few pictures to show you the clarity. I think these photos are great. The view is great. It really took my dog a long time to not be afraid of the camera. He finally learned that when he heard the bell, he had some snacks waiting for him. Here, he is looking at the camera…Where are my snacks! ! !
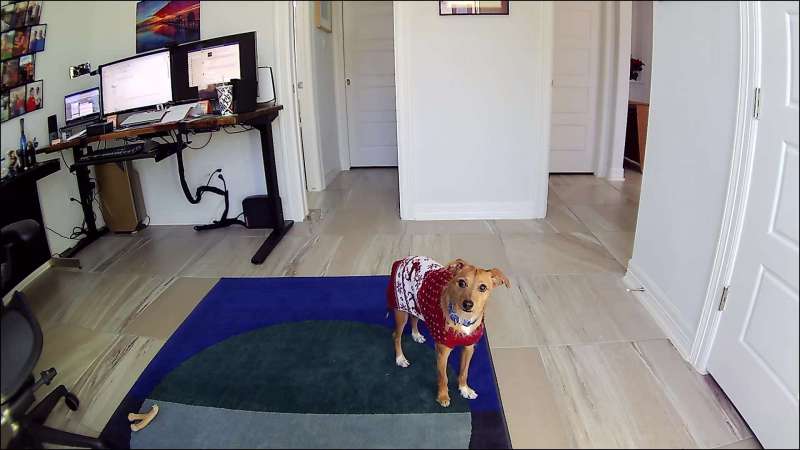
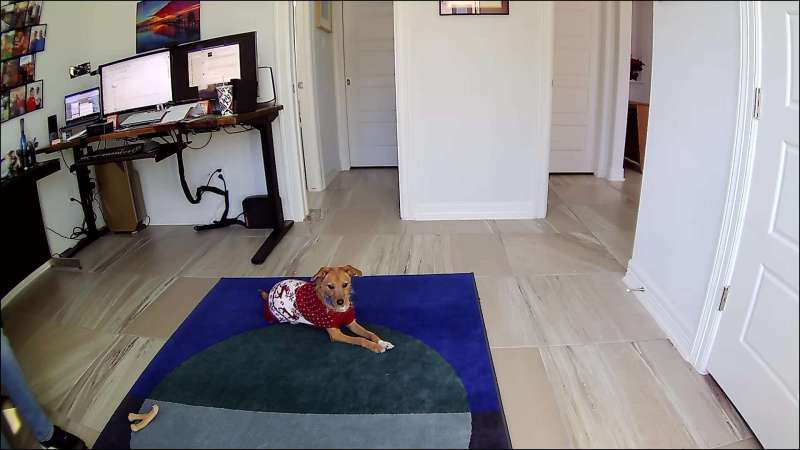
Now he patiently waited for the next bell.
I also included the night camera lens. This is not the best, the dog was constantly looking for snacks at the time. He almost looks like a ghost dog!

This is a screenshot of the video part of the app. What I want to point out is that I eventually moved the camera from that table to the file cabinet on the side wall of the office. I need that table to install the new 3d printer I received at Christmas! ! I will show you a video clip in the comments later.
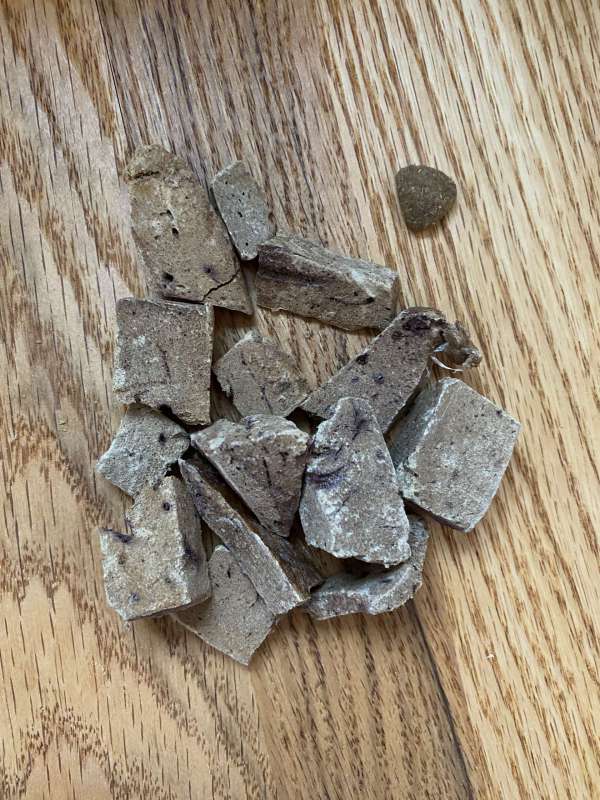
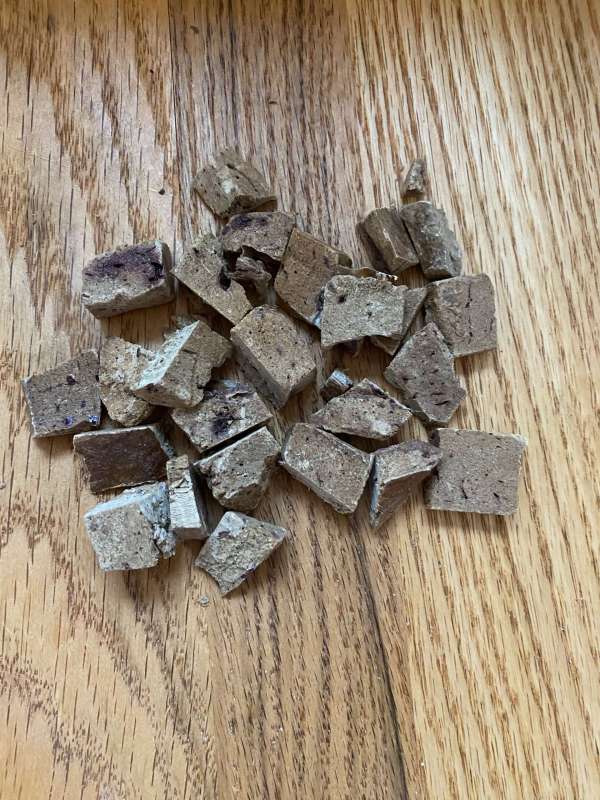
The next thing I tried was to get some bigger snacks so as not to allocate so many pieces. I bought some freeze-dried bison liver for peanuts for Christmas. This is certainly not a daily hospitality. Gosh, it’s expensive, but he does like it. I initially tried to use the standard size in the picture on the left. I have a piece of coarse flour to show you the difference in size. It turns out that these fragments were too big and they got stuck in the dispenser. I pulled them out and cut most of them in half to look like the photo on the right. When I pressed the process button, this resulted in about three pieces being sent to the nuts.
This is a video recording from the app that contains food for the distribution of bison liver. I turned off the volume, so there was no recording. You will also notice that Nuts no longer wear sweaters. Our temperature was as high as 80 degrees on Christmas Day. This is crazy weather.
what do I like
- Easy to set up and connect to the network
- The app allows you to control the volume of the speakers, which is very good.
- The snack storage area can hold a lot of snacks.
- I like that it comes with two wall mount brackets that will not damage the wall.
- I like to talk to my dog and see what he is doing.
- Videos and pictures are very clear, and have a good wide-angle viewing angle.
- Record your own videos or pictures without subscribing.
Areas for improvement
- I can’t get Dim Sum to assign record work-I am currently working with support staff.
- The night vision camera is weak.
Final thoughts
I think the image quality, wide-angle viewing angle and treatment distribution capabilities really make the Cengcen pet treatment camera a winner. As long as you leave a light in your area, you should always be able to see your pet and give some love. They did consider power cord management, allowing you to hang it on the wall without damaging the wall. My only dislike is that it can’t replace the annoying ringing when snacks come out. Hope this will be fixed soon.
price: $109.99
Where to buy: Amazon
source: This product sample is provided by Zeng Cen.

