

review – I was in a dilemma when Creality offered to send me their Ender-3 S1 3D printer for review. I’m impressed with their CR-Lizard 3D scanner software, but their printers seem to be popular. Of course, I chose to review it, but read on to see if it’s a good choice.
What is it?
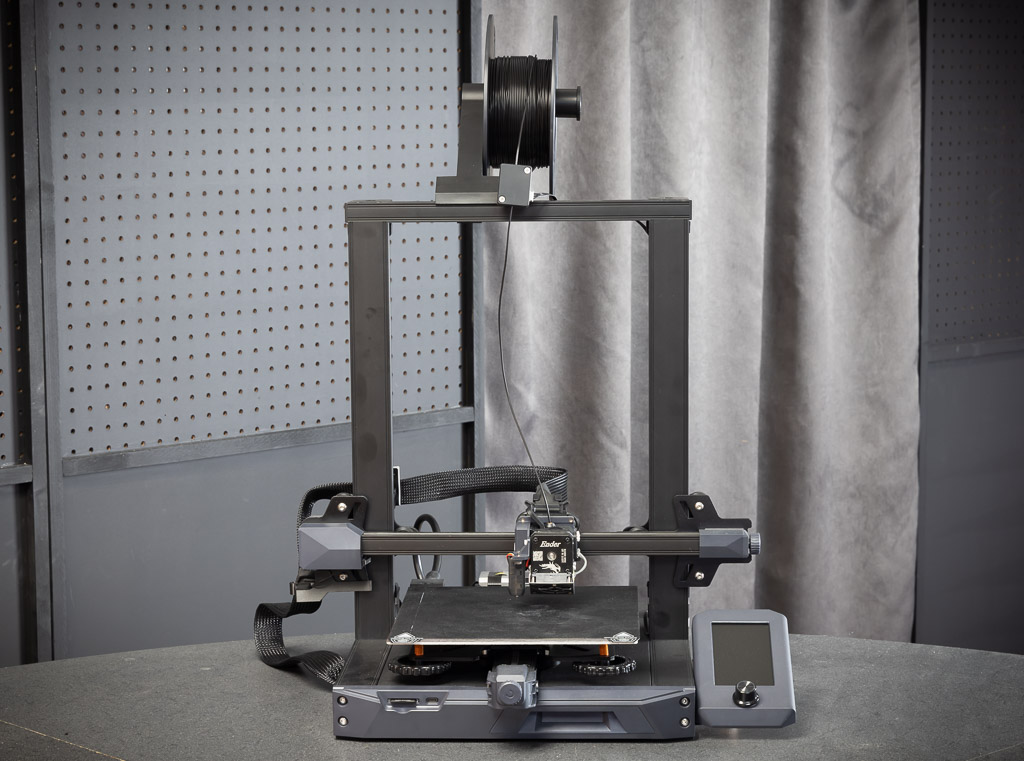
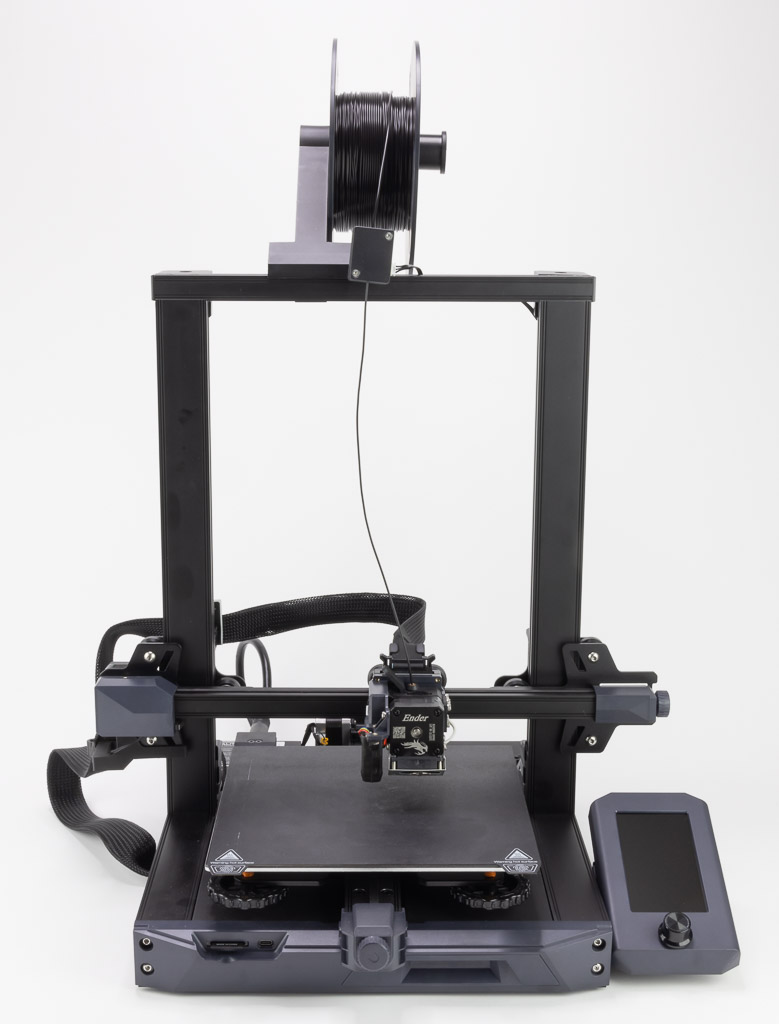
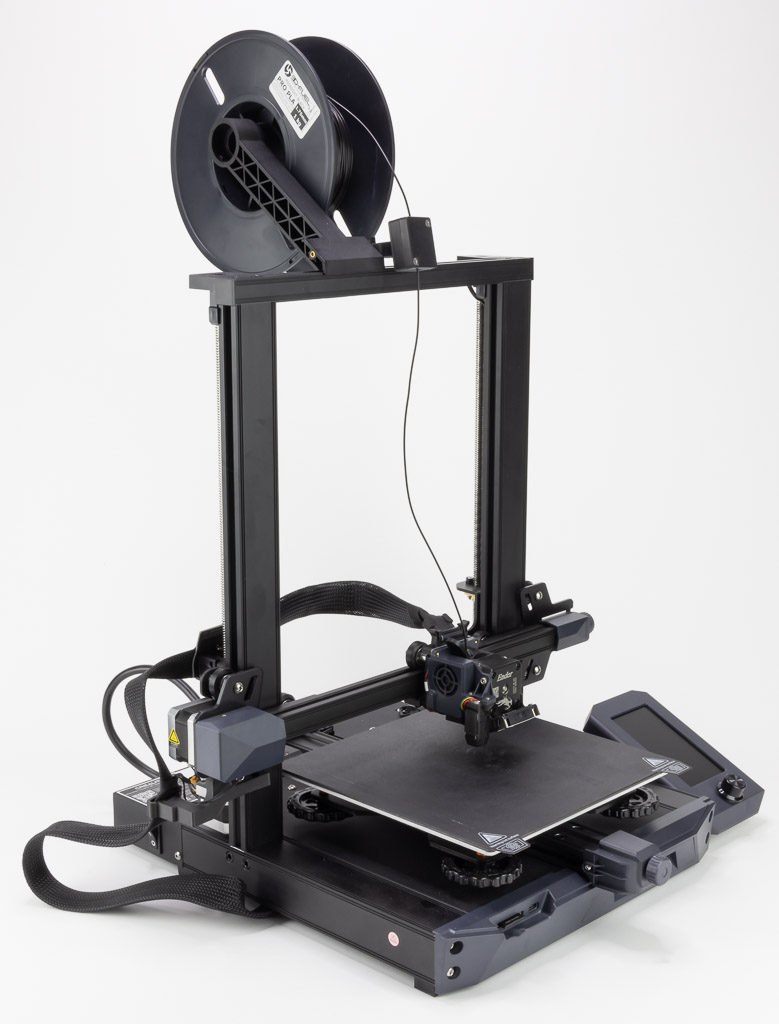
Creality Ender-3 S1 is a Fused Deposition Modeling (FDM) 3D printer Features self-leveling and direct drive extruders.
What’s in the box?
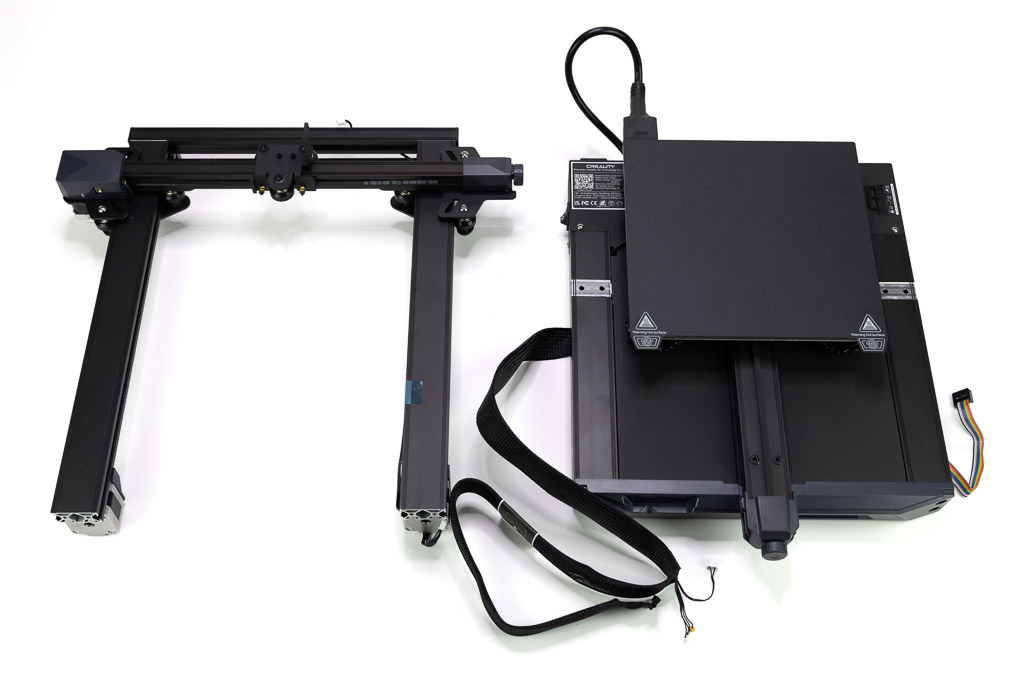
- Creality Ender-3 S1 3D Printer Base
- Gantry
- Nozzle Kit with Cord Clamp
- spool stand
- Monitors and Stands
- Filament sensor
- Sample Filament
- Spare Nozzle
- SD Cards and Card Readers
- Tools: Shovel, Diagonal Pliers, Wrench, Screwdriver, Hex Key, Nozzle Cleaner
- user’s guidance

Hardware Specifications
- 220 x 220 x 270 mm print bed
- “Sprite” direct drive double gear extruder
- 150mm/s maximum printing speed
- 0.4mm nozzle
- 0.1mm accuracy
- 0.05-0.35mm layer thickness
- 1.75mm Filament
- 260C maximum nozzle temperature
- 100C maximum hot bed temperature
- CR Touch Self-Leveling Bed
- High-precision dual Z-axis
- 32-bit silent motherboard
- Support PLA/TPU/PETG/ABS filament
- Filament runout sensor with recovery printing capability
- Quick assembly
- PC spring steel printing plate
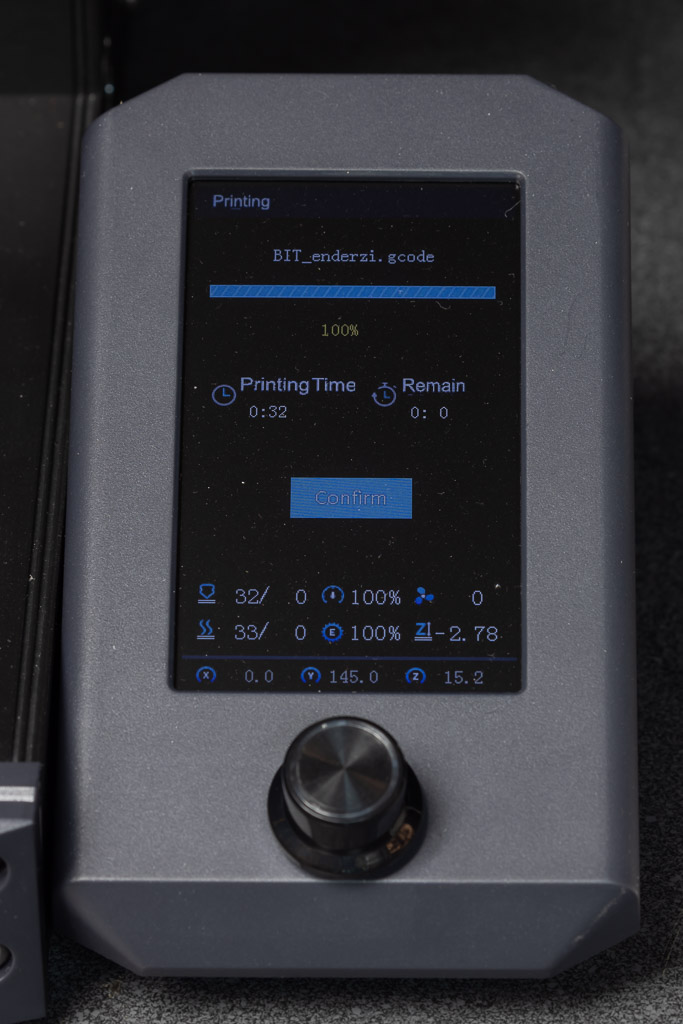
- 4.3-inch LCD screen with knob control
Design and Features
Assembly of the Creality Ender-3 S1 3D printer is very simple. It consists of four screws in the nozzle assembly, four screws in the gantry, and three screws in the monitor mounting bracket, pops on the filament spool bracket, and plugs in some connectors. Read the instructions to find out which screws and where to install will take longer than assembly. Don’t forget to switch the power supply to 115v or 230v depending on your mains.
The Ender-3 S1 3D printer has a drawer on the front of the base, with a usable space of approximately 170 x 115 x 25 mm (6.75 x 4.6 x 1 in). I found this to be a great place to store spare parts.
I was initially concerned about the lack of touch functionality on the 4.3-inch LCD screen. However, after using the control knob for a while, I found it wasn’t as bad as I thought. Knob controls are actually faster than touchscreens for some tasks.
The machine powers up and starts up quickly in about 6 seconds. Click the knob three times to the right and press the knob to start the leveling procedure. The 16-point automatic calibration of the entire bed surface takes approximately three minutes. Automatic bed leveling compensates for bed variations as the printhead moves across the bed surface. If there are lows or highs, the printer will compensate for this.
Next is to prepare the Z offset compensation value. This is probably the most important part of setting up a 3D printer. Z-axis compensation sets the initial distance between the nozzle and the print bed. Fine-tuning on some printers may take some practice. Do this by placing a sheet of A4 paper between the nozzle and the print bed and adjusting the Z offset setting until there is slight resistance to moving the paper under the nozzle. I think it’s better to set the Z offset too high and lower it if needed, rather than setting it too low and damaging the print bed.
Here I found one of the things I thought could be improved with the Creality Ender-3 S1 3D printer. The CR touch sensor and cooling fan are located on the front of the nozzle assembly. It is difficult to see the nozzle when sitting on a standard table unless you are looking at it from the side at about a 45 degree angle. Certainly not a deal breaker, just something that could be improved.
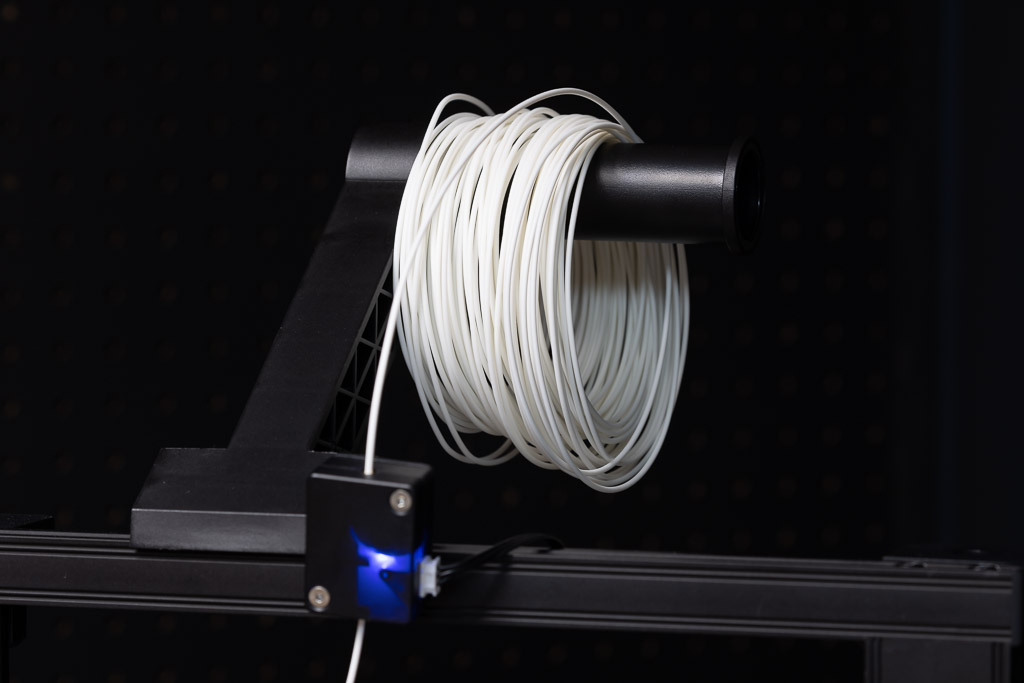
Loading filament is not well covered in the manual. The manual says “heat the nozzle above 185°C” but doesn’t tell you how to do that. There are two ways to do this. The first method is to select Prepare->Preheat PLA. The second method is to use Control->Temperature->Nozzle Temperature. Also in the Nozzle Temperature section are the Preheat PLA/Preheat ABS preset settings mentioned in the first method.

When loading the filament, didn’t know that the lever next to the extruder’s filament hole was to release pressure on the drive gear to manually push the filament into the extruder. The manual doesn’t cover this either. My other printers use a different approach to this lever. I think the lever might be a tab to handle the extruder when it’s hot. I eventually found that pushing this lever to the left made it easy to load the filament.
The rest of this manual will guide you on how to download the Creality Slicer software, which is just a customized version of the Ultimaker Cura.
I found that I really like the overall design of the nozzle assembly. The ribbon cable connector and four screws make it very easy to remove for maintenance.If you want to make it easier to remove, check out Simple tool changer for correct printing.
The easy-to-remove sprite extruder allows for easy tool head replacement for the optional all-metal high temperature (300C) extruder and possible future accessories. Or, if you prefer, you can have a second extruder with a different size nozzle. The extruder assembly also includes two fans, one for hot-end cooling and one for layer cooling.
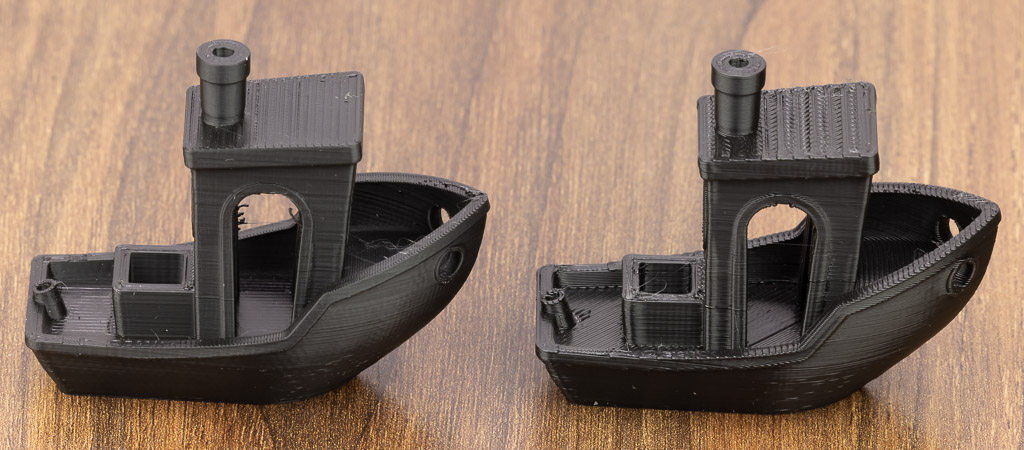
Probably the most serious problem users have with 3D printing is bed adhesion. Before flexible build boards, getting prints to stick to the build surface can be tricky. Creality prevents this problem by including a magnetic PC spring build plate in the Creality Ender-3 S1 3D printer. No tape or glue required. My initial impression was that the supplied filament was almost too sticky and a little hard to remove at first. However, I have found that print removal is easier if I remove the plate and let it cool first. I also found my favorite filament, 3D Fuel Pro PLA, easier to remove. Part of the print sticking too well may also be due to the sample filament that Creality ships with the printer.
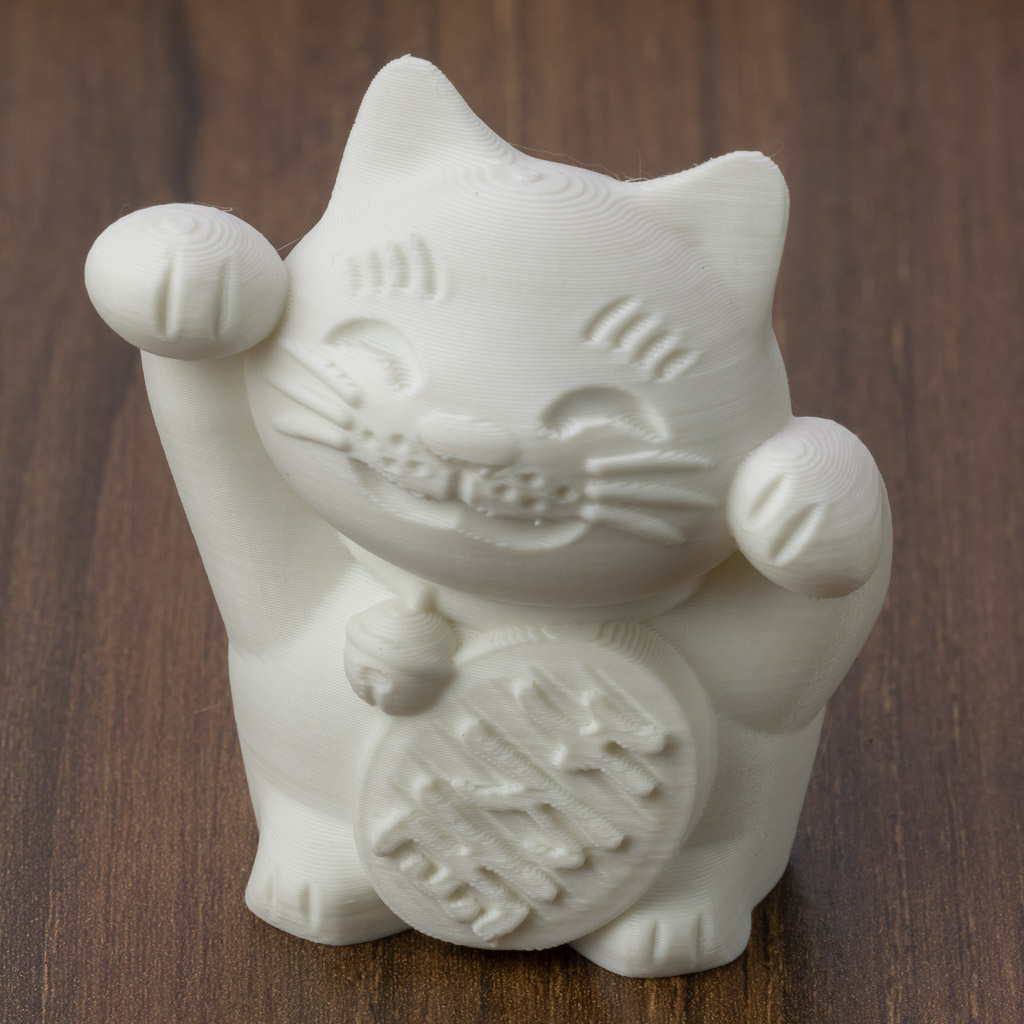
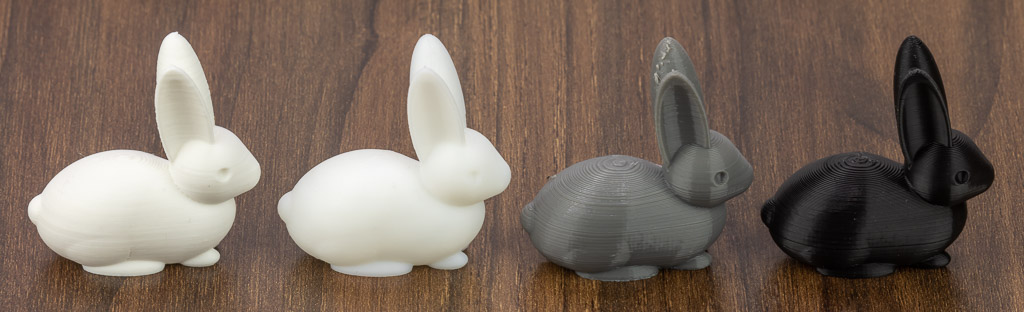
Of course, you want to know how it will print. I must say that the Creality Ender-3 S1 prints better than my Kywoo 3D printer, except for my very expensive Markforged Mark Two 3D printer. Z-offset is also easier to set than Kywoo3D printers. The S1 is also quiet when printing.
One thing the Creality Ender-3 S1 lacks is WiFi connectivity. In this day and age, transferring files via SD card is simply a nuisance. Not bad if you just print a model every now and then. However, if you’re changing the prototype and reprinting it, it gets old quickly.
I was very impressed with the hotbed wiring. Usually this is something that the printer manufacturer doesn’t spend a lot of time designing, usually just connecting the wiring directly to the head pad. Creality has implemented very nice cable and connection points at the back of the bed, eliminating any concerns about wiring breaking over time.
Creality also includes a Z-axis limit switch for the hot end without the BL/CR touch module.
what do I like
- Detachable Sprite extruder (hot end) for easy nozzle maintenance
- Automatic bed leveling
- its wiring and wiring is great
- Filament Bounce and Power Recovery
- direct drive extruder
- PC spring steel plate
- Synchronized dual Z axis
- quiet
- Nice full size SD card
what would i change
- The English translation in the documentation requires a lot of work.
- External wiring setup could be better
- Small bed (220x220x270)
- The sample filament that comes with the machine is not on the spool.
- No wifi.
final thoughts
Overall, the Creality Ender-3 S1 is an excellent 3D printer. For beginners, this will be perfect. It’s easy to upgrade and prints really well. I was very impressed with the little details and gave me a whole new perspective on Creality. Well done creative, well done.
price: $399.00
where to buy: Reality
source: This product sample is provided by Reality.

