

Crowdfunding Review – My bibliophile/book collector and private educator (employing a professional tutor) are increasingly conflicting, and I need to capture images of documents (e.g. invoices for purchases of books and mayflies, version change documents and illustrations to give my student). So far, I’ve been collecting and processing these images using the camera and document management app in my iPhone. I now need a more robust setup to handle my imaging needs. I hope the CZUR ET24 Pro Smart Document Scanner will help me dig out of my current imaging backlog.
What is it?
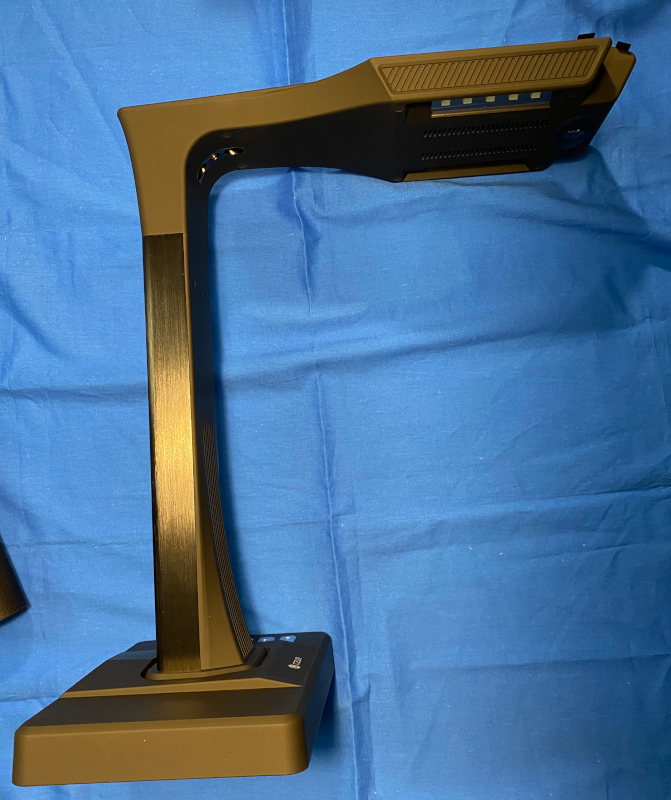
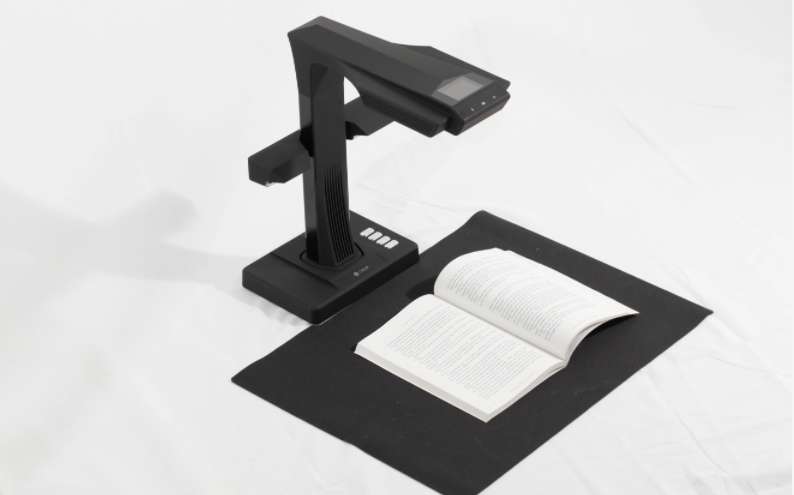
The CZUR ET24 Pro Smart Scanner is the latest generation of CZUR’s document imaging system. The ET24 Pro is CZUR’s sixth generation document imaging system. In addition to being a document scanner, the ET24 Pro can also be used to capture real-time audio and video and transmit it to a projector or monitor via HDMI.
What’s in the box?
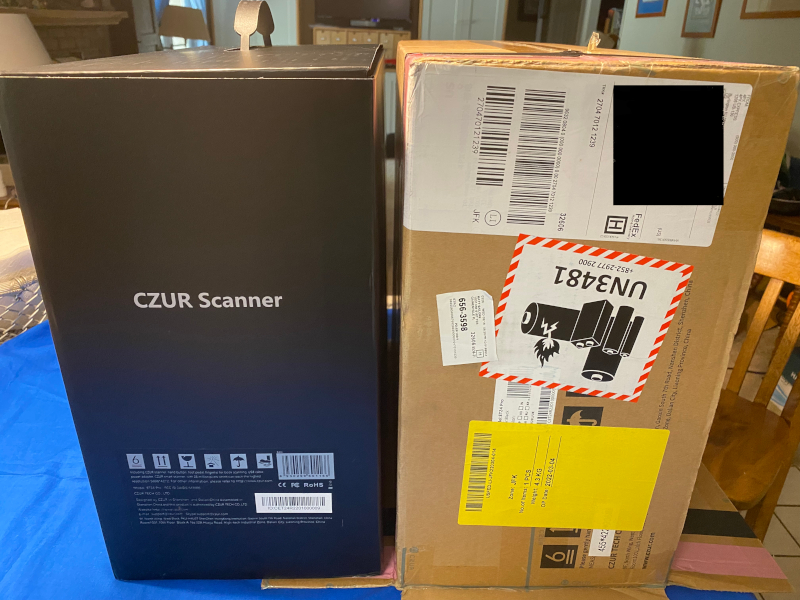
The ET24 Pro comes in a well designed box/case in a brown carton.
Inside the black equipment case, each piece sits in a fitted cutout in the foam lining. The main body is not wrapped, but most of the smaller parts are packaged in individual boxes marked with a purpose.
This caused some concern as I could hear a noticeable rattling as I picked up the carton from the front door where the courier left. It turns out that it’s just the foot-activated pedal (we’ll get there) parts bumping against each other.
Notice the large black “mouse pad” (actually the work surface on which the item to be scanned is placed) rolls up along one edge of the box.
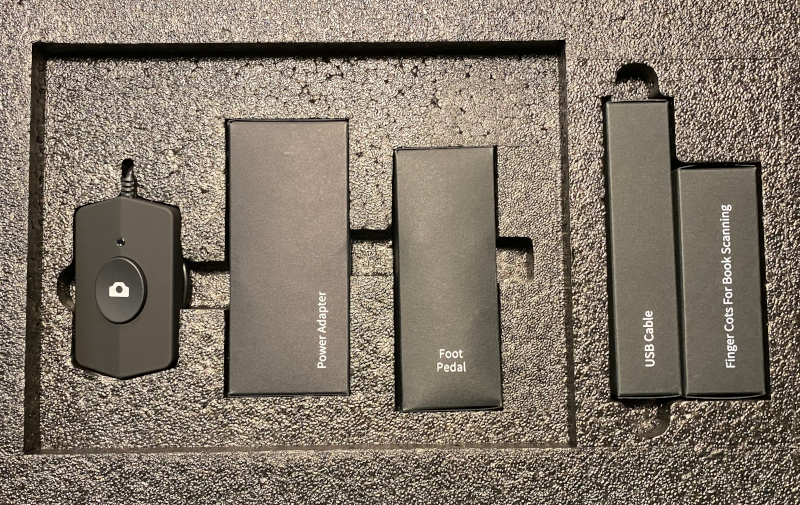
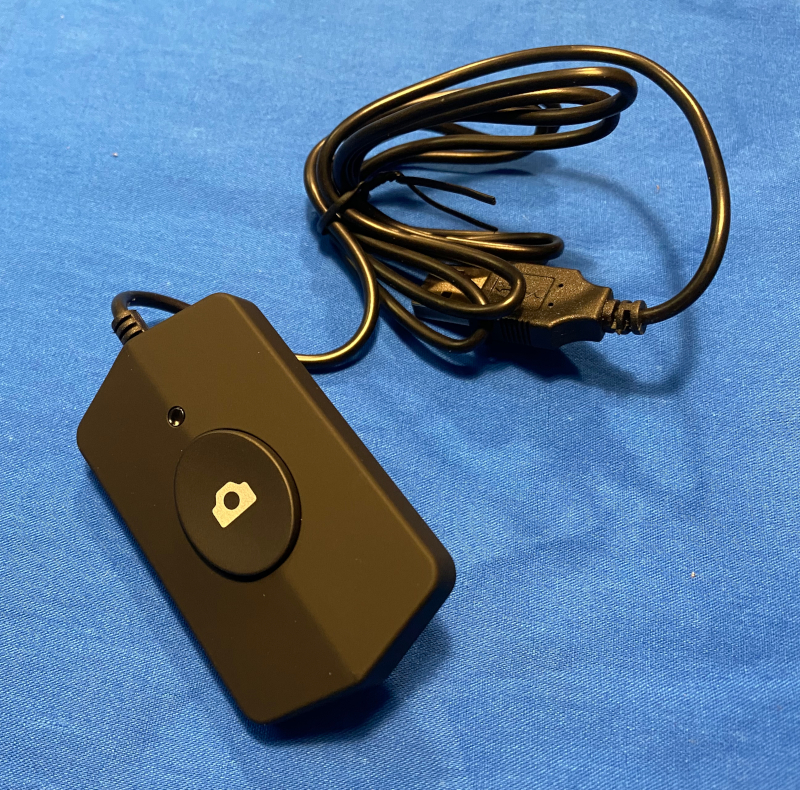
The button on the far left is the desktop remote trigger.
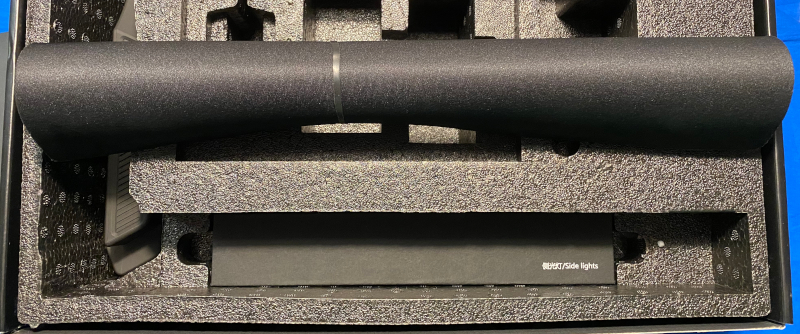
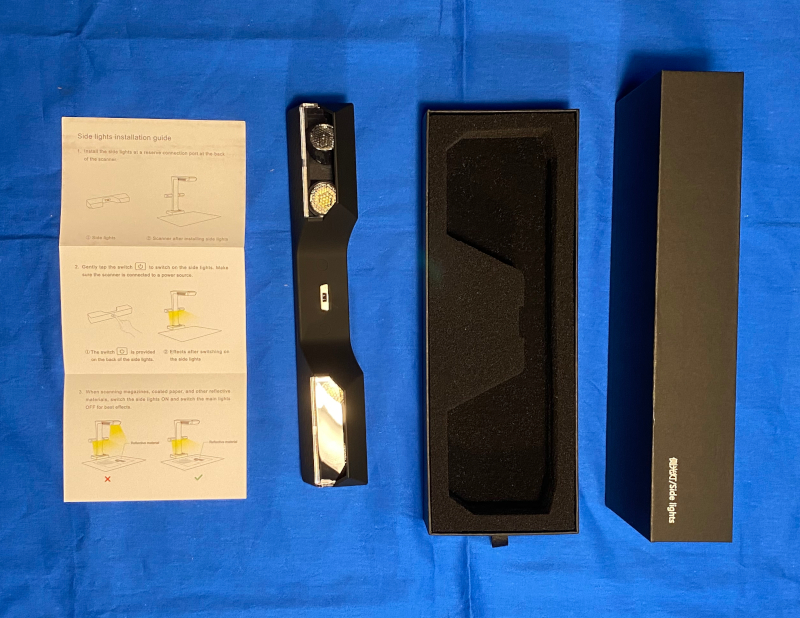
The side lights are tucked into boxes under the file pads.
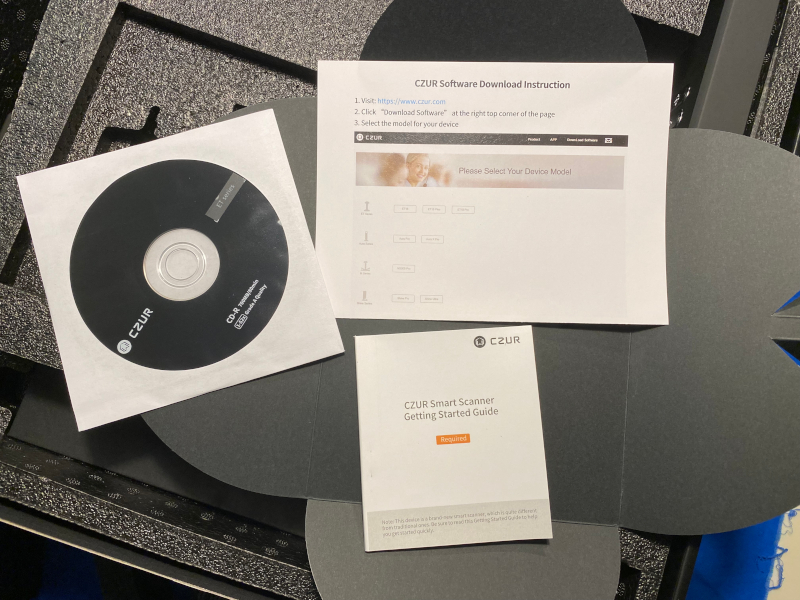
Quick Start Documentation and Software CD.
Once everything is open, you will find the following:
- scanner
- side light
- USB cable (USB-A to USB-B)
- Power Adapter
- hand button
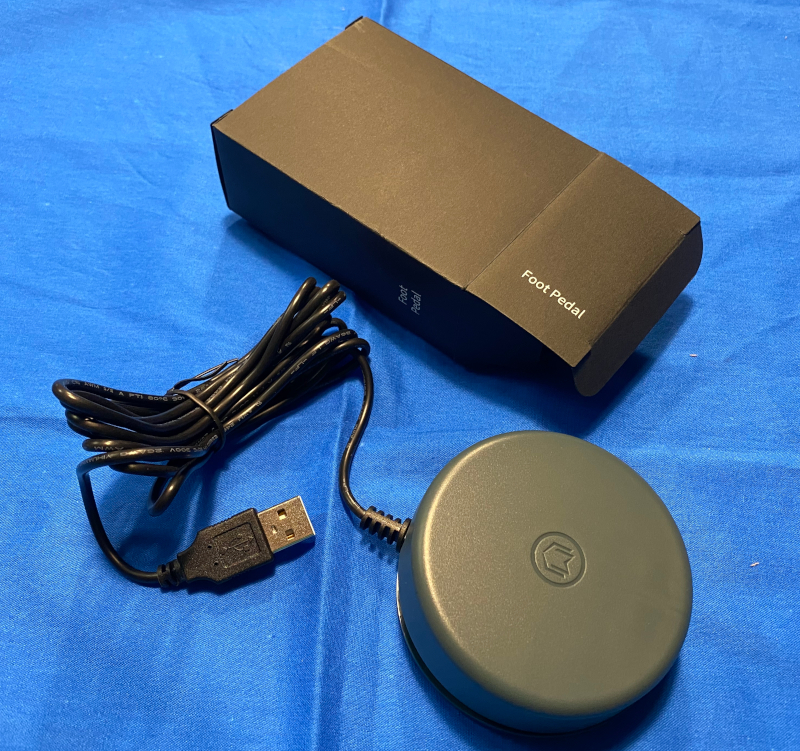
- foot pedal
- black document pad
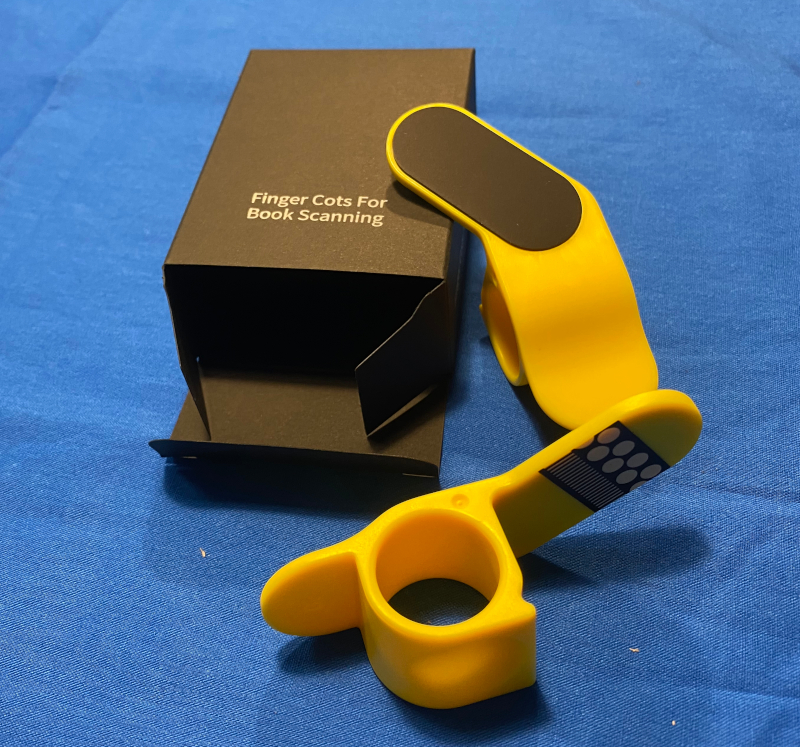
- special finger cots
- CD, user manual
- Warranty Card
- Quality Certification
Hardware Specifications
Brand: CZUR
Model: ET24 Pro Smart Scanner
Size: 375*220*390mm (L*W*H)
Weight: 1.5kg (net weight)
Colour: Black
Sensor: CMOS
Pixel: 24M
Resolution: 5696 x 4272
DPI: 360
Scanning format: flat single page≤A3; book≤A4
Scanning speed: flat single page≈1.5s/page;
Books≈1.5s/double page
Image formats: JPG, PDF, TIFF
Image Color: 24-bit
Static file output formats: JPG, PDF, Searchable PDF, Word, Excel, TIFF
PC-Visual Presenter: 3072*1728@12Fps;
PC-scan: 1536*1152@20Fps
Focus Mode: Fixed Focus
Scanning light source: natural light and LED light
Input: 100 to 240V, 50/60Hz
Output: 9V/1.5A
Languages: Supports more than 180 languages
System: XP, Win 7/ 8/10/11, 32/64 bit; macOS 10.11 and above
Design and Features
set up
hardware
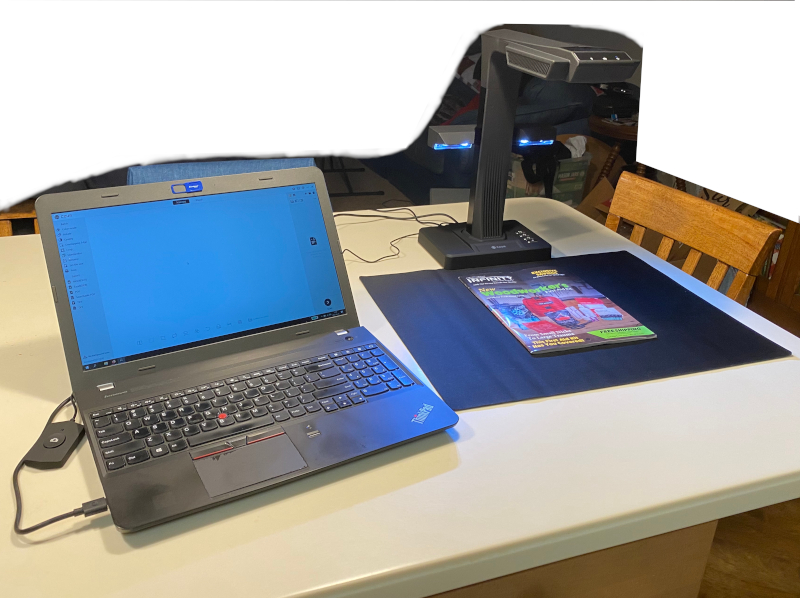
Setting up the ET24 Pro requires unpacking all the small boxes, removing the main unit from the box and unfolding the imaging pad.
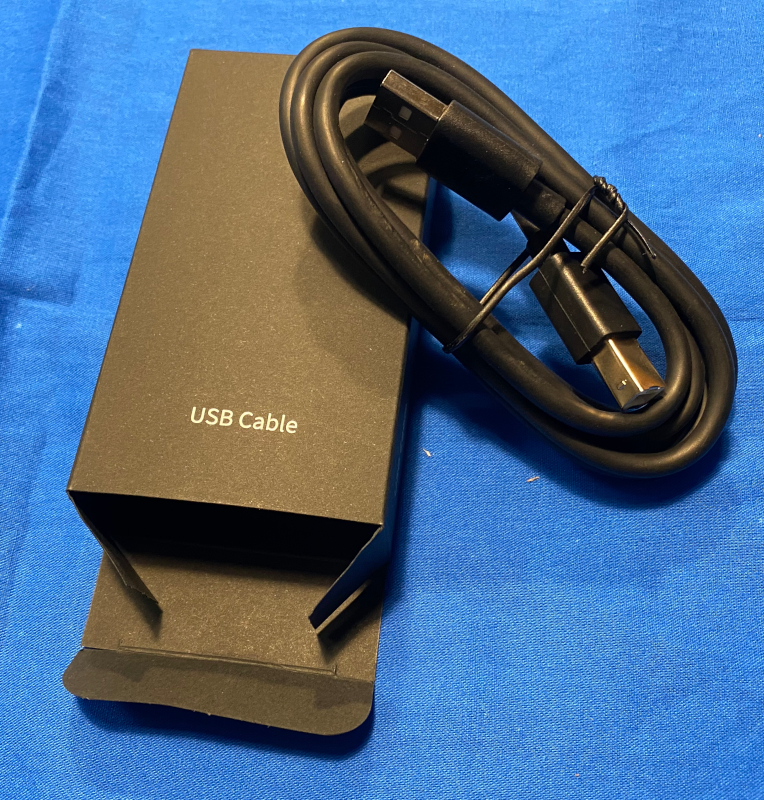
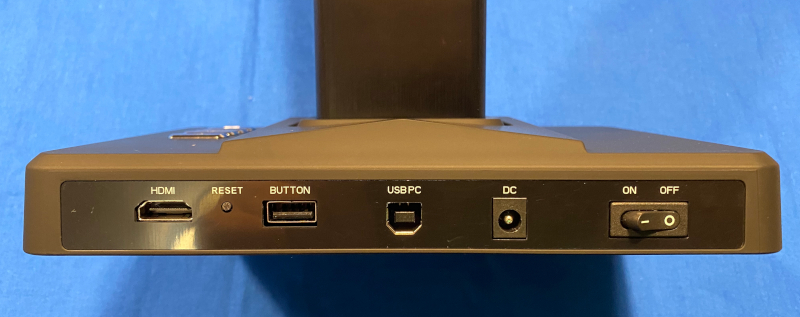
Interestingly, CZUR decided to use a USB-B port on the back of the device instead of a mini/micro-USB or even a USB-C port.
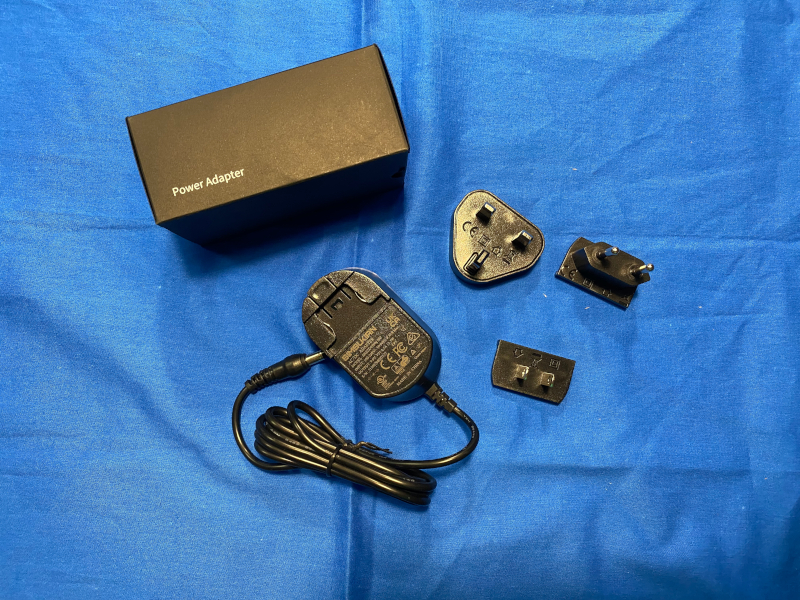
The power adapter comes with a variety of interchangeable pins.
Fingertips for opening books for scanning – requires the use of a foot pedal, not just a tabletop trigger.
Once everything is turned on, it has to be setup/assembled.
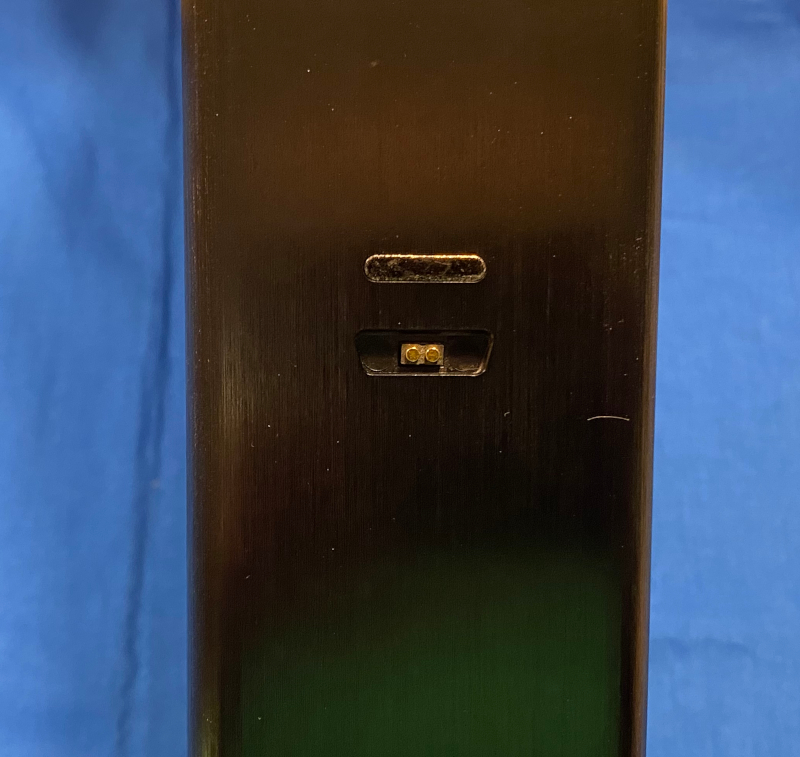
The side light attaches to the back of the main unit with a magnetic connection and a small niche, provides mechanical alignment keys and contains a power connector.
The USB cable, power adapter cable, and trigger device (foot pedal or desk button connected using USB-A) must be plugged into the back of the device.
Of course, the device must be turned on.
Finally, the scanner unit must be placed in the groove on the document pad.

Ready system manufacturer image.
software
After the hardware is assembled, the CZUR software must be installed on your computer. This was the first hurdle I encountered. All the Windows computers in our house refuse to read the CD-R in the box. They all report it as an empty disc. However, the internet and our contacts came to the rescue and I was able to download the correct drivers (same drivers as previous models) from the CZUR website.
After installing the software, I plugged the scanner into my laptop and launched the application. The scanner was recognized at the door.
Performance
hardware
On the base of the scanner itself there are buttons for turning the overhead light on and off (along with the head’s camera) and adjusting the brightness (the button icon was poorly chosen), as well as activating the camera.
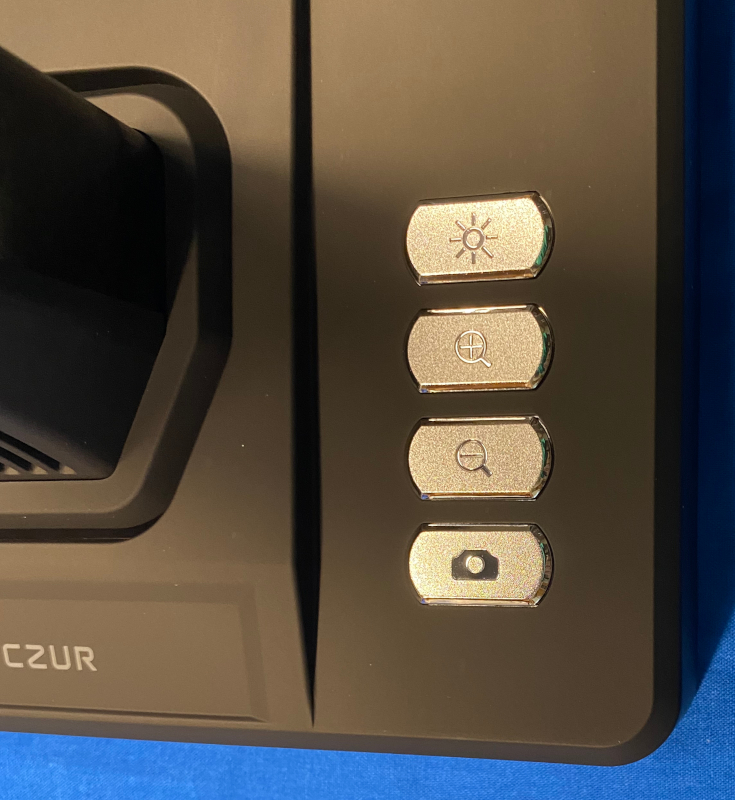
The business side of the scanner displays overhead lights, camera lenses, and diodes that generate witness lines for page flattening.
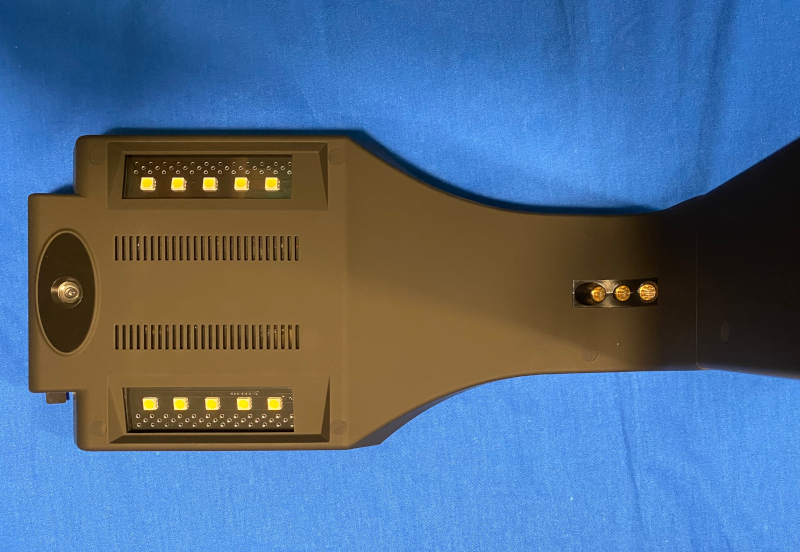
In addition to these controls, there is a button on the back of the side lights to turn these lights on and off.
The only real controls I need to use when using the scanner are the light on/off button and trigger button/foot pedal. I do use the video display on top of the scanner head for initial positioning of the item being scanned/displayed, but I do most of this with the image displayed on the computer screen/HDMI output device.
software
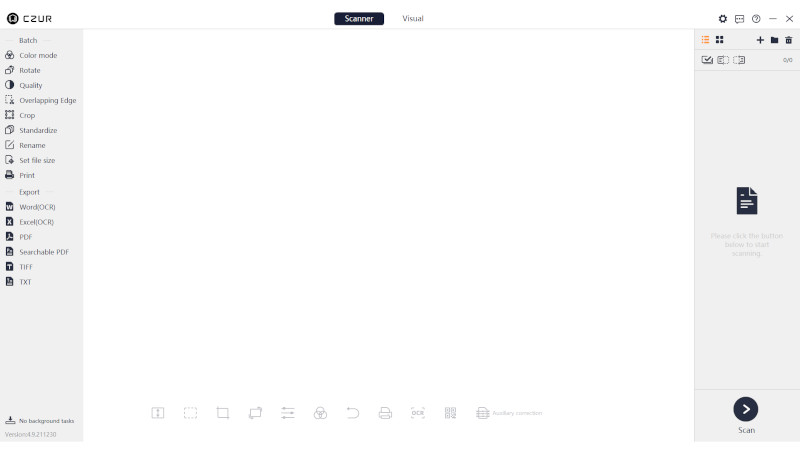
The software included with the ET24 Pro is a bit of a letdown after a well-executed hardware package. My first impression is negative as the software only runs in fullscreen mode, which might be fine if you’re running a lower than HD laptop resolution or even a 1920 x 1080 monitor, but very annoying when running the software in 2K or a 4K monitor. This is an unforgivable design flaw in the 2021/2022 software. Aside from this quirk, the overall UI/UX impression is that the design language of the software is stuck around Windows 95. The workflow is not very obvious.
I was able to trip me up by snapping some images before breaking it down and watching the instructional video. This eliminates many workflow issues and makes the rest of the testing process easier.
Once you work around the UI, the power of the underlying software engine comes into play. ET24 supports multiple image acquisition modes:
- Whole area (no processing)
- Manual selection
- Automatic selection with rotation correction
- front/rear mode
- Left/Right Page (create 1 large image or 2 separate images depending on settings)
Let’s see what each mode does.
no treatment
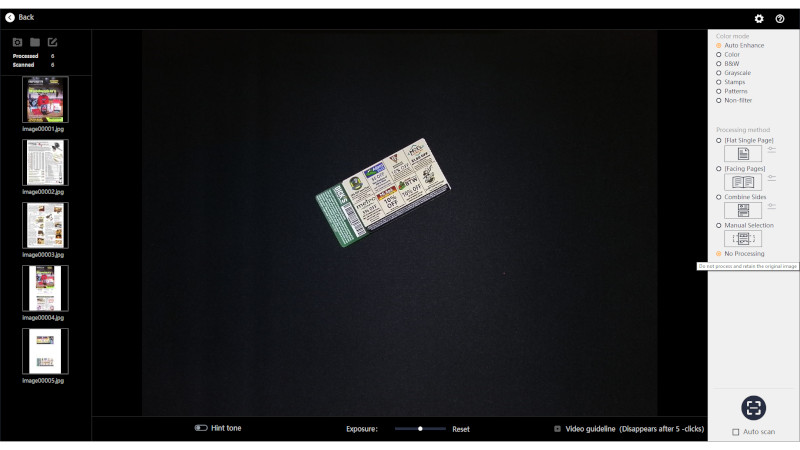
As you can see, both the project and the entire document pad are set to be captured.
Manual selection
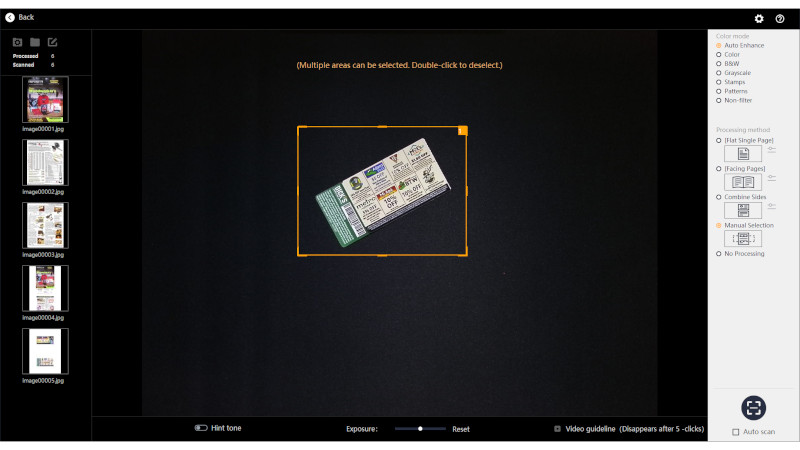
Here, I manually selected the rectangular area to capture. Again, nothing special here.
flat sheet
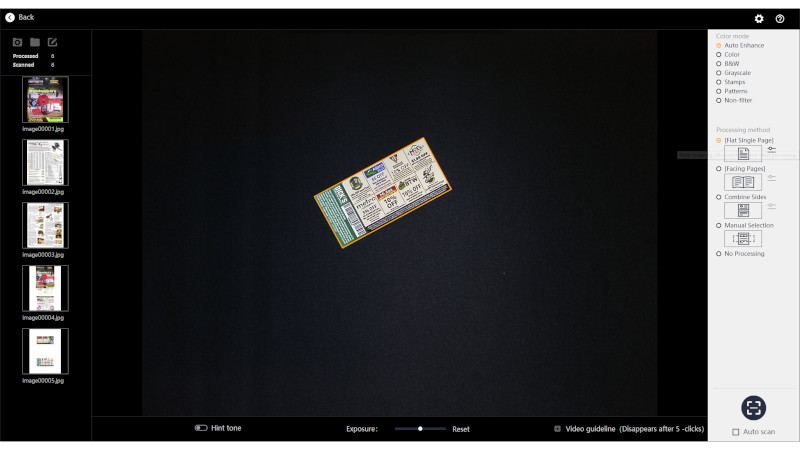
Here you can see that the rotated object has been isolated and will be scanned and the rotation corrected. Now things are starting to go a little better.
before and after
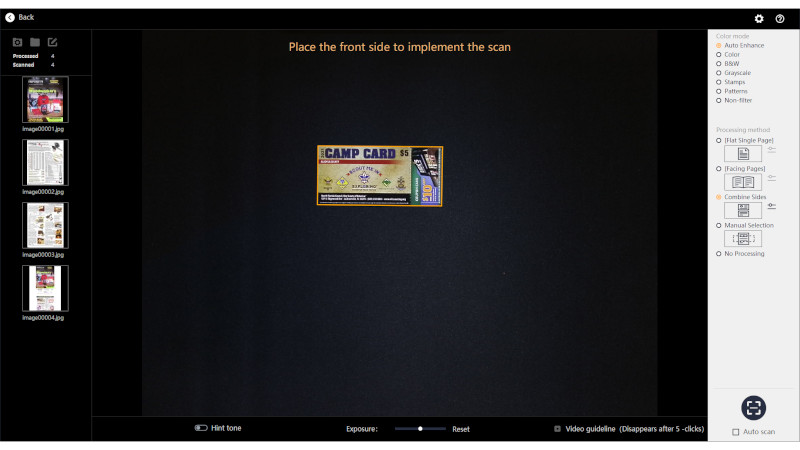
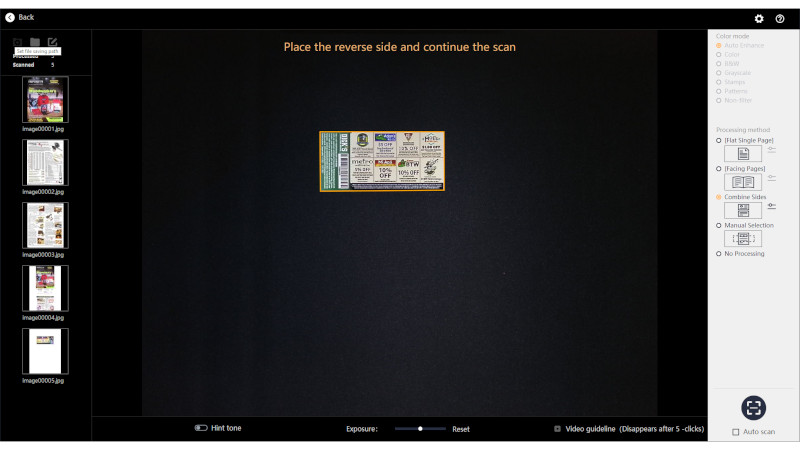
To capture the front and back images and combine them into the final image, the camera must be activated twice. On-screen prompts will guide you through the process. The software can handle this, as well as any standalone copier with similar capabilities.
facing pages
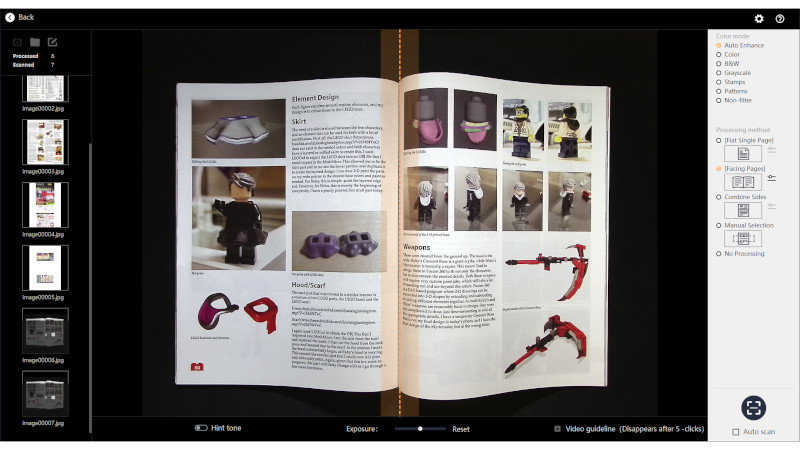
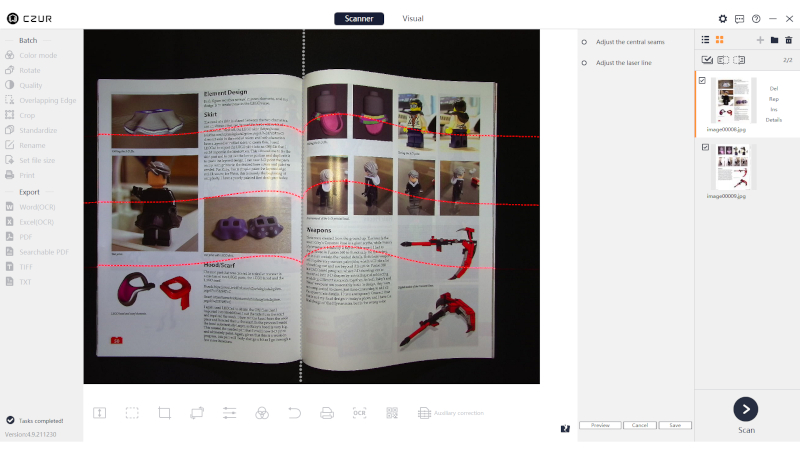
Now we’re looking at the real advantages of software engines. You have to manually align the center of the magazine/book using the onscreen guides. When you press the image capture button (foot pedal or desk button), the ET24 quickly illuminates the item being scanned with three bright red lines (laser?) to provide a software reference point for flattening the captured image.
If you want to tweak the process manually, the data captured by the software ends up looking like this. Now this is very smooth.
(This image is from a friend’s regular column in BrickJournal magazine, used without the express permission of the publisher)
If you are scanning an item that does not want to lie flat (such as a large book), you may need to use the included fingertip to hold down the edges of the page (be careful to align the edge of the page with the special pattern printed on the fingertip) and use the foot pedal to capture the image . The software will digitally erase the fingertips around the edges of the image. I didn’t take a picture of myself doing this action because I don’t have free hands and it looks awkward working on my counter.
The default is to capture separate left and right page images, which is what I’m going to cover.
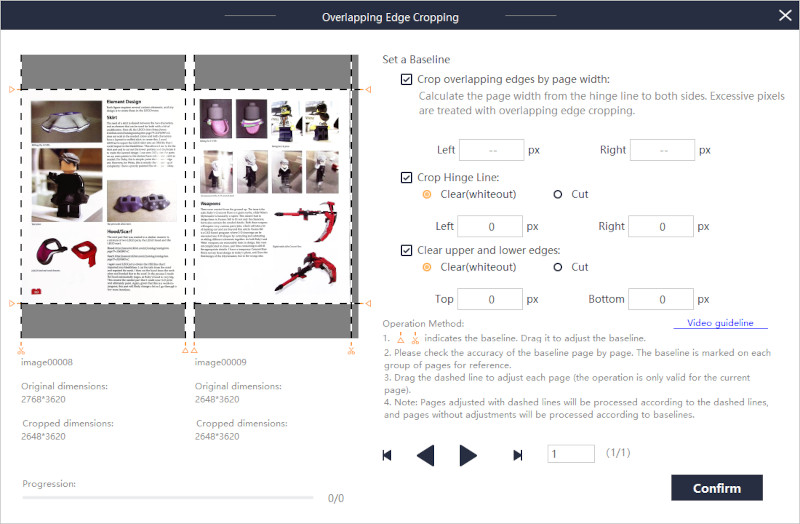
Captures can be edited after the fact by manually adjusting the crop to remove extra space between pages or page edges in large books.
This is a post capture function.
A final note on image capture. Dome lights create a lot of reflections/glare on glossy paper, so they should be turned off, and side lights only to minimize glare. This glare can be seen in the image above the page image on the right.
Create output file
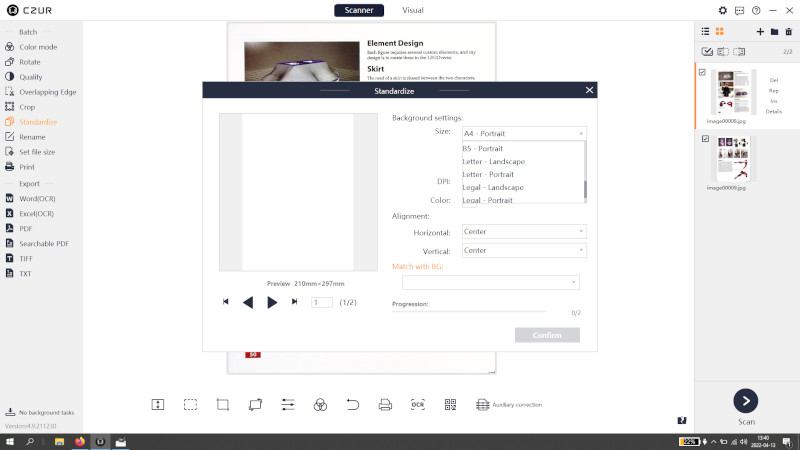
After capturing the image, you must go back to the main interface, where you select the image you want to adjust (see above), and then select the image you want to export as a single image/merge as a PDF. Another quirk of the software pops up here: you can normalize the output image size to use ISO or US paper size in the original file settings, but if you try to do this during save/export, only the ISO paper size is displayed.
Initial PDF settings.

Try normalizing output during save – no US paper sizes.
Once you’ve selected your image, you submit your file, and Bob is your uncle.
You’ll notice that in addition to creating PDFs containing only page images, the software also allows you to create searchable PDFs that combine page images with additional layers of text captured using the built-in OCR engine. Another neat feature. The Word and Excel export functions also use OCR to create files in these formats.
Some files I created using this software.
video projection
Using the ET24 Pro as a projection document camera is as simple as connecting the camera to your computer with a USB cable and then connecting the camera to a monitor with an HDMI cable (I use a spare monitor). I just had to select HDMI mode on the computer’s initial software screen and I was able to project it to the monitor. It’s not something I have much experience with, so I don’t have a good frame of reference for how the feature stacks up with a dedicated demo camera.
what do I like
- The software does a good job of correcting curved pages (like in books)
- Once you’ve watched a few tutorials, it’s easy to scan multiple pages and create a PDF file, although I’ve never been able to reach the scan speeds quoted in the product literature or demo videos (I blame the operator error)
- Ability to connect to a projector
what can be improved
- Software User Interface and User Experience
- more portable
- Repositionable side lights (as on traditional document/art photography equipment)
- Better printed documentation (I’m old school, I don’t want to watch YouTube videos to learn how to use software/hardware)
- Complete translation of all parts of the software interface into other languages
(Some parts are only in Chinese)
final thoughts
I like the CZUR ET24 Pro smart scanner system, but the software needs to be more user friendly for novice users. The features are all there, but the UX and UI are disappointing. If you need to image a large number of documents, the ET24 Pro is a good choice, but plan to spend some time watching the videos to understand the workflow required to create basic documents before moving on to the more complex features of the system.
On the Indiegogo page, there are many add-ons that might make the system better, but they weren’t available at the time of review.
Also check out our CZUR Lens Pro Document Scanner and also.
price: $399.oo (early bird price)
where to buy: independent
source: This product sample is provided by CZUR.

