

Eufy Security Floodlight Cam 2 Pro Review Rating
Summary
The Eufy Security Floodlight Cam 2 Pro is by far the best and most advanced floodlight camera I have used, but it is also the most expensive by quite a margin. Eufy Security continues to be my favourite wireless security camera company and this camera reinforces that belief.
Pros
- Auto tracking pan and tilt provides superior coverage than any other camera on the market
- 3000-lumen directional panels provide excellent illumination and good quality colour night footage
- 2k video quality
Cons
- Premium price
- WiFi connectivity is not as good as the home base style cameras
The Netatmo Presence was the first smart floodlight camera to enter the market, and this was followed up by the Ringfloodlight and EZVIZ LC1. For a time, there were many other options on the market, which I felt was a missed opportunity as I find floodlight cameras one of the best home surveillance products out there.
Since then, the market has expanded considerably. Spotlight cameras that can enable colour night vision have started to become the norm, and most of the big brands now have a smart floodlight camera.
The eufy Security Floodlight Cam 2 Pro is one of the latest security products from Eufy and the third floodlight they have on sale.
As far as I am aware, it is the most advanced solution on the market and has a price to match.
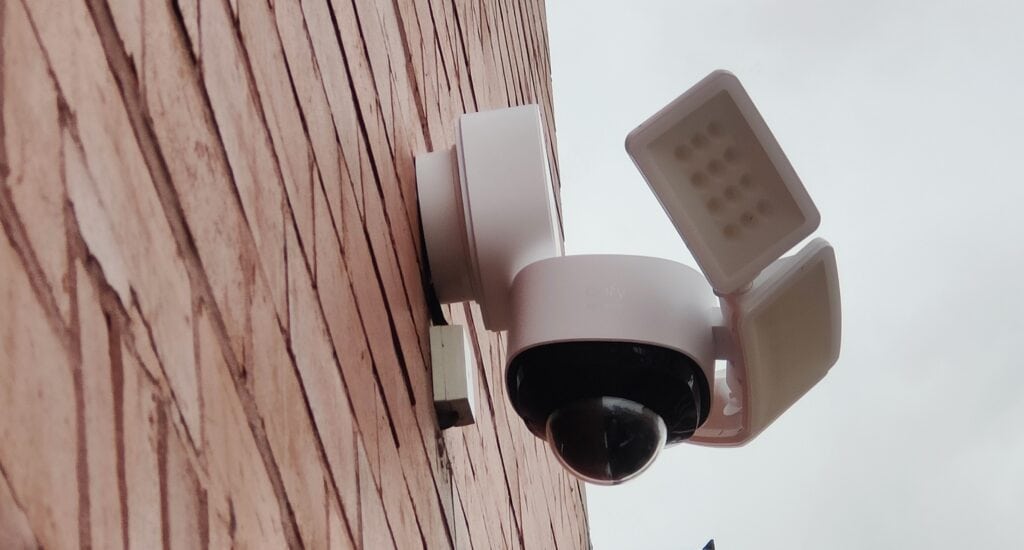
The main selling point here is the camera has pan and tilt functionality, allowing it to rotate 360-degrees horizontally plus 130-degrees vertically.
It will then use AI person detection to track people as they move around automatically.
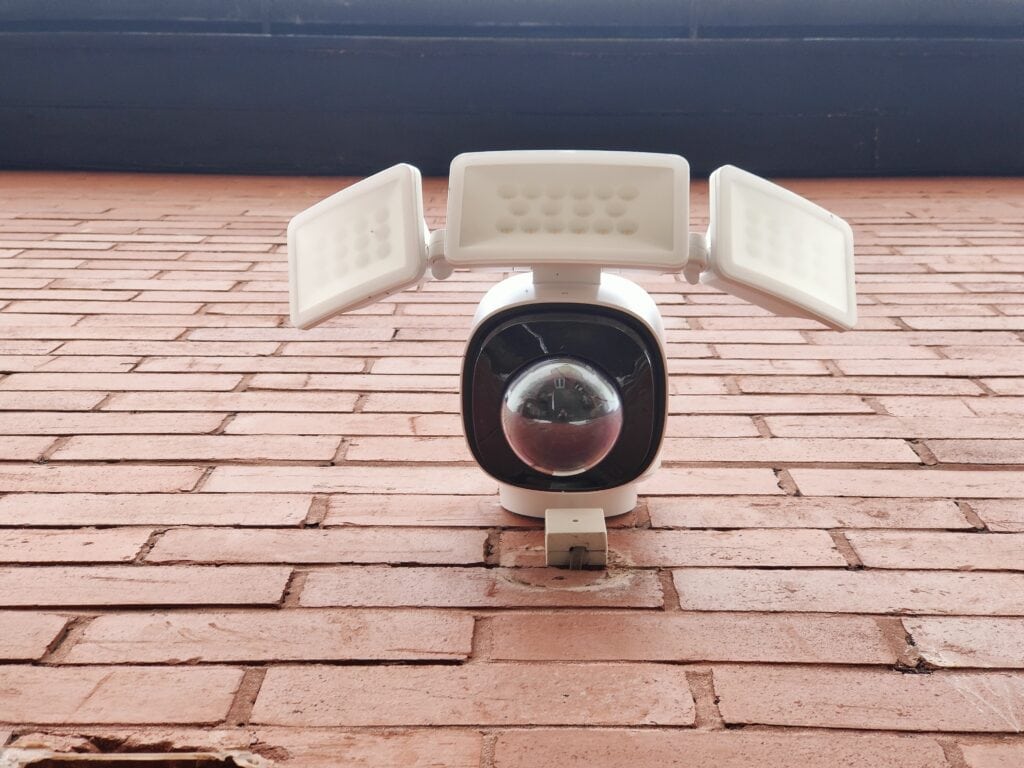
The floodlight has three adjustable panels (compared to the standard 2x lamps), and it can provide 3000 lumens of light, which matches up with the Arlo Pro 3.
As always with Eufy security, the are no ongoing costs. The camera will record to its inbuilt storage, though you can optionally subscribe to a cloud plan.
With a price tag around £100 more than most competing solutions, are all these fancy features worth it?
Specification
- Field of View: 360° horizontal, 130° vertical
- Video: 2K, HD, live view, colour night vision
- Smart AI Support: Human detection. AI lock and track subject
- Motion Detection: 270°, 40-foot customizable motion detection zones
- Pan and Tilt:
- Motion tracking and automated cruise
- Preset views with activity zones
- Smart illumination: Activated by schedule, sunrise/sunset, time, and motion detection
- Lighting Brightness: 3 tunable light panels at up to 3000 Lumens
- Lighting Color Temperature: Adjustable from cool to warm, 3000° Kelvin to 5700° Kelvin
- Siren: Remote-activated 100dB siren
- Audio: Two-way talk
- Camera Lens: 130° field-of-view
- Video Storage: Motion-activated event recording, on-device 8GB local storage (lasts 30+ days)
- (Recording duration estimation model: 45 times one day, 30s recording per trigger)
- Power: Hardwired 110-240V
- Connectivity: 802.11 b/g/n Wi-Fi connection @2.4GHz
- Mounting: Wall mount and ceiling mount support with included junction box
- Dimensions (Length*Width*Height):
- Wall mount: 17.7 (light extension) * 10.5 * 8.3 in / 45 * 26.5 * 21 cm
Ceiling mount: 17.7 (light extension) * 7.5 * 7.3 in / 45 * 19 * 18.5 cm - Weight: 4.9lbs (2.2kg)
- -4°F – 122°F (-20°C – 50°C)
- Weather resistant
Note: The cradle head explosion-proof cover resists snowy weather. At -20° the cradle head will not freeze and will rotate freely.
Set-Up
One thing I liked about the set-up process was the ability to power up the camera via microUSB and then preset it up before you mount it. It would be quite frustrating to mount the camera and try and set it up only to find something doesn’t work. The less time up my ladder, the better.
The set-up procedure is standard, power up the device, scan the QR code, pass your 2.4Ghz Wi-Fi details.
Mounting
The written instructions were a little confusing at first, however Eufy has a video guide which makes things much more understandable. There is nothing technically difficult about mounting this, if you are replacing an existing outdoor camera, this should be quite easy. If you don’t have outdoor wiring, you will probably want to get someone to do it. I did it by myself, and I am absolutely useless at DIY. Just remember to switch the power off at the main electrical panel.
I was replacing the Ezviz Floodlight, which has served me well, but I want to simplify my home security as much as possible with fewer apps.
Luckily the back bracket of the Ezviz had screw holes where the Eufy bracket/junction box is, and the overall installation was quite simple.
The camera is physically quite heavy, or it is when you are up a ladder. There is an included hook and loop, which you can use to hang the camera. I found this a bit fiddly, but I managed to mount it without dropping and smashing the camera.
There does seem to be a few design quirks, though.
It seems a bit weird that the camera doesn’t sit flush on the wall, it protrudes out sat on the junction box. I would have thought having the back part of the camera hollow with the junction box slotting into it would have made more sense.
The camera is designed to be mounted exactly where the power cable comes through the wall. In my case, I didn’t want to drill new holes, so the junction box sits on top of the wire, squashing it. Normally (on POE dome cameras, at least), you’d have a little recess for the cable to fit through.
Settings
There are quite a lot of settings to customise, this includes:
- Motion Detection
- Extensive options including human-only/all, zones, detection range and sensitivity
- Monitoring Settings
- Setting for the pan/tilt auto tracking including on/off, sensitivity, preset positions, auto cruise, and out of view detection
- Light Sittings
- Enable/disable floodlight
- Ambient Light – stays on all night with a controllable brightness and temperature setting
- Motion activate light with trigger speeds, timer for the light, brightness and colour temperature.
- App control settings (when you hit the bulb button) for brightness and colour temperature.
- It is also possible to switch on/off the light using Alexa/Google
- Recording Settings
- Options to end if the motion stops and increase the clip length up to 120 seconds
- Video Quality Settings
- Settings for streaming quality and recording quality
- Night vision image adjustment will switch off the IR lights next to a wall (if wall mounted)
- Colour Night Vision – enables flood light when video is being recorded at night (though it will probably already do this if you have the flood light settings enabled)
- Audio Settings
- Set speaker on/off and volume
- Notification Settings
- You can have basic person detection notifications or text notification + thumbnail. You can also make the notifications silent/different noises
- Storage
- This provides current local storage usage and the ability to clear it
- You can also set up cloud storage
- There is also the possibility to enable RTSP, which will allow you to record motion events to a NVR/NAS such as Synology or Blue Iris.
- Calibration
- This is on by default and will allow the camera to calibrate the default position automatically
Wi-Fi Connectivity
Unlike many of the other Eufy cams, such as the EufyCam 2c, this does not connect to a home base, but instead directly to your WiFI, which is standard for most floodlight cameras.
At this price, it is a little disappointing that there is no 5Ghz Wi-FI. I assume the logic for this is that 2.4Ghz has a longer range, but 5Ghz has higher bandwidth and is a less crowded frequency. I think many homes could provide a good enough signal for this.
When I first started using the camera, I found that Wi-Fi connectivity seemed a bit poor. However, this has now improved. I have an access point in my garage/gym and one in my kitchen, which is the same wall the camera is mounted on. So I shouldn’t suffer from poor Wi-Fi at all, I suspect the camera may have struggled connecting to the correct access point initially. It would be good if there was an option for this to connect to a home base instead. I find this provides a more responsive connection.
Performance
Storage
With the camera being hardwired into the mains, I don’t have to worry about the battery life. I have therefore set the video length to be 120s. I even disabled the option to stop recording after motion stops. I don’t really need weeks worth of footage, and my back garden generally(and hopefully) only has my partner or me triggering videos. A 2-minute daytime video is 40MB in size, so I should get plenty of days worth of recording.
It is also possible to record to cloud, it is $3 per month for a single device or $10 for up to 10 devices with 30-days worth of activity.
You can also enable the RTSP stream and record to a NAS or NVR. I haven’t done it with this camera as my Blue Iris server and Synology NAS are not currently in use, but I have covered it when I reviewed the EufyCam 2C.
Read more here: Setting up RTSP on the Anker Eufycam to record to a NAS Surveillance Station or BlueIris NVR
Motion Detection & Pan Tilt Auto Tracking
The camera can detect all motion or humans, and as usual with Eufy the accuracy of the human detection is good. You can tweak the detection range and sensitivity
Within the settings, you can enable pan/tilt auto-tracking, and the camera will track any human it detects. It has off camera detection, so if you are out of the field of view, it can still detect something.
Under the auto-tracking settings, you can tweak the tracking sensitive settings, by default, this is at level 2. I dialled this up to level 3 wanting the most accurate tracking possible, but this produced quite janky tracking. Dialling it down to 1 produced the best results.
In theory, this can give you a 360-degree field of view, but if you are like me, mounted on a wall you are only ever going to get 180-degrees. While this is obvious, it is worth noting because many other cameras offer 140+ degrees but at a much lower price point.

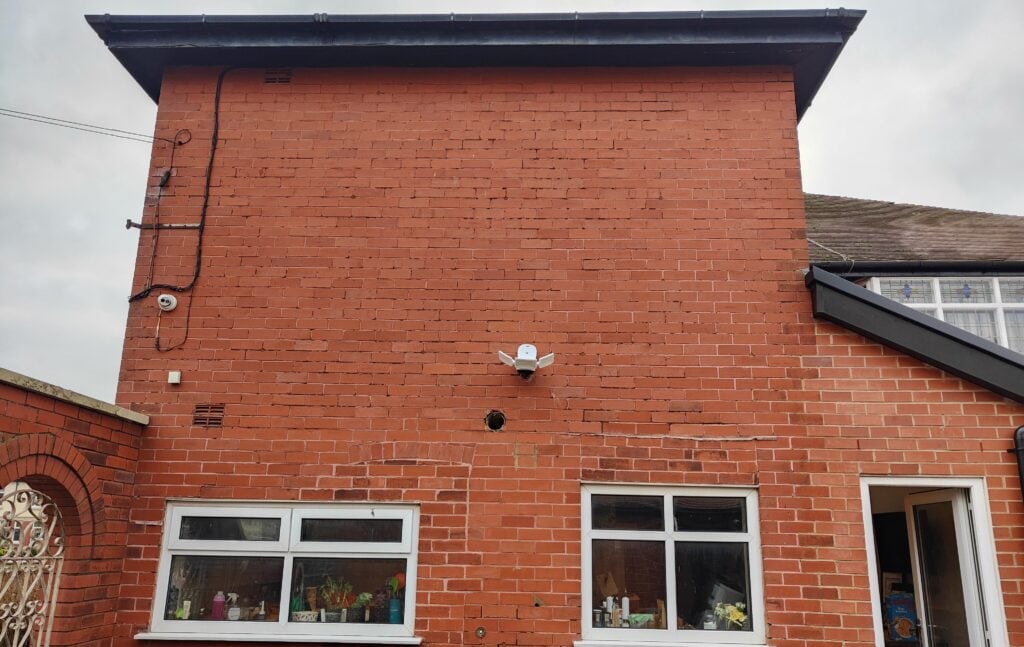
However, I do feel the pan and tilt tracking provides better overall surveillance, with the subject staying in the centre of the shot, you can easily see what they are doing and capture identifying information if they are an unwanted visitor. In particular, the tilt mechanism also allows the camera to be pointed quite far downwards or upwards. In my back garden, there are pretty much no blind spots using this one camera.
Mounting this on the corner of your property would significantly expand the total viewable area far beyond what none pan/tilt cameras can achieve.
Daytime video is excellent, a significant upgrade from the 1080P Ezviz it replaces or the Netatmo I have near my front door. I’d say it is also better than the EufyCam 2C and 2, which I also have, both of those are also 1080P.
In the above video, I have auto-tracking sensitivity at either level 2 or 3, which I think produces slightly janky movements.
The spotlight and, therefore, colour night vision is superb. I have the brightness set to 50% with the colour temperature in the centre, and it easily illuminates my entire back garden.
Street lights provide good illumination on the front of my house, and it means the back garden isn’t in total darkness, so some people may appreciate the higher brightness settings. I certainly don’t need them.
The spotlight is almost always fast to activate and accurate. My old Ezviz would occasionally fail to recognise things immediately, whereas I haven’t experienced this once with the Eufy. There are a few occasions where there has been a brief lag with the spotlight activating, and oddly this seems to be when I am directly facing the camera (coming out of my garage).
With the spotlight off, the video is in black and white. The quality of this is, again, significantly better than most other none POE cameras I have used. However, it is unlikely you will ever really need to record or view footage in B&W.

Price and Alternative Options
The eufy Security Floodlight Cam 2 Pro is priced at £279, and it has been as low as £208 on Amazon.
It is, therefore, the most expensive floodlight camera by far. However, the pan and tilt functionality need to be factored in. Nothing else offers anything like this.
Eufy has multiple other options, including:
- eufy Security Floodlight Camera 1080p for £159.99 RRP, which has been as low as £90
- eufy Security Floodlight Camera 2K which has an RRP of £179.99 but is currently a bargain price of £99.99
Ring Floodlight Cam Wired Plus is £179.99 RRP, but you also have monthly fees.
The EZVIZ LC1 Outdoor Floodlight Camera I just replaced is £179.99 normally but currently £99
The Arlo Pro 3 Outdoor Floodlight Camera is £259.99 RRP but hasn’t been that price since March, and is currently £149.99.
The Netatmo Smart Outdoor Security camera with siren is £319.99 RRP and currently £248. It is an excellent camera and certainly the most aesthetic, but I think it struggles to compete with the others at this price.
Overall
I have only reviewed three floodlight cameras, including this, as they are a pain to install for testing. However, this is by far the best of the three I have used. The Ezviz and Netatmo are excellent in their own right, but this is just better.
It also costs a lot more than most of the other cameras on the market. In particular, it is hard to ignore the 2k eufy Floodlight Cam E, which is just £100 currently. The field of view is only 130 degrees, and the lights are not quite as bright, but it is less than half the price.
However, with the premium pan and tilt feature, superb 2K recording, and very bright floodlights I feel like this justifies the price. I also suspect it will drop in price further once it has been on the market a bit longer.
Last update on 2021-12-17 / Affiliate links / Images from Amazon Product Advertising API

