

Review – When the lockdown started, I was already working remotely from home, but it wasn’t until everyone else was working from home that the video conference really started running at high speed. Since you all experienced the same challenge, I don’t need to describe what it was like. However, I pointed out that I would do my best to improve the experience on my desk. The visual aspect was the first to jump to my mind, but my appearance was just as important, or even more important. I switched between built-in, webcam, earbuds, headphones, and several different external microphones, each with its own advantages and disadvantages. Recently I was able to use the new Mackie Element series carbon microphones. This is part of their element series, and it’s worth seeing.
what is it?
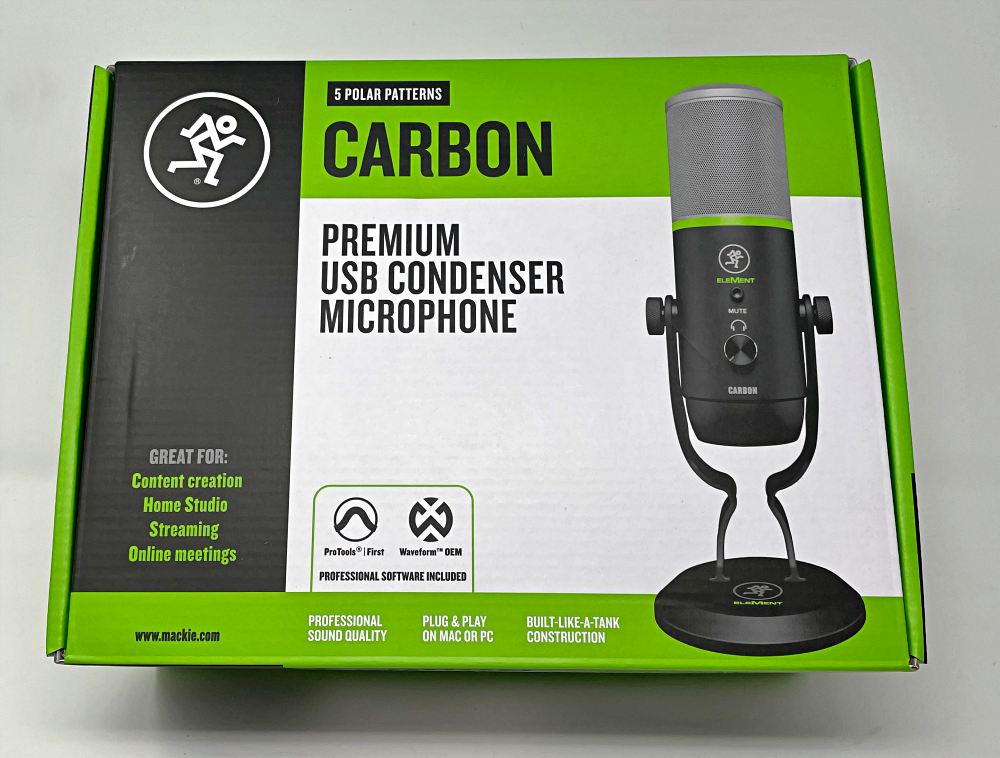
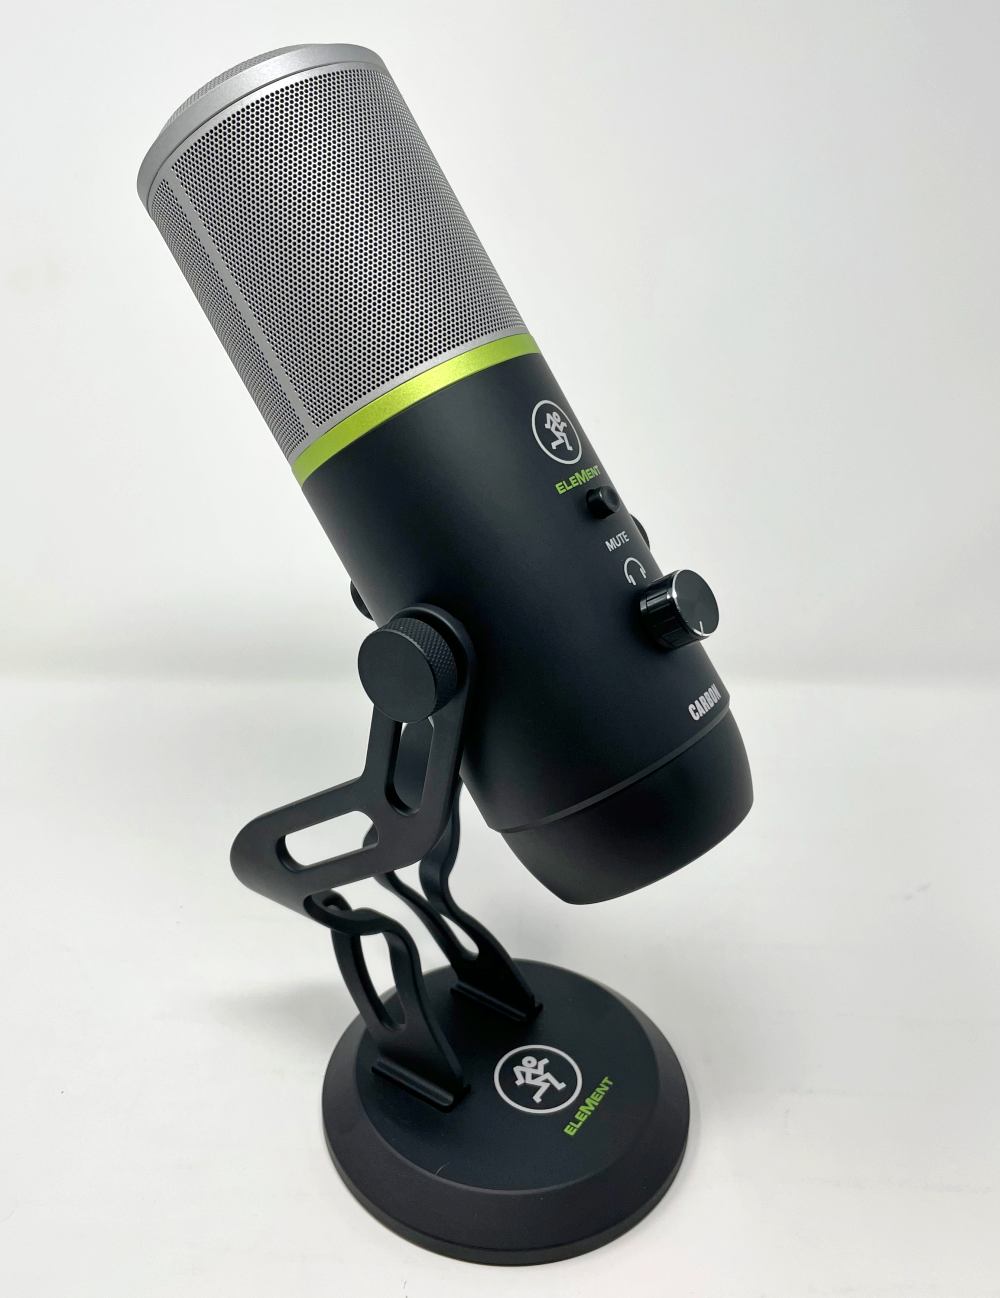
The Mackie Element series carbon fiber microphone is a desktop USB microphone that can significantly improve live and recording capabilities through the microphone in a laptop or webcam. As part of the Element series, Carbon’s goal is content creation, live streaming and mobile recording, enabling it to handle daily Zoom calls.
What’s in the box?
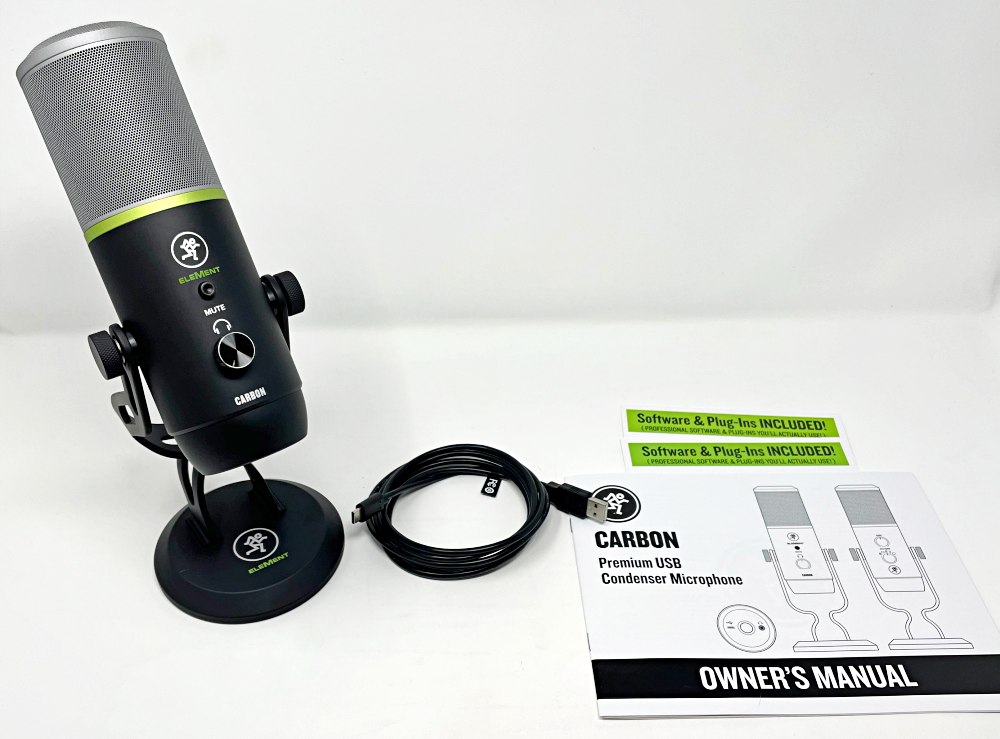
- Mackie Element series carbon fiber microphone
- Desktop stand (pre-installed)
- Small thread mounting adapter (not shown)
- USB-A to USB-C cable
- User manual
Provided separately:
Hardware specifications
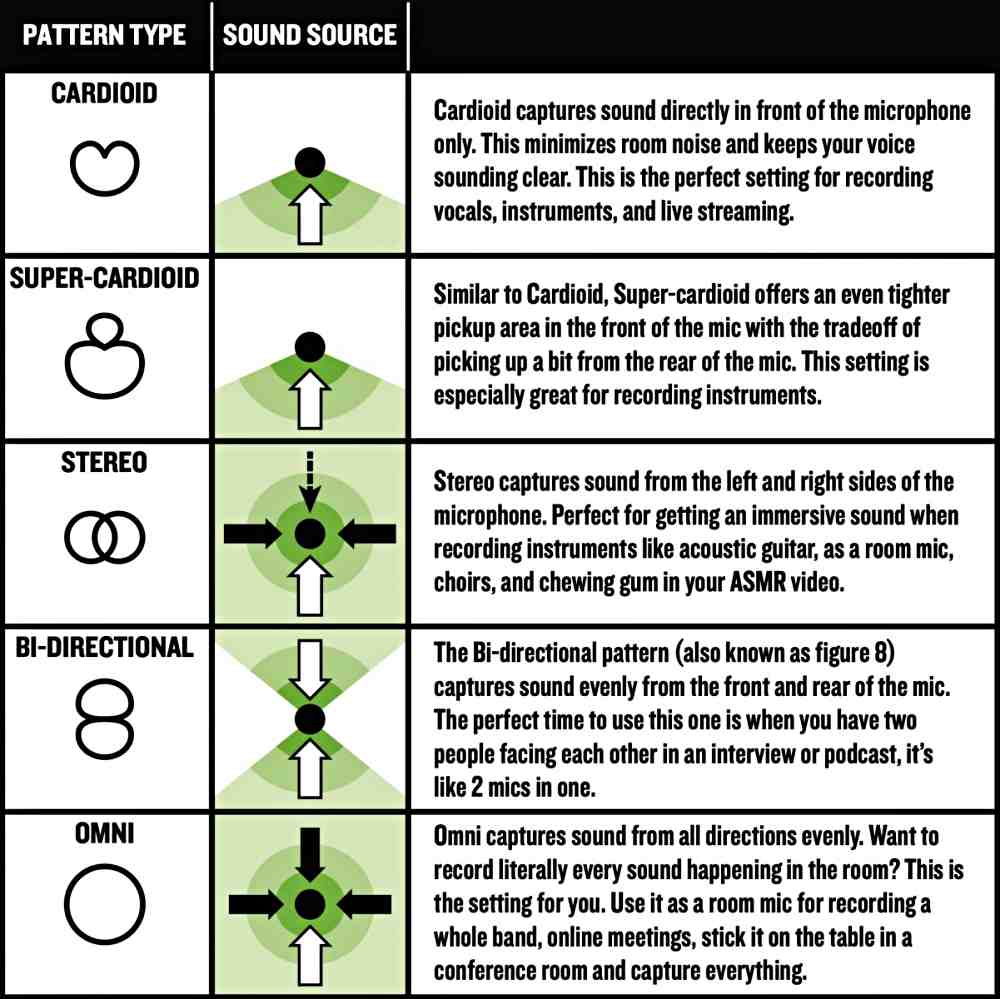
5 Polarity mode: Stereo, cardioid, bidirectional (Figure 8), super cardioid, omnidirectional
Sampling Rate: 16 bit, 48kHz
Connectivity:USB-C t0 USB-A cable, no driver required
Vocal: Onboard headphone port with volume control
Onboard control: Polarity mode dial, gain, mute switch (microphone), headphone volume
put up: Robust all-aluminum structure
Prosperity support: Standard thread installation
Desktop stand:Heavy base, adjustable angle
Design and features
The Mackie Element series carbon fiber microphone is part of its element series, a serious desktop microphone.
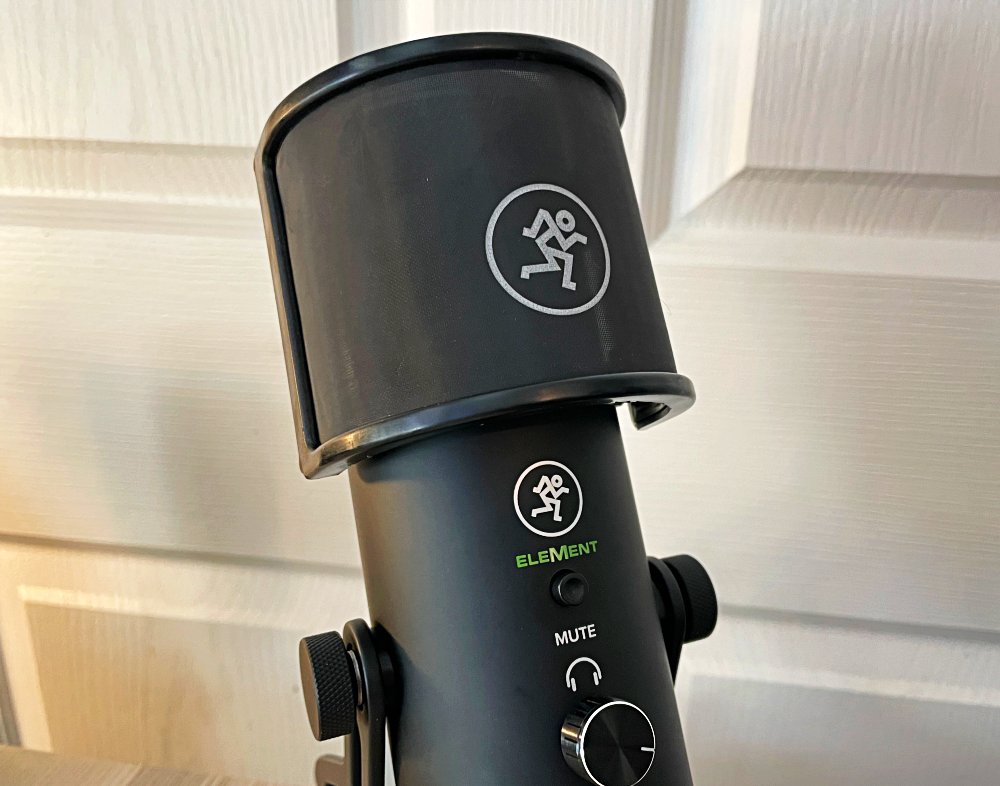
The mute button allows you to control it instantly when you need it, and the volume knob adjusts the level of the onboard headphone port.
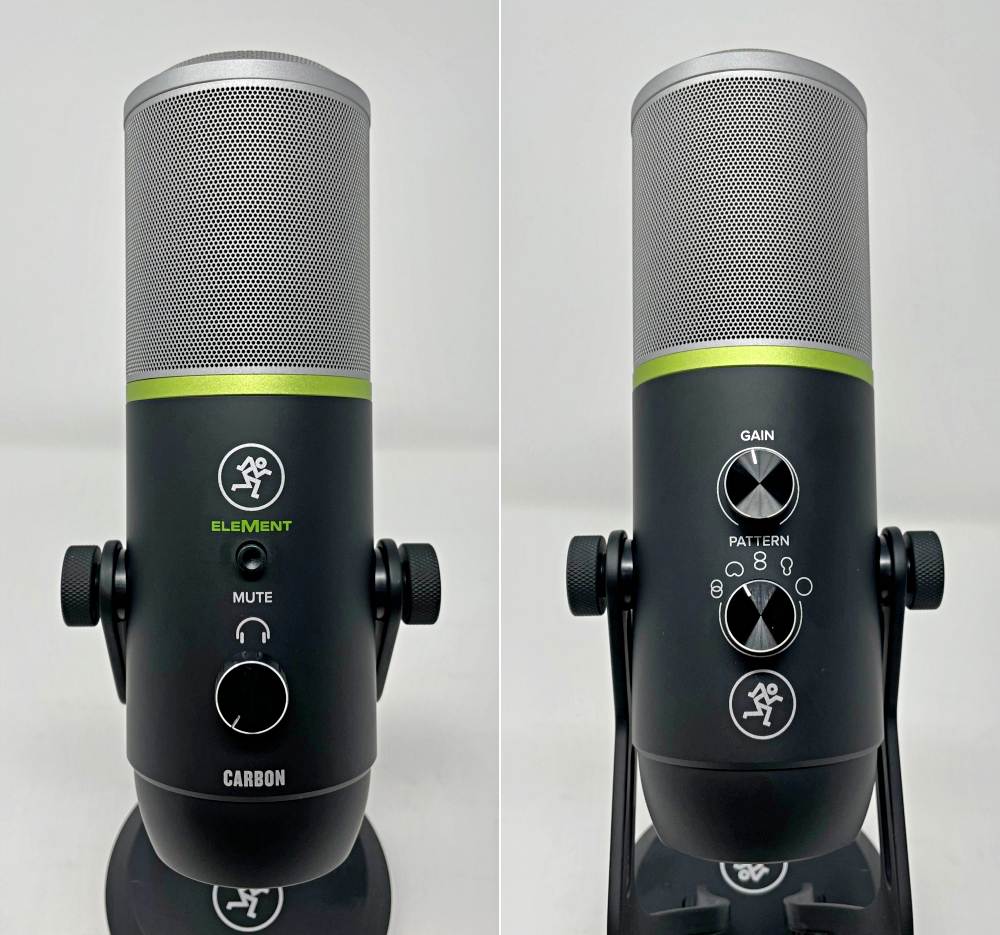
The mode selector provides five different directivity modes, so you can easily switch to the mode that best suits your needs, and the gain control allows you to easily set the correct input level.
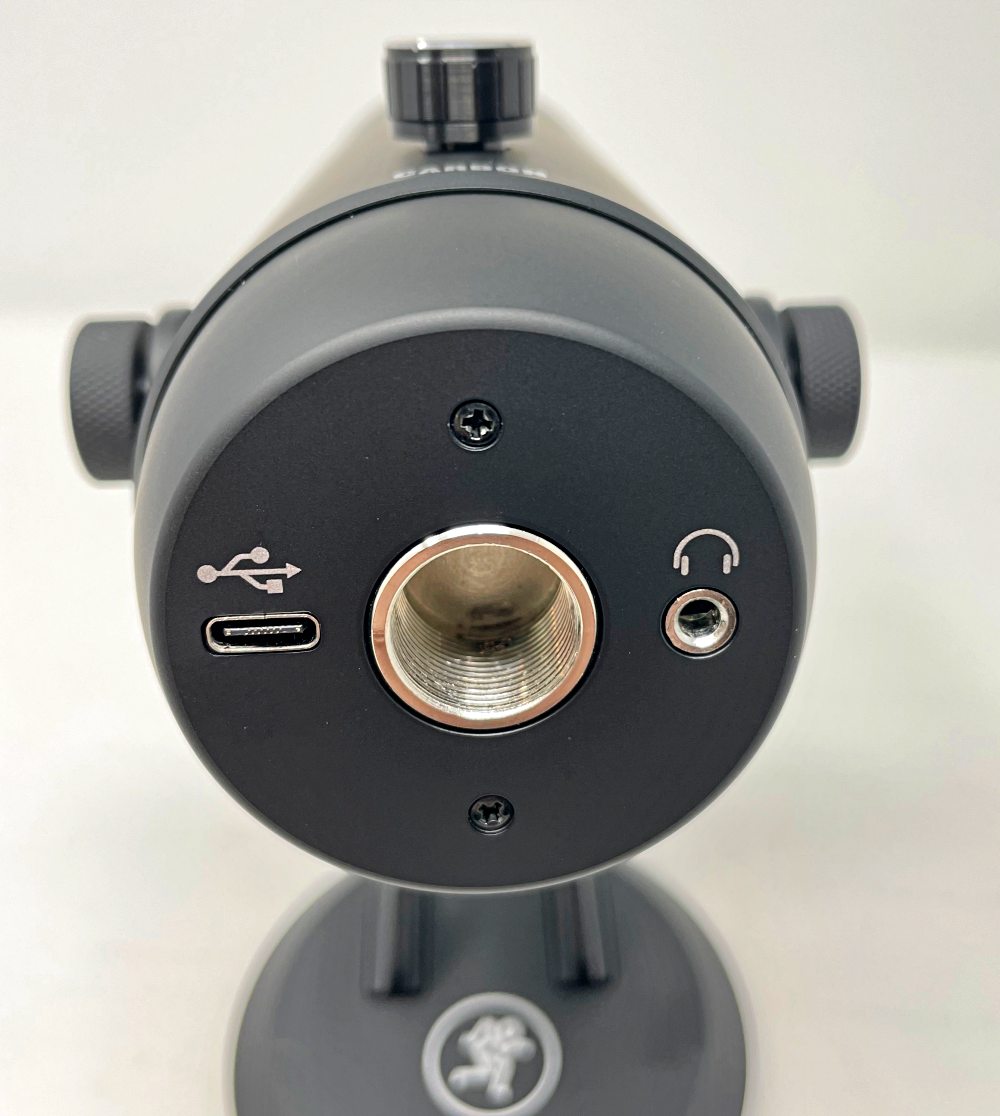
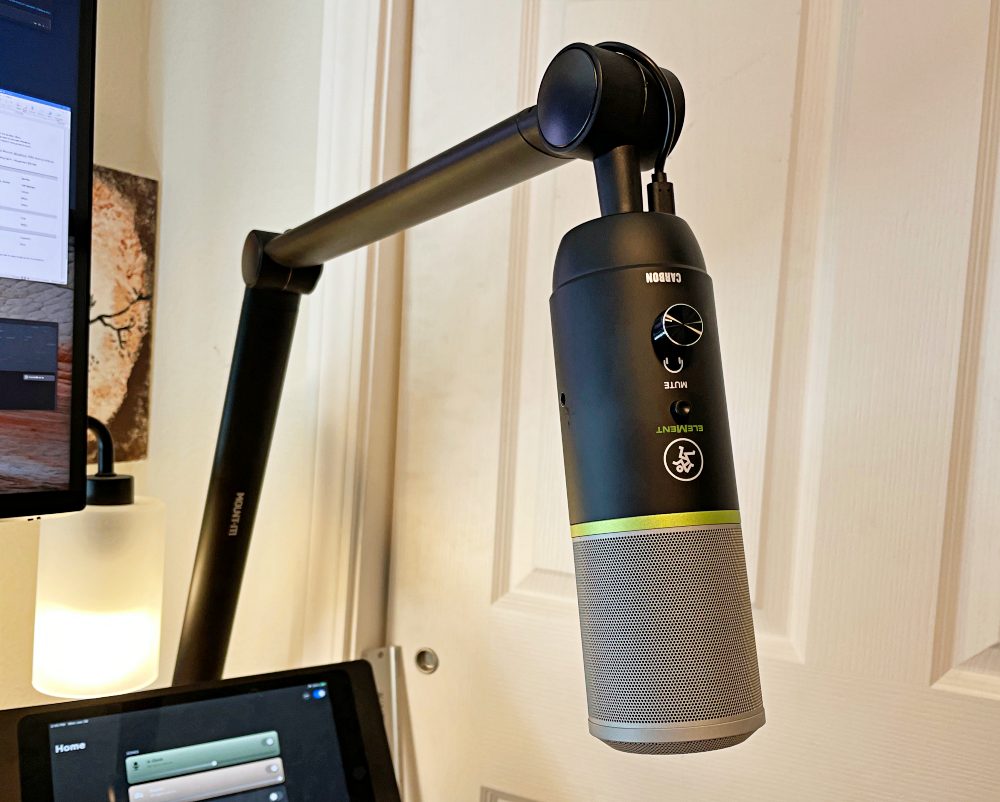
The bottom of the Mackie Element series carbon fiber microphone has a USB-C port for connecting to a computer, a headphone port, and standard threads (if you want to install it on a floor stand or desktop boom, there is also an adapter (not shown).
The weighted base with traction pad provides a solid foundation for it, no matter the angle, it will not shake, which can be easily adjusted by the knurled knobs on both sides.
Set up
Apart from opening the box, you only need to connect it to the computer. Connect the included cable to the USB-C port on the bottom of the microphone, and connect the USB-A connector to an available port on the computer. If you are using a USB-C or Thunderbolt machine, you will need an adapter or hub. Please note that it seems that USB-C to USB-C cables are indeed supported.
On your computer, you need to enter the audio settings in the system preferences or specific applications (maybe both depend on your global settings), and then select Carbon fiber microphone.
The back of the Mackie Element series carbon fiber microphone is the gain control. Since this is within reach, you may prefer to use it on anything in your computer settings, but please pay attention to the location of the application and the location of the settings that are not automatically adjusted, so your input will not vary from application to application. There is also a directivity mode selector on the back of the microphone. You can choose from 5 different patterns, Mackie’s own graphic explains very well which setting is best for different purposes.
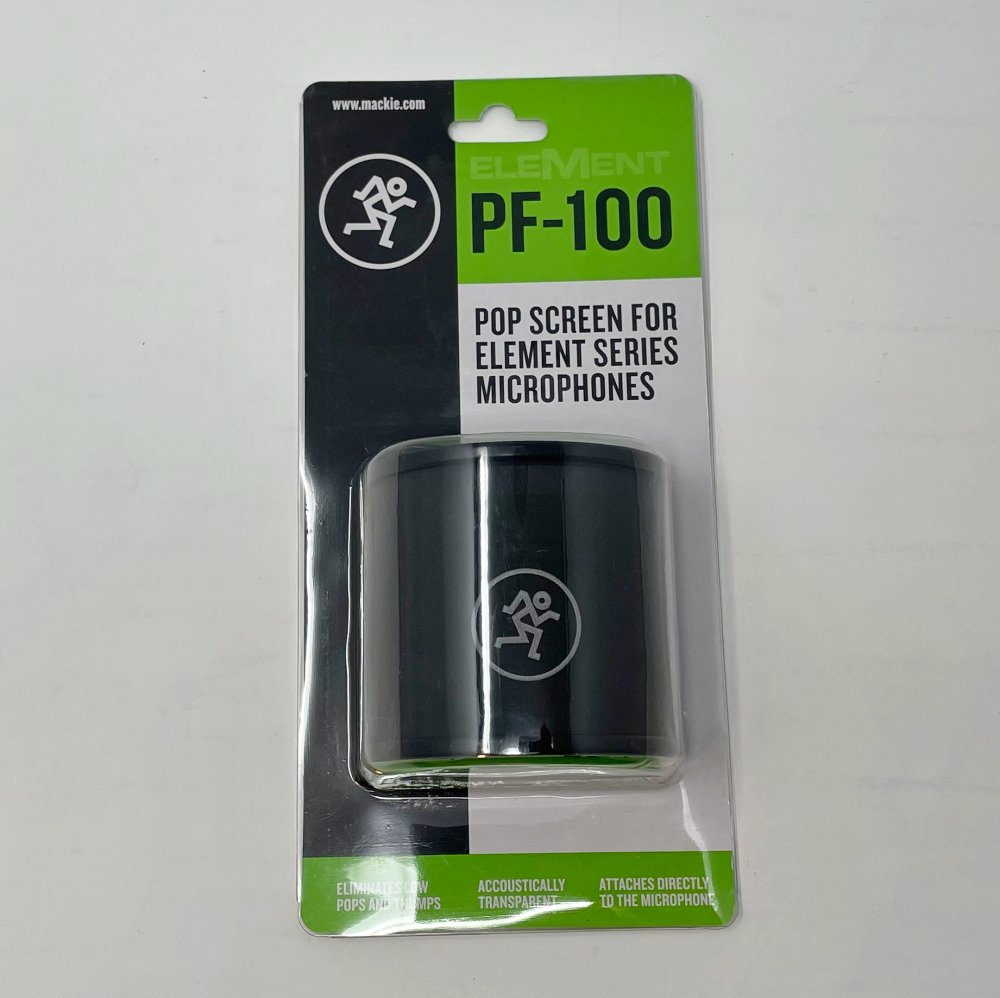
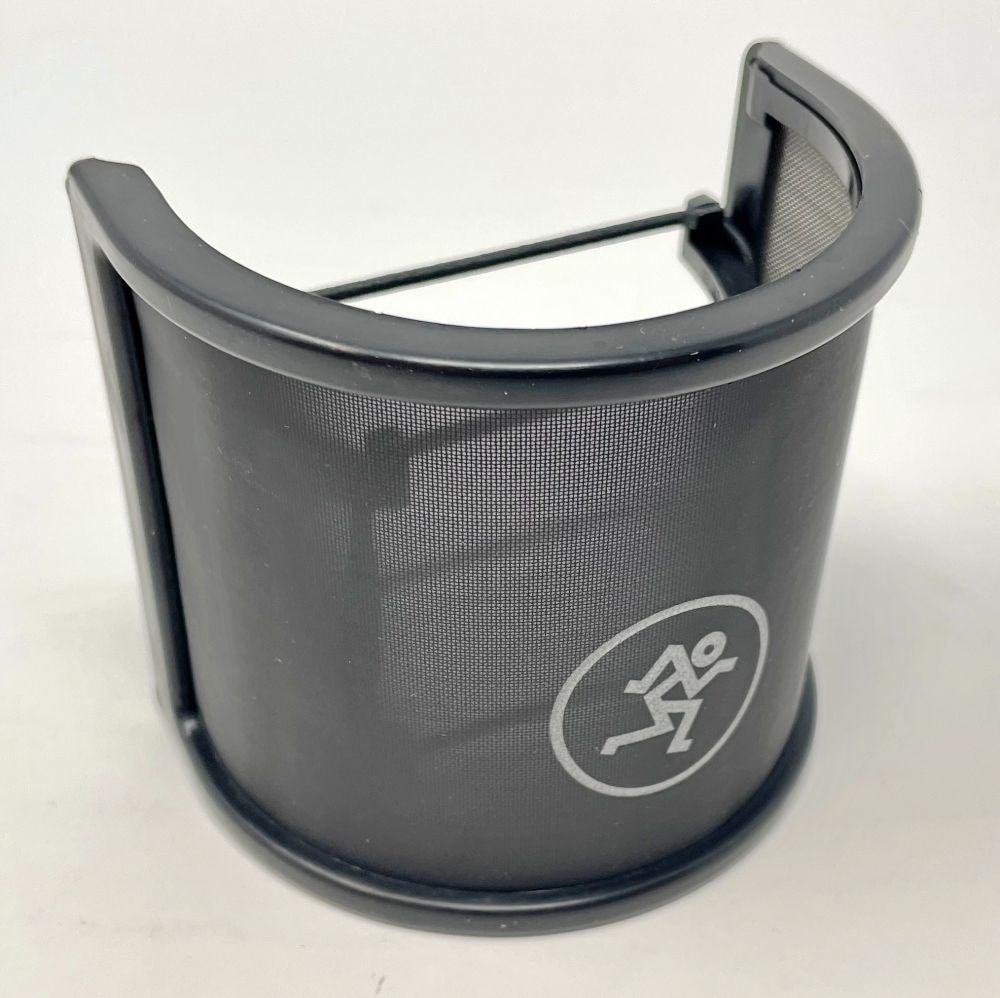
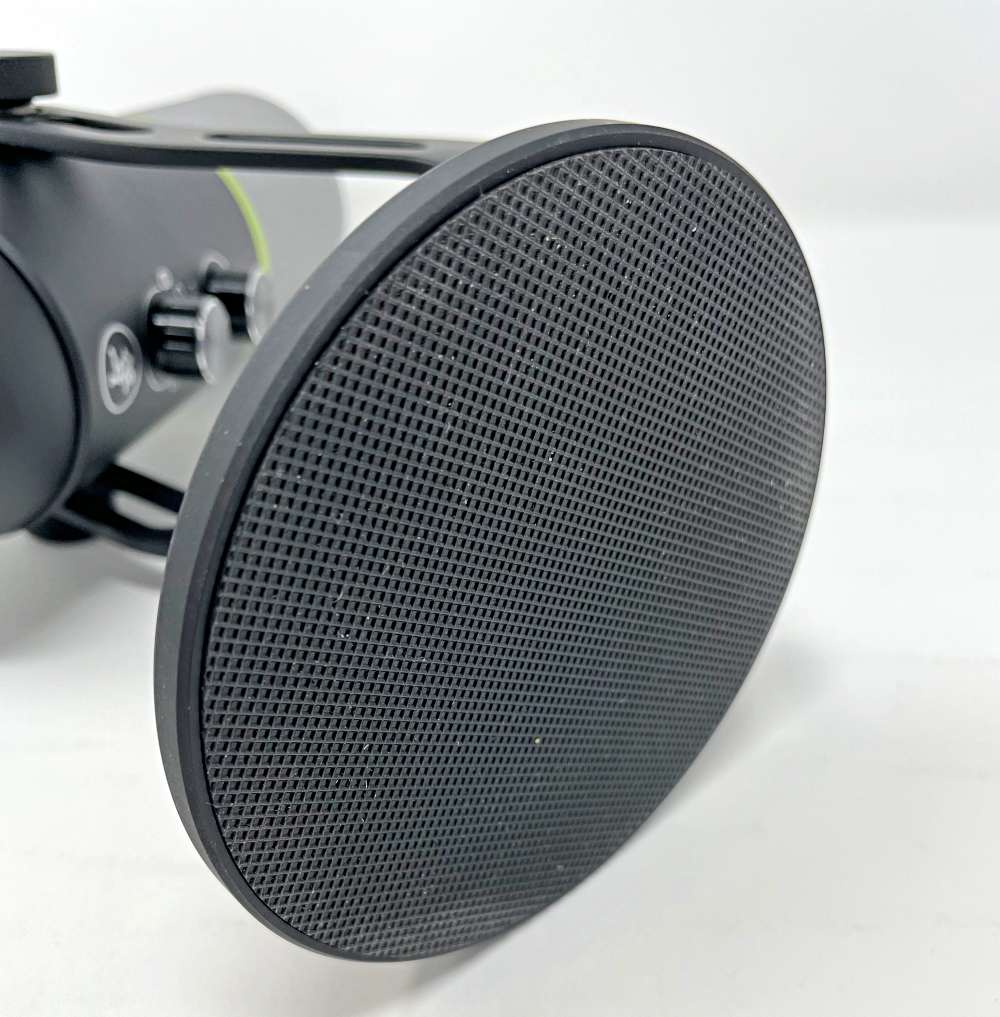
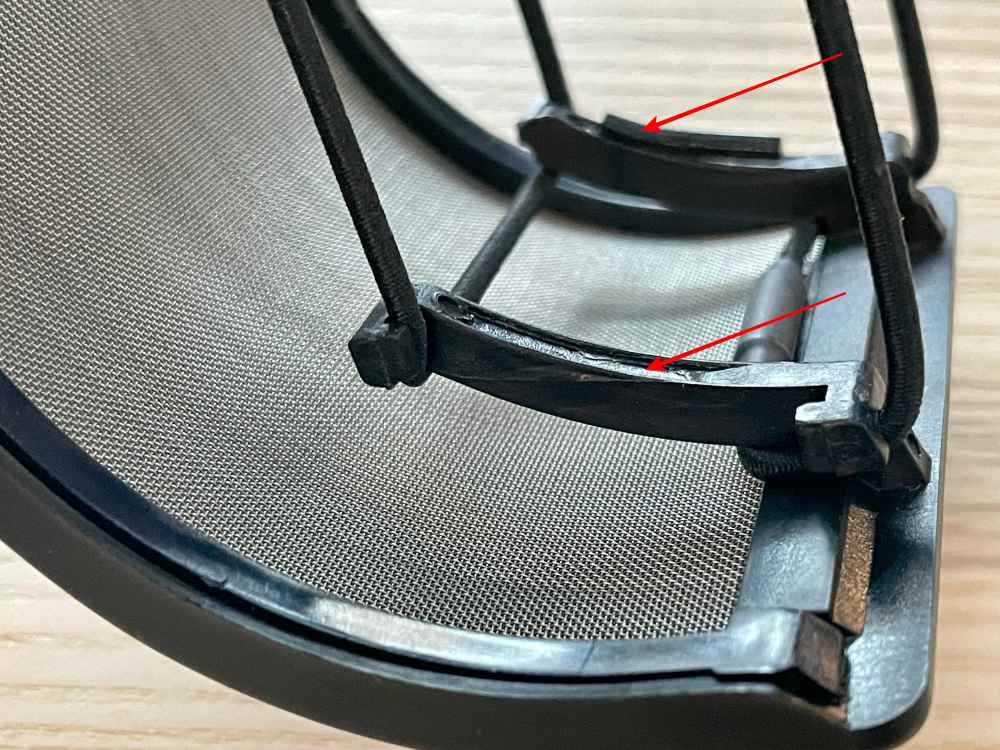
Finally, if you want to install Pop Screen (available separately)…
- Hold the screen with one hand
- Stretch the two elastic bands with one finger of the other hand (a little larger than the diameter of the microphone)
- Lower it all the way down, then loosen the strap
- The key is not to drag the side of the screen along the microphone
which performed
When everything is normal, it is actually very difficult to write a summary of how the product works. It almost feels like nothing to talk about. This is the situation, I will give it a try.
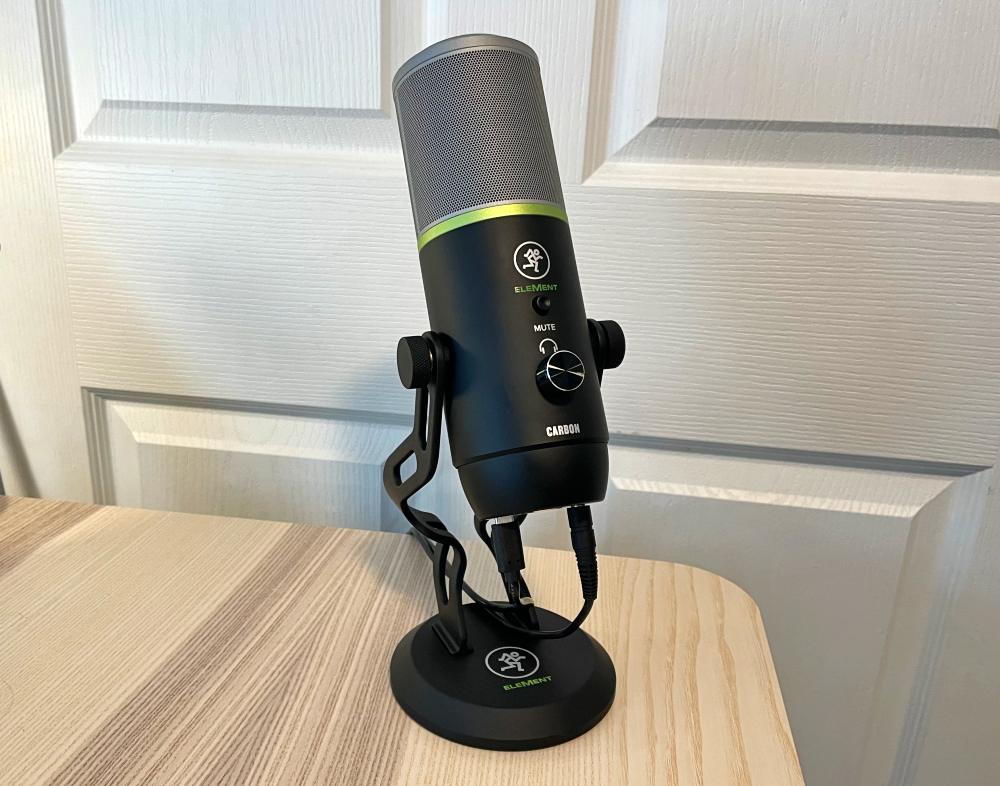
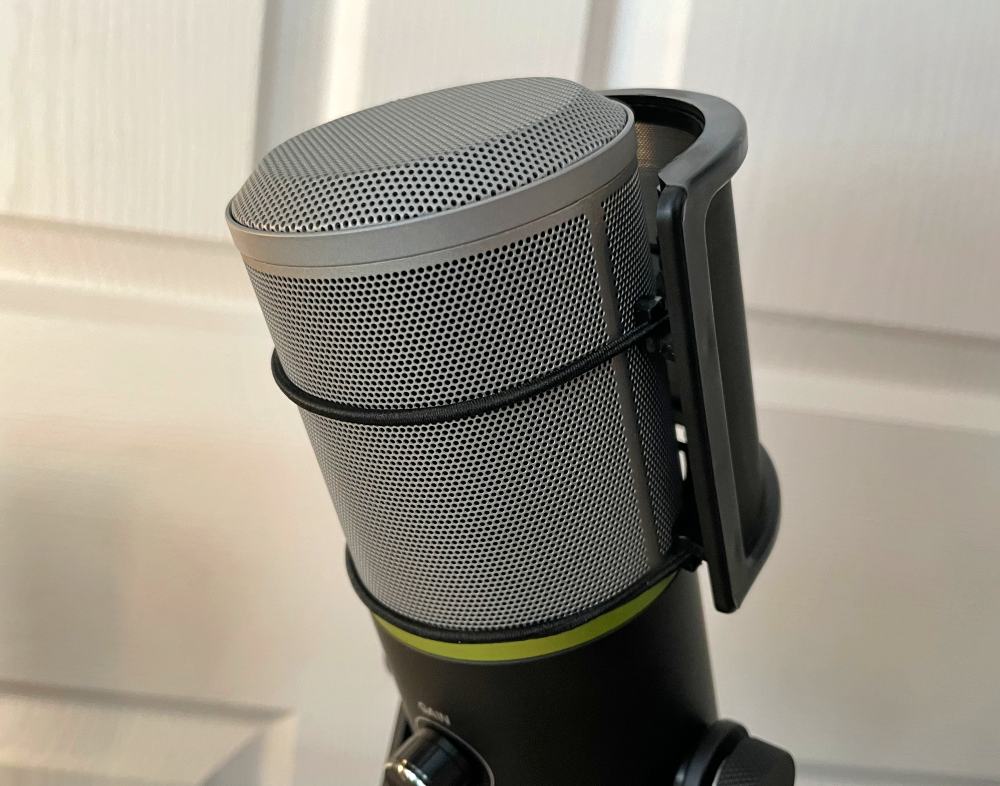
The Mackie Element series of carbon fiber microphones are eye-catching with their matte silver grille, black body/bracket and metallic gray-green stripes in the middle. Made of aluminum, it will be hit and has a cool touch (at least in my climate). The knob feels solid, and the polarity mode selector has a strong pawl that can pop out into place without any trouble. The headphone port and volume control on the microphone are also great.
There is a small green LED behind the grille, which turns red when you press the mute button. It is actually just behind the green stripes, visible in desktop mode, and not so obvious when the boom is installed upside down. Anyway, I found myself using the mute button on Zoom instead of keyboard commands. The red light is a better indicator, reminding me that I am muted.
Carbon microphones are not small. It is more than 11 inches tall and feels very imposing, even my 13-inch MacBook Pro feels small.
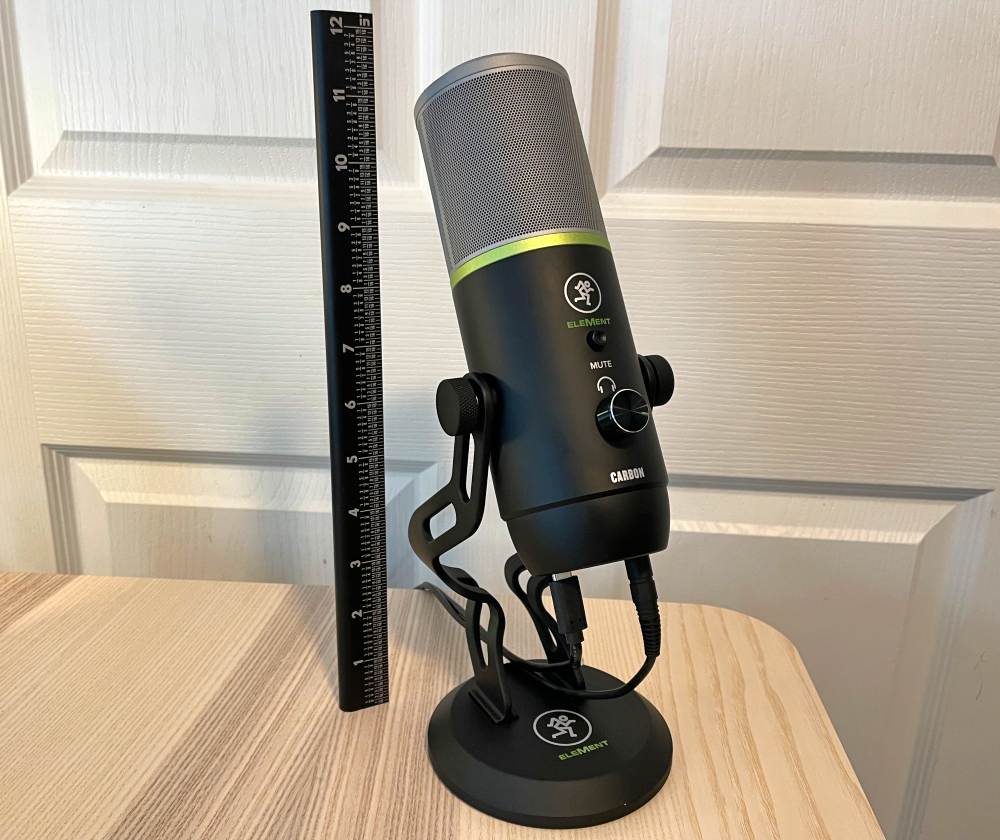
This is one of the main reasons I ended up using it on prosperity. And it can be opened when it is not needed, without having to put it down in another location.
There are only two real problems with the Mackie Element series carbon fiber microphones I encountered…
- When using a USB-C to USB-C cable, I cannot make my computer recognize the carbon microphone. As a Mac user, this is a frustrating problem, and I hope they can solve this problem in the future.
- Installing Pop Screen should be a simple process, but you need to stretch the strap much more than you think. I didn’t do this. As a result, Pop Screen dragged the surface of the microphone, tearing off one of the rubber isolation pads in the process. If you can keep the gasket clean before the final position, then this glue will work fine.
This is how it is installed.
So this is a video where I read the description in the Mackie chart (above the settings) when using each mode. Think this is the best way for everyone to hear the difference. Please note that this is just what I’m talking about, so I won’t show the best uses for some of these modes, but as the Mackie Element series carbon fiber microphones focus on their new duties every time, you will hear this shift.
what do I like
- Excellent audio quality, with obvious differences between 5 different audio modes
- Integrated support for boom installation, mute and earphones
- High-quality architecture and clean visual effects
What will i change
- Support for USB-C cables (because more and more laptops are giving up USB-A)
- Add some threaded holes to the bracket to store the mounting screws (if you use a hanger)
- Better glue to fix the rubber isolation pad to the Pop filter (and instructions on how to not drag during installation)
Final thoughts
Mackie started in the professional audio field, so when you mention a USB microphone, it may not be the first name you think of, but considering how much music and content the computer creates, Mackie is a name that should attract your attention. The Mackie Element series carbon fiber microphones can be set up quickly and are very easy to use. In the short time I have used it (mainly for Zoom meetings), I have been asked many times what I use for audio because of how clear my voice is.
price: $149.99 Element Series Carbon Fiber Microphone | $14.99 PF-100 Barrage
Where to buy: Amazon
source: The sample of this product is made by McGee

