

Review – The term “smart home” is a bit general. Whether it’s an alarm system, connected audio or controllable lights, if the product is not suitable for the way your home is used, it may not make life easier, which does not sound that smart. When I was about to move to a new home, X-Sense sent out their smart video doorbell and XC01-WR carbon monoxide detector for inspection. It forces me to think about how I connect and use my home technology, and what different things potential buyers might want. Let’s dive in, shall we?
What is it?
There are two independent X-Sense products in this review…
The smart video doorbell connects to your home WiFi, allowing you to conduct video, notification, and two-way audio communication with anyone standing outside the front door.
XC01-WR Carbon Monoxide Detector is a battery-powered networked sensor that can be used in conjunction with other X-Sense detectors to remind you whether there is carbon monoxide in your home.
What’s in the box?

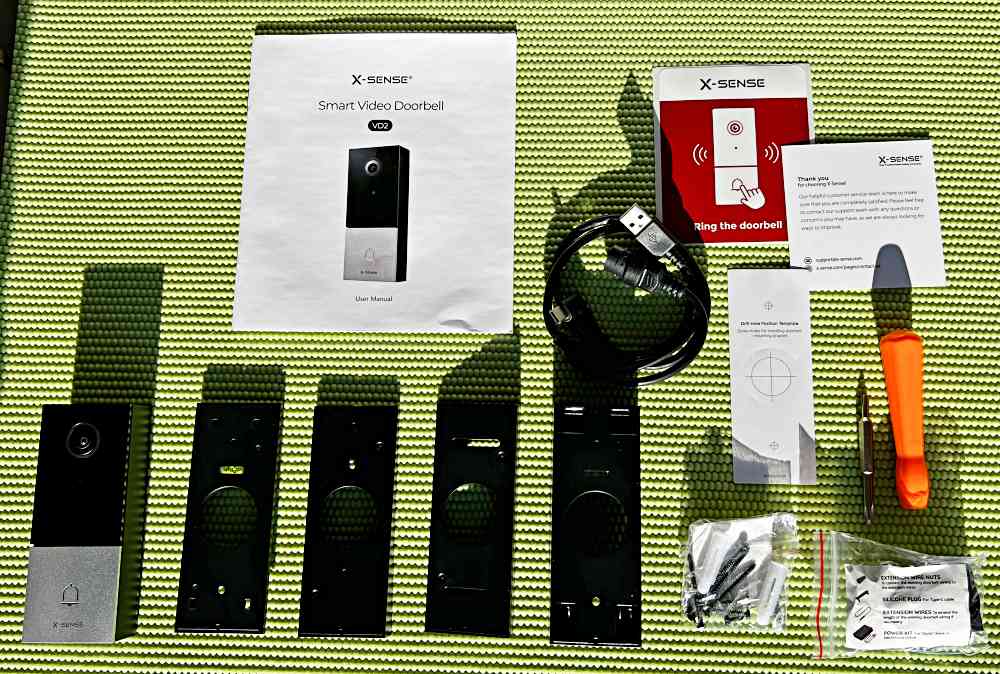
X-Sense Smart Video Doorbell
- Smart video doorbell
- Mounting plate and bevel gasket
- Install hardware and templates
- power cable
- screwdriver
- Extension cord and power supply kit
- Description and thank you card
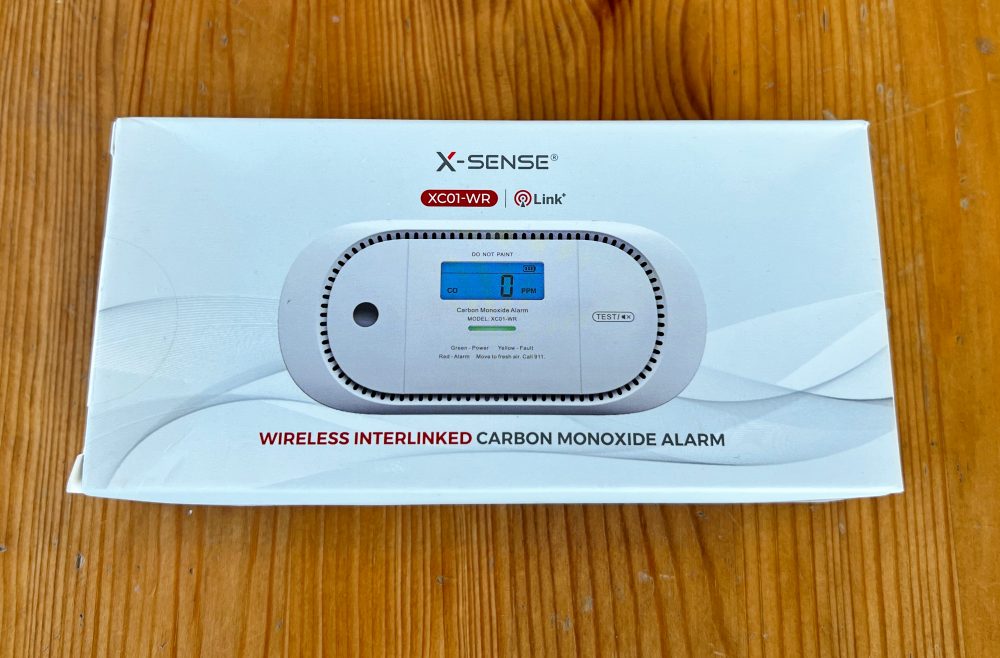
X-Sense XC02-WR Wireless Interconnect Carbon Monoxide Detector
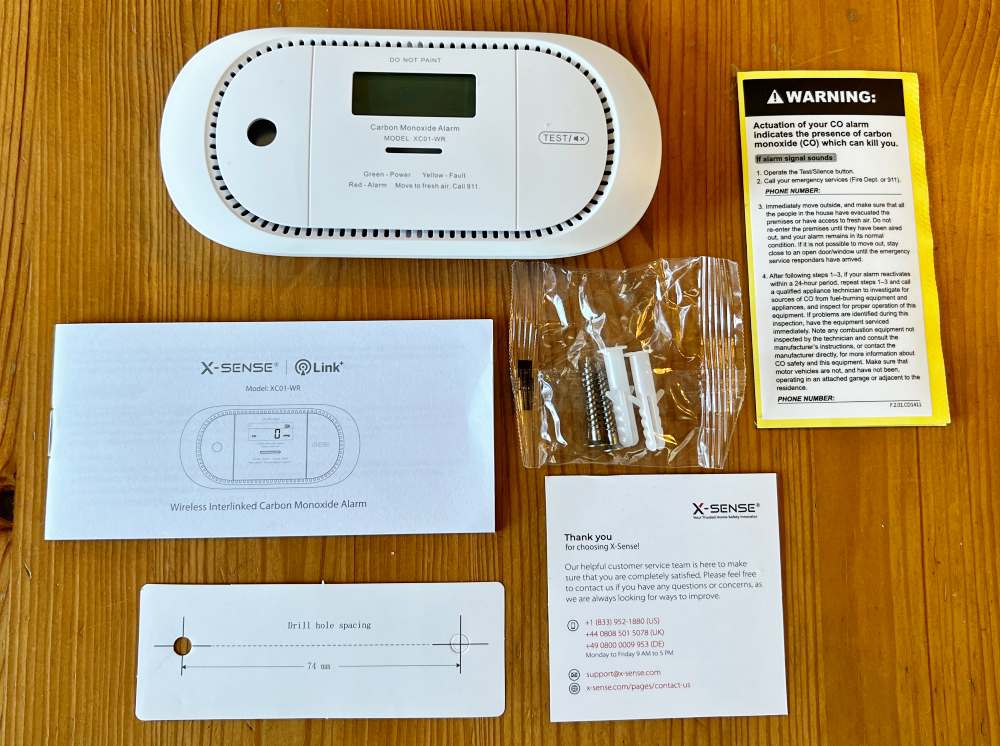
- XC02-WR Carbon Monoxide Detector
- Install hardware and templates
- Instructions, thank you cards and warning stickers
Hardware specifications
X-Sense Smart Video Doorbell
Lens: Viewing angle-diagonal: 170°; horizontal: 152°; vertical: 81°
Lens: Resolution-2K (2560 x 1440), 1080p (1920 x 1080), 720p (1280 x 720) | Support HDR
video: Manual and automatic modes, can be flipped vertically and horizontally, night vision 16.4 ft (5 m) range
Vocal:Built-in microphone and speaker; support full-duplex real-time 2-channel audio
Connectivity: 2.4 GHz & 5 GHz, IEEE 802.11b/g/n/ac
strength: AC 8-24 V or USB Type-C 5-30 V
Software features: Face recognition can recognize up to 20 faces | Supports up to 128GB Micro SD card
weathering: IP65 waterproof | Operating temperature range -4–122°F (-20–50°C)
X-Sense XC02-WR Wireless Interconnect Carbon Monoxide Detector
Battery: 3V CR123A lithium battery/5 years life
sensor: Electrochemistry
Safety& Certificate: UL 2034, EN 50291-1:2018 | TÜV and CE certification
current: Standby <15 uA (average) | Alarm <90 mA (average)
Working temperature/humidity: 40–100°F (4–38°C) | 10%–85% RH (non-condensing)
volume: ≥ 85 dB at 10 ft (3 m) | Silent duration ≤ 9 minutes
working frequency: 915 MHz (UL), 868 MHz (TÜV)
Maximum link unit: Up to 24 wireless X-Sense units
aspect: 5.3 × 2.5 × 0.9 inches and 0.2 pounds (135 × 63 × 24 mm and 92 grams)
Design and features
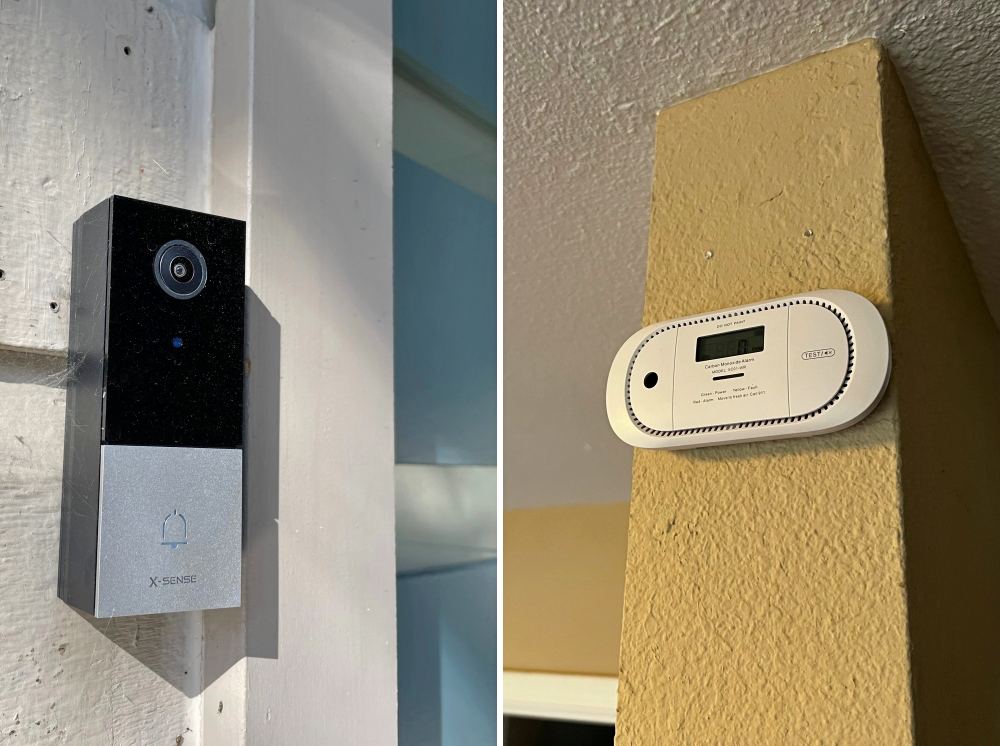
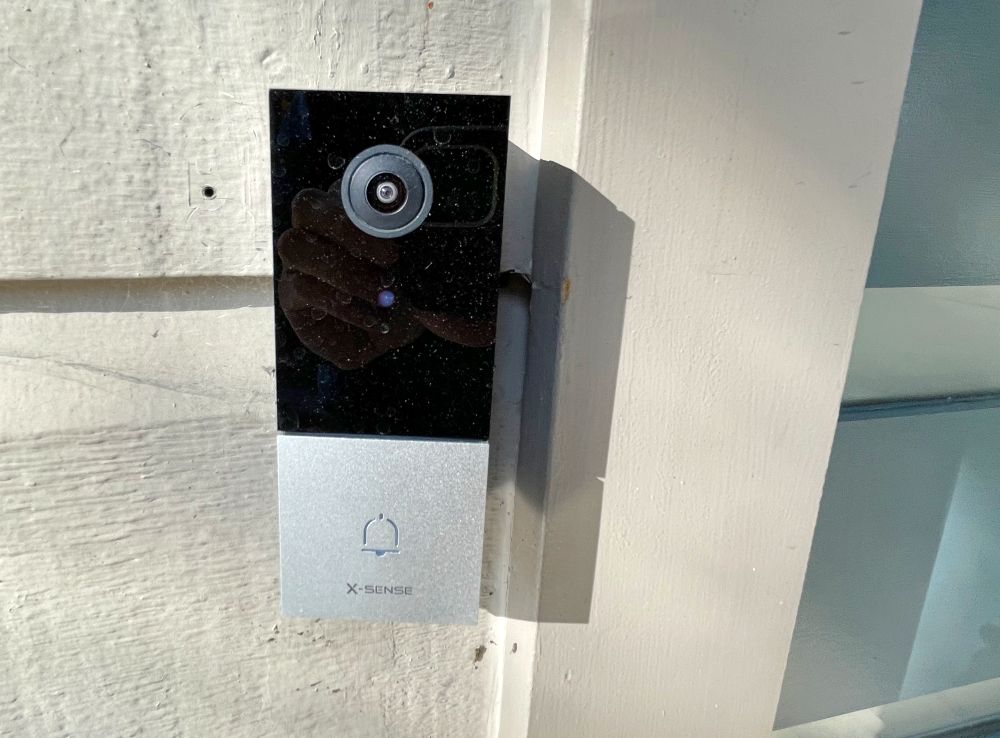
The smart video doorbell adopts a neutral black and silver aesthetic design and should be integrated with most households. After setting up with the app, you will have access to real-time video sources, automatic event-based recording, and the ability to talk directly with anyone nearby.
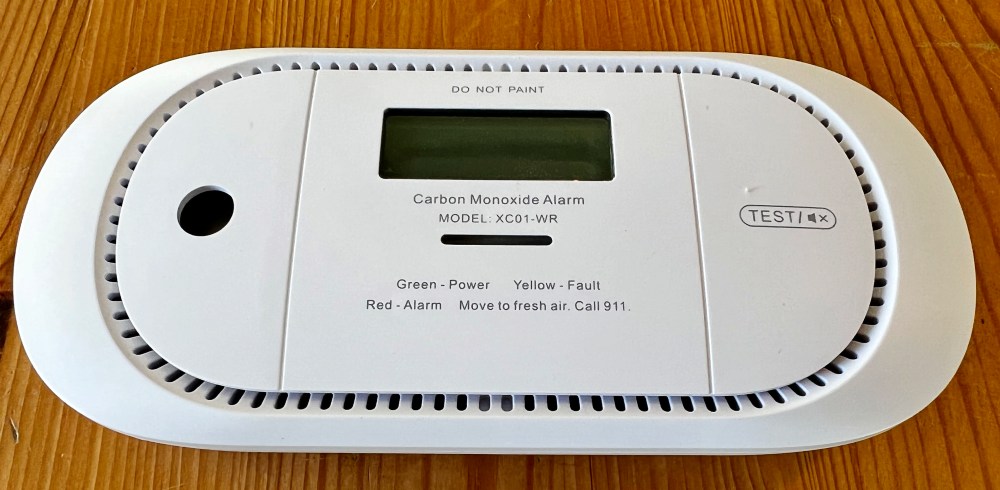
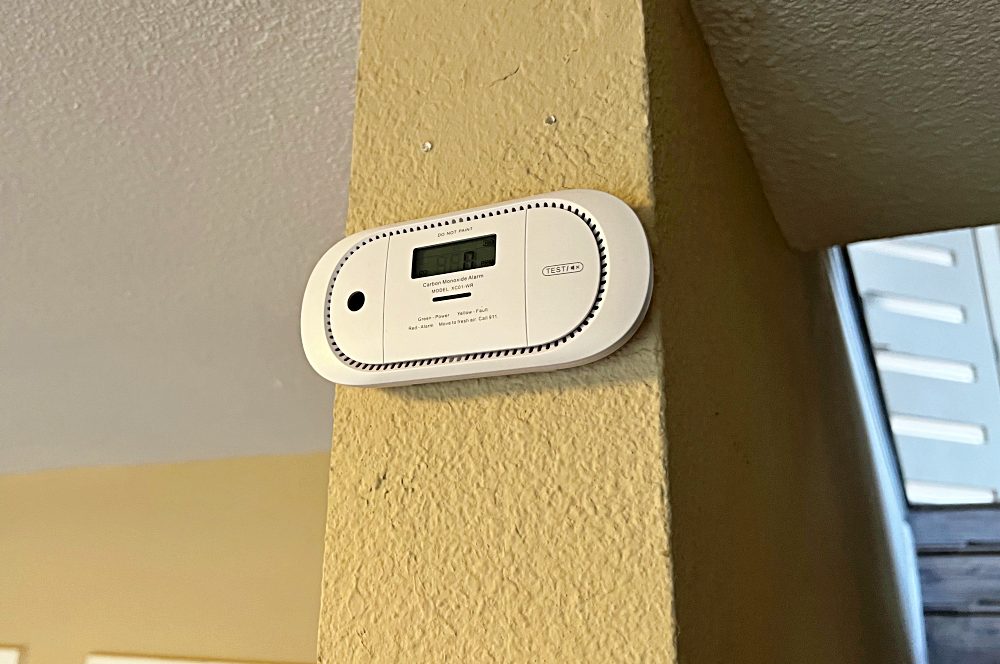
The XC01-WR carbon monoxide detector is also neutral, but this time it is off-white. As you can see in the image below, you should not draw it to match your wall because it may affect its functionality. The buttons on the right are used to run tests and silence ongoing alarms. The central LED screen will display the peak CO concentration since the last reset. The horizontal bar below is a color LED indicator, which will display green, yellow or red according to the current status. Those directly printed below are helpful, so there is nothing to remember. The circle on the left is the speaker.
set up
Let us first take a look at the settings of the smart video doorbell.
If you want to replace the wired doorbell, the installation is very simple. I am replacing a different video doorbell and I already have a compatible AC adapter running from the socket inside the front door. Either way, some of the same initial steps need to be followed.
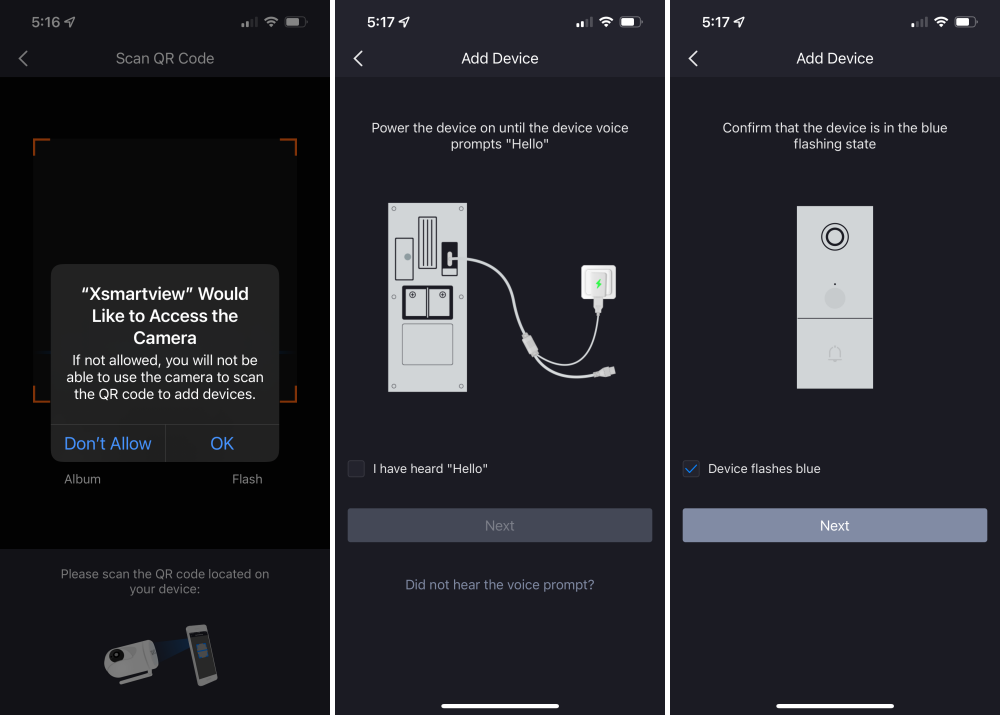
First, download the Xsmartview app from your favorite app store. It is available for iOS and Android. Before setting up the doorbell, you need to confirm again that your phone is connected to WiFi.
Next, the easiest way is to connect the doorbell to a typical USB wall adapter to connect it to WiFi. This way you can rest in the living room during this step instead of standing around the front door.
Follow the steps in the app to connect the doorbell to WiFi. They are very detailed and should allow you to get started quickly.
Now you are ready to actually install the doorbell. Make sure your power is off and/or the adapter you are using is unplugged. Pass the power cord through the hole in the base plate appropriate for your setup. For me, it is horizontal. The built-in spirit level makes it easy to align. Screw it into place in any way suitable for the material you are working with.
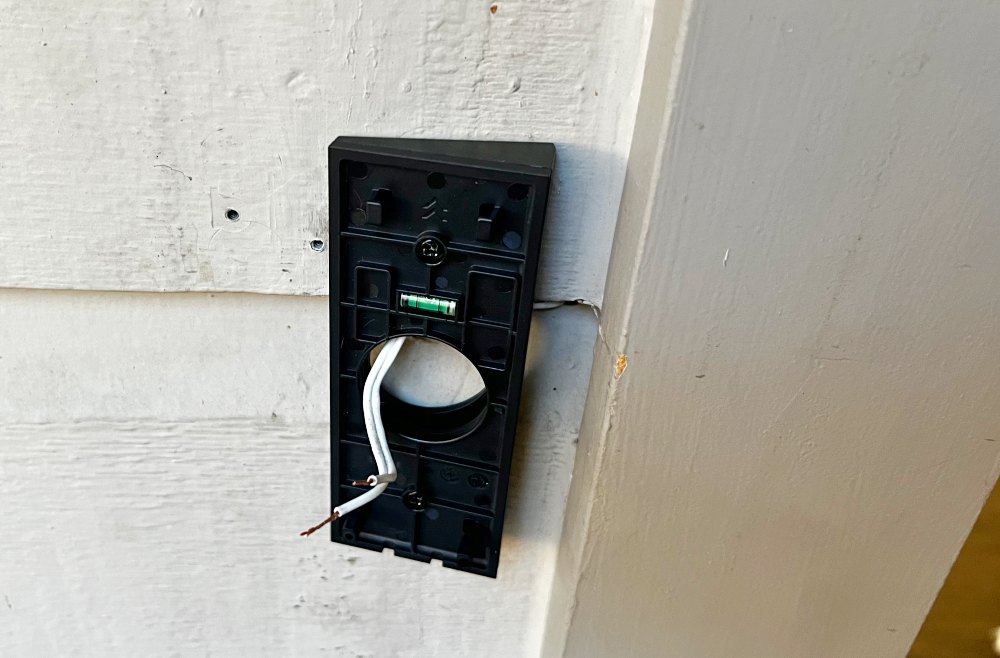
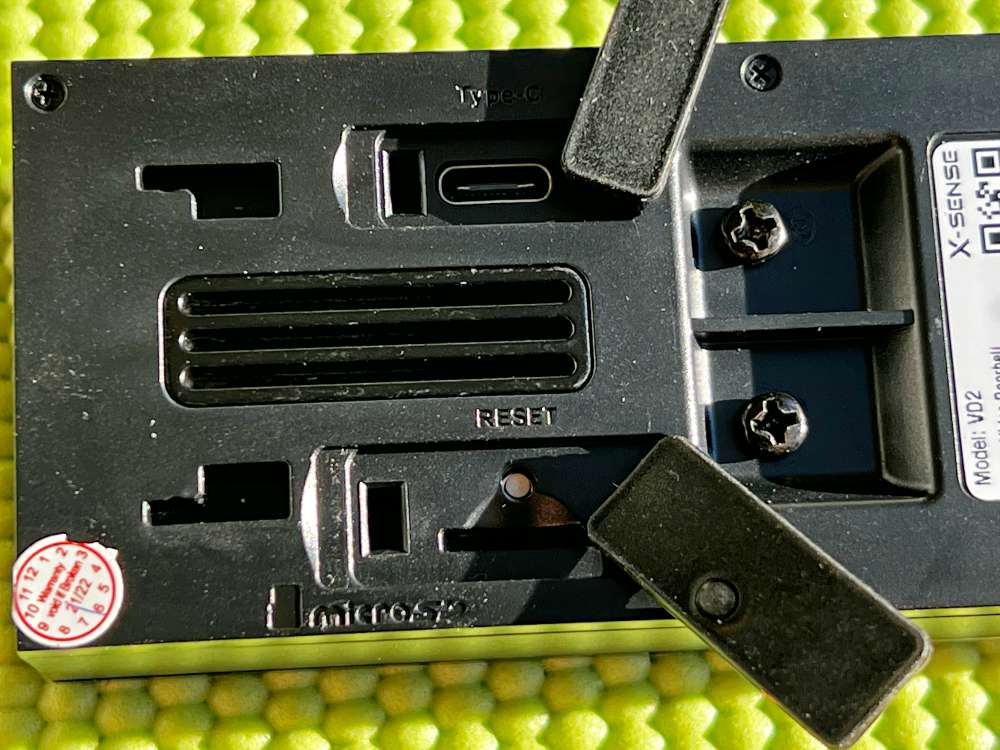
As for the power cord, you either want to connect the lead of the power cord directly or use the included USB power cord, depending on your source. Depending on your ringtone, there may be another step here, including the power cord. I don’t have a bell, so the two AC wires in the picture above are directly connected to the two screws on the back of the doorbell. In this photo, you can also see the USB-C connector and the hidden reset button and MicroSD card slot in the bottom center. The two odd cut shapes on the far left are mounting cavities, which are used to connect them to different wall-mounted panels.
After the power supply is firmly connected, push it onto the wall panel and slide it down into place. Turn the power back on and confirm that it is powered on and the doorbell is visible in your app. If everything is ok, use the included screwdriver to tighten the two screws below to ensure that no one accidentally moves (or worse, steals) your new doorbell.
Any remaining settings will be in the app, such as adjusting the area for monitoring and recording settings.
Now we will deal with the setup of wirelessly interconnected carbon monoxide detectors.
The setup of a single unit is very simple. I installed this in the landing area between the hall below the gas stove and the bedroom. There are some rules about height and proximity that you will want to read, but once you put it in the right place, it will be installed with two screws, and you will want to pull out the long-life strip battery connection.
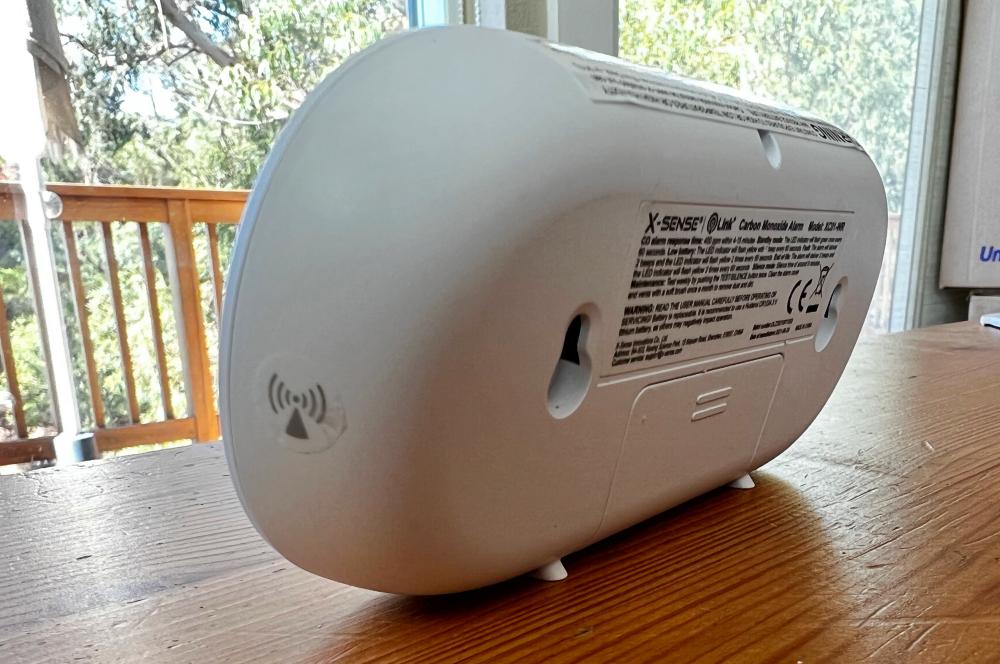
If you don’t want to fix it on the wall, it also has small feet designed to make it stand up.
If you are setting up more than one, they have a built-in interconnection that allows them to communicate with each other. It will be described in detail later.
Performance
So I mentioned in the opening remarks that I was preparing to move, and when I received these products, the home I moved out was almost empty. This is actually the perfect timing. I purchased some additional X-Sense products from Amazon to be able to create a complete home solution. For reference, I picked up a 2K outdoor spotlight camera, 3 wireless interconnected combined smoke and carbon monoxide detectors, and 6 wireless interconnected smoke detectors.
The smart video doorbell is as you wish. The Xsmartview application opens quickly and displays the images from any X-Sense cameras you have installed in alphabetical order according to the name you specify. In my case, it was the driveway and the front door.
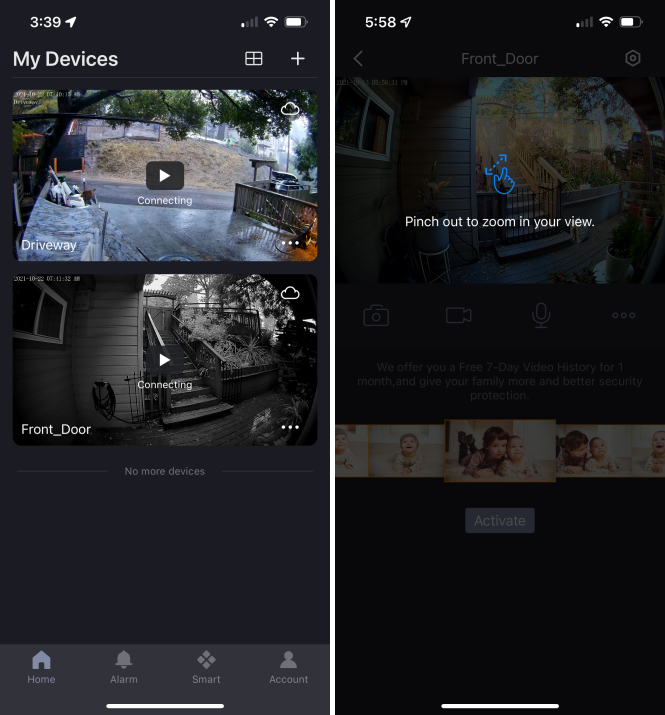
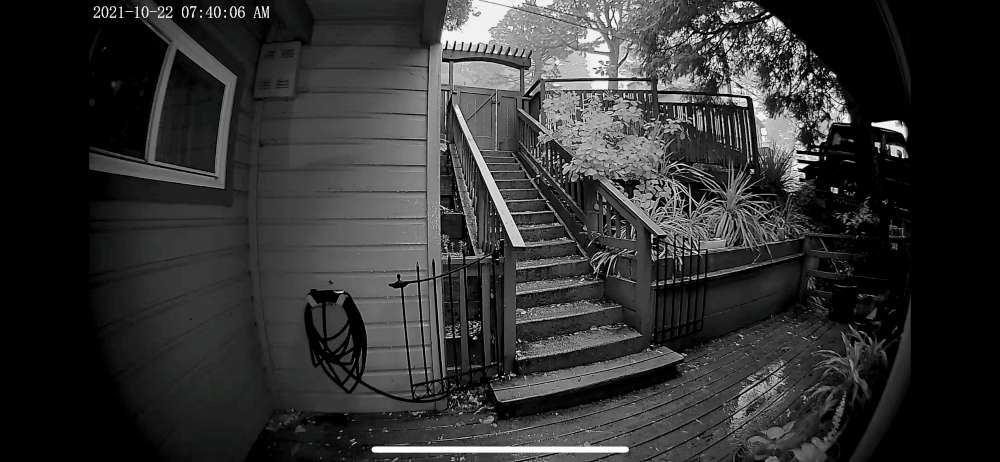
Click any of them to provide a real-time view, where you can adjust the zoom ratio to see exactly what you want. This is an early morning view, where the camera is still in night mode, but it is a good example of camera sharpness.
The smart video doorbell works as I want, without the need for additional WiFi relay boxes like other brands. When someone presses the doorbell, my phone will remind me within a few seconds. This is not instant, but it is not too long. This will depend on your network congestion. However, my scene is unique because I don’t have a doorbell that will ring immediately in most installations.
As for the wirelessly interconnected carbon monoxide detector, it is easy to install. Although I did not try to trick it into activation, knowing that it is already set up and ready to give me peace of mind. The coolest part of the X-Sense system is the “interconnect” part. All Link products of X-Sense have a built-in radio frequency transmission function that allows them to communicate with each other. After setting a unit in the application, the rest will be activated by quickly pressing the button 4 times on the activated unit, and then quickly pressing the button 2 times on the next unit to be set. The speed is very fast, and then they are all ready. Now they are interrelated. If one is triggered, they will all respond, so it is impossible to miss.
It is worth noting that RF is not WiFi, or even an open standard that you can connect to outside of the X-Sense proprietary products. It works well time and time again and is very simple to set up. However, I would like to see these support WiFi so that I can check the status of the detector in the Xsmartview app required by the smart video doorbell. To advance this idea further, since I don’t have a doorbell bell, it would be great to be able to use the interconnected detectors (10 I installed) to ring when the doorbell is pressed. I know these products are not designed as a system, but why not?
what do I like
- Both products are easy to install and set up
- The doorbell looks good, works well, and has a great image
- The carbon monoxide detector is interconnected with other X-Sense detectors for unified alarm
What will i change
- Add Wifi and App monitoring to the detector
- Allow the detector to also be used as a doorbell
Final thoughts
X-Sense has some reliable products here. If you haven’t locked the Ring or Google Nest system, then the smart video doorbell is worth a look. Although Nest dominates the field of detectors, the XC01-WR carbon monoxide detector has better options for eliminating noise through its interconnection system and significantly cheaper options, but if you don’t, it won’t warn you Your mobile phone home.
price: $139.99 Smart Video Doorbell | $39.99 XC01-WR Wireless Interconnect Carbon Monoxide Detector
Where to buy: X sense and Amazon
source: The sample of this product is made by X sense.

