

Review – Over the years, I have many multifunction printers (does anyone remember to print on a CD?), and they have more or less completed their work. However, I don’t have any single-purpose printers, and this is the main content of this review. My wife and I are both engaged in consumer products, and we always have samples coming and going. So when FreeX said they had a dedicated label printer, it was all 4×6 labels and thermal printing, so there were no ink cartridges… Good game!
what is it?
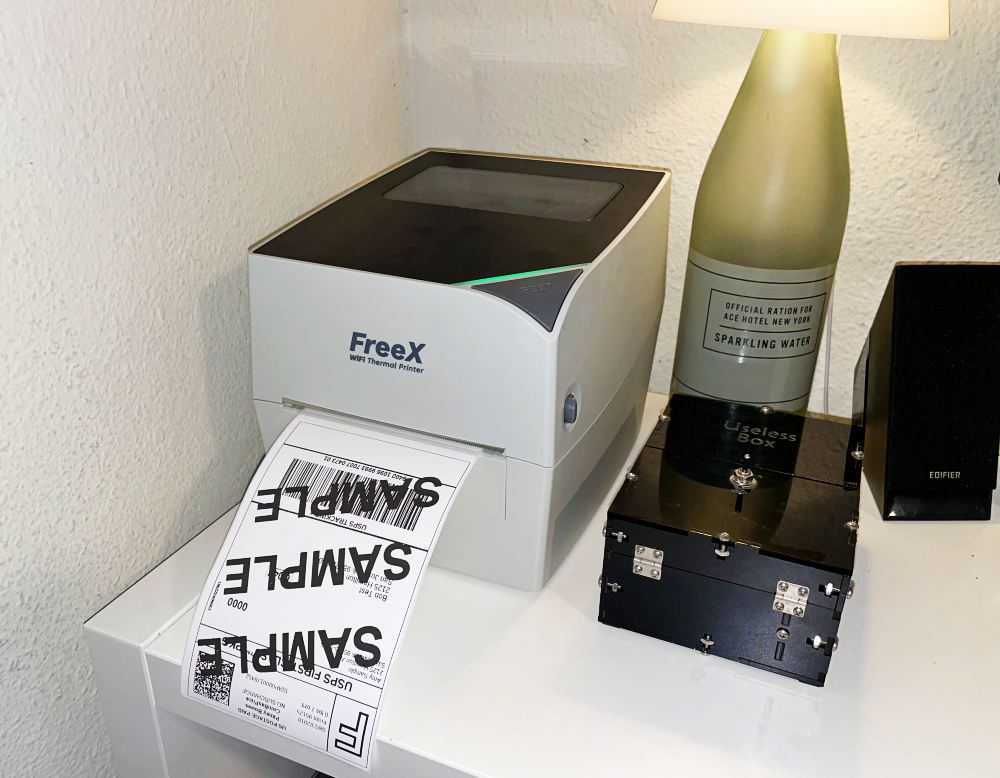
The FreeX thermal label printer is a small desktop device that can quickly print 4×6 labels. It works via USB or WiFi, and supports rolls to 600 label super rolls. Thermal printing means you no longer need to consider ink issues.
What’s in the box?
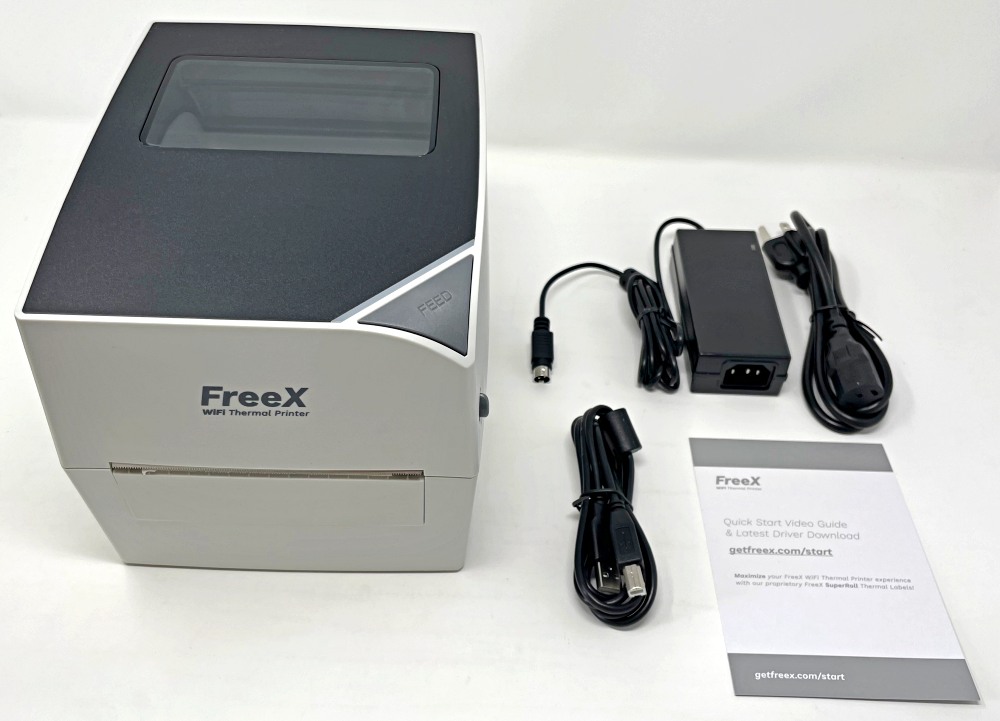
- FreeX thermal label printer
- USB-A cable for wired printing
- Power Adapter
- Quick start card
- *Note that tags are not included
Hardware specifications
compatibility: Mac or Windows
Connectivity: USB-A or WiFi
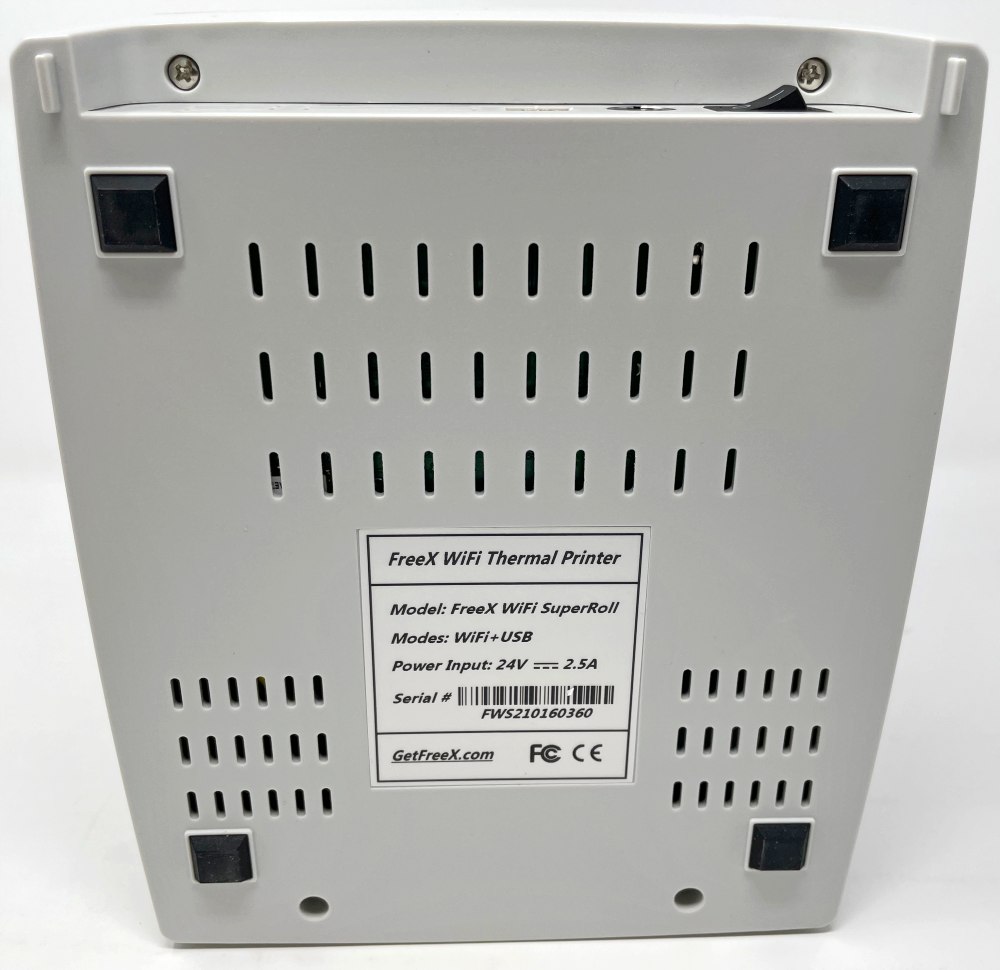
power Input: 24v, 2.4A wall adapter
Label support: 4×6 labels or smaller, after passing through the paper roll or fan-folding
feature: Thermal printing, label edge detection, self-adjusting roll holder
Design and features
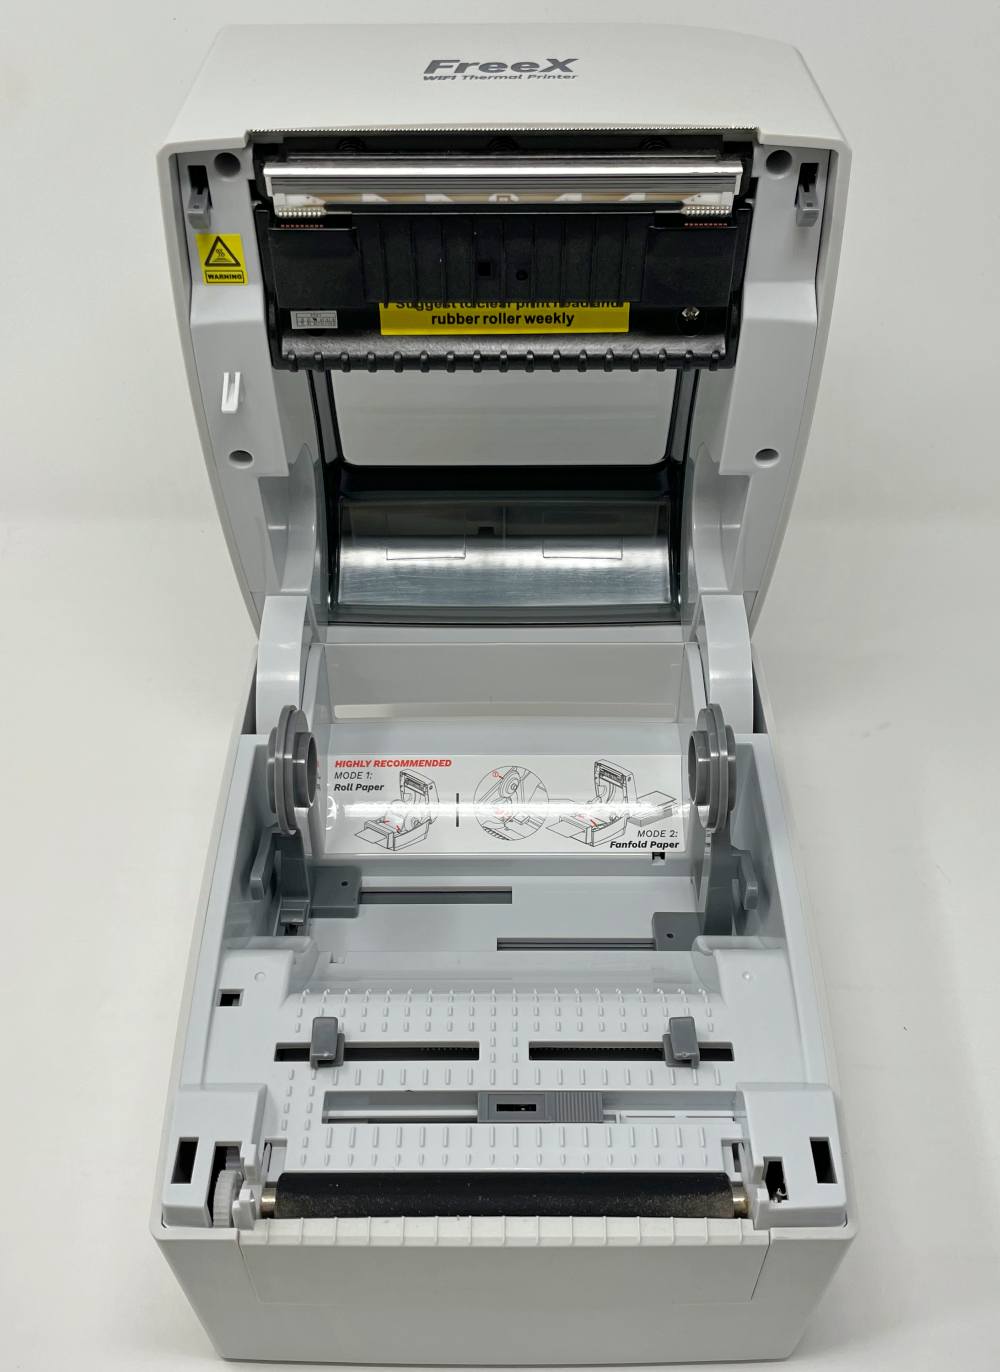
The FreeX thermal label printer prints labels and is designed to fix large rolls inside, occupying a small space.
Printing is done by heat, so no ink or ink cartridges are required, and only some maintenance is required every week. And there is no need to cut off the label and stick it on the box.The label edge is automatically detected and advanced, so it is always ready for your next print
At the bottom, you will find the product label and four large rubber feet, which are well spaced to keep the printer stable.
Set up
- Make sure you order some labels, because the printer does not come with labels. Not even a pair.
- Connect the power adapter to the wall and the circular connector on the back of the printer.
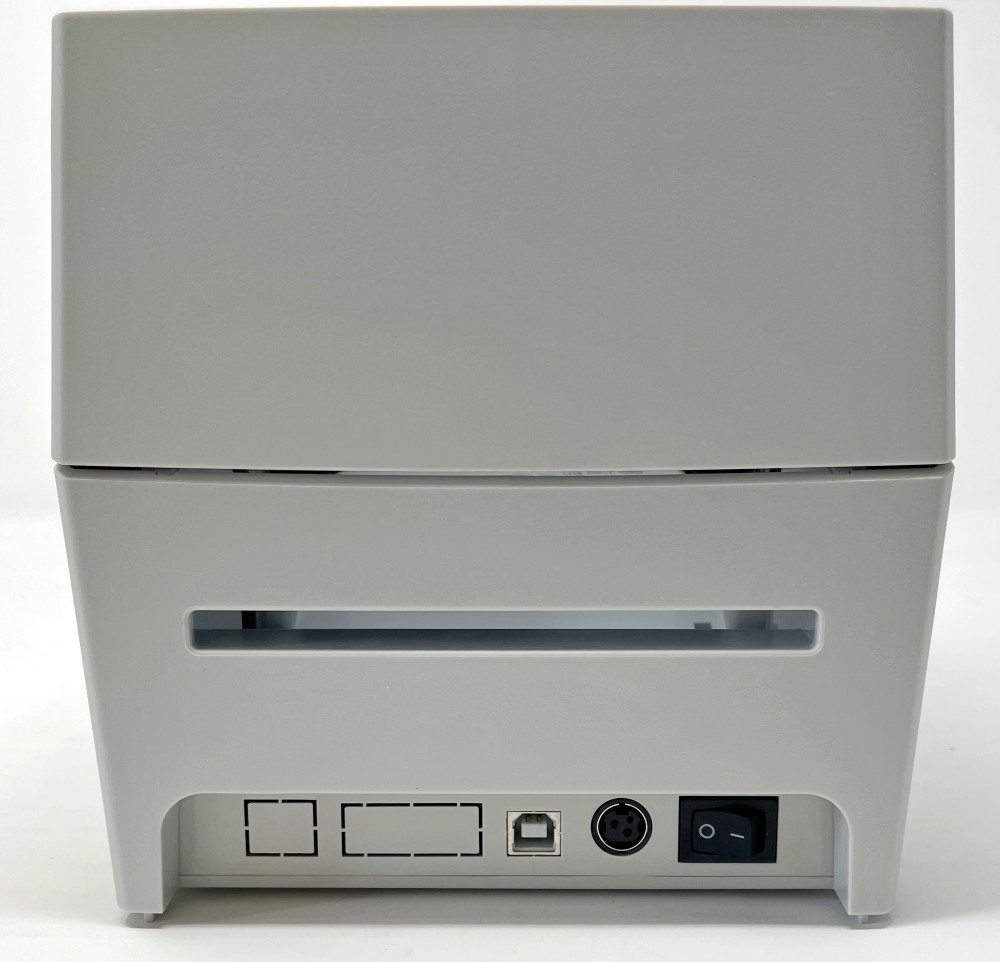
- For Mac, connect the USB cable to the USB-B connector of the printer. It is USB-A on the computer side, so if you are using a USB-C machine, you need an adapter or hub. For Windows, you may need to install the software first to prevent any automatic loading.
- Turn on the printer using the release levers on both sides near the front edge.
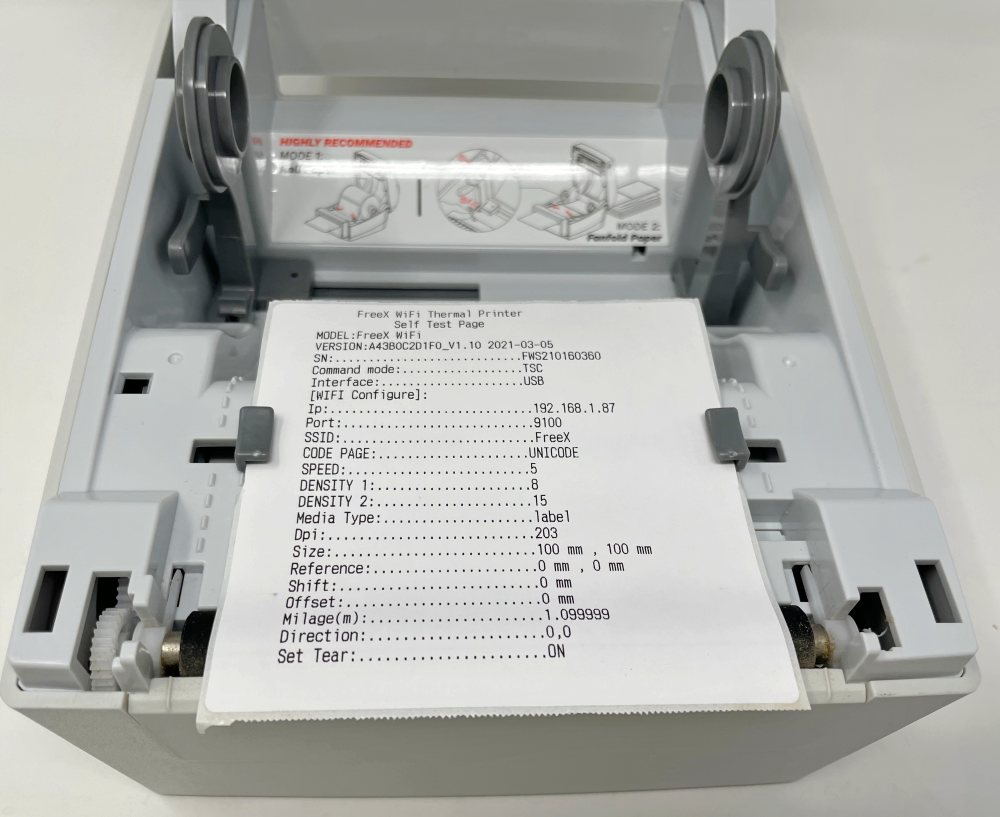
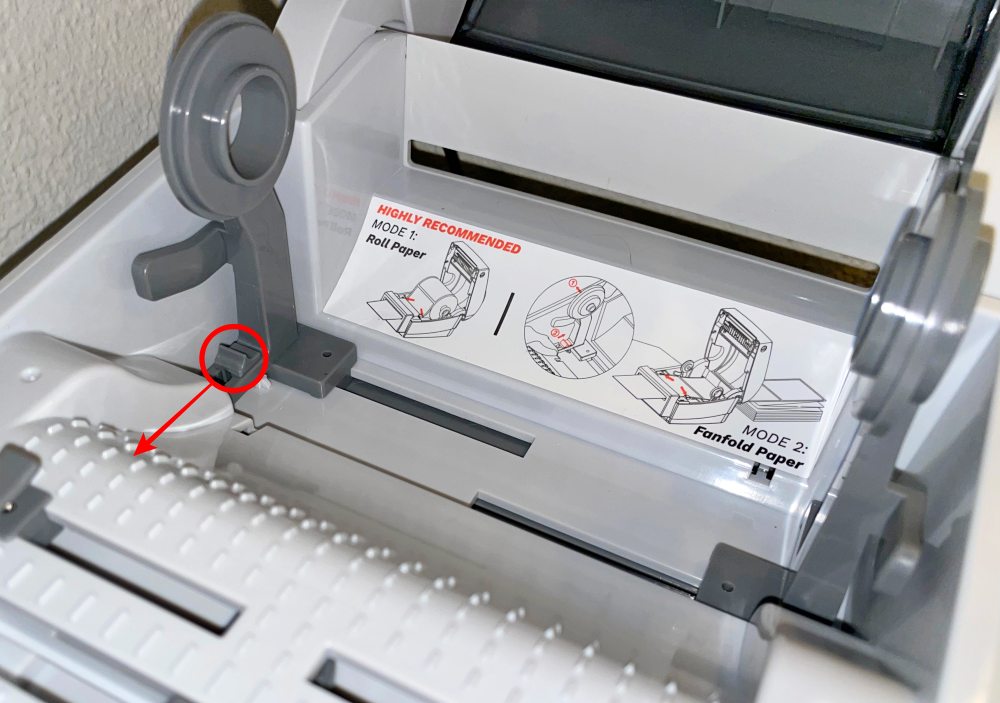
- When you turn on the printer for the first time, you need to remove a self-test page, but it also helps to highlight how the label guide works. If you are using a folded label in a box or a very large roll on a spool, FreeX can bring the label in from the back. For these, pass the label through the back, tuck the edge under the label guide, and then slightly pull over the front before closing the lid.
- This is a close-up of the label on the back, showing how they work.
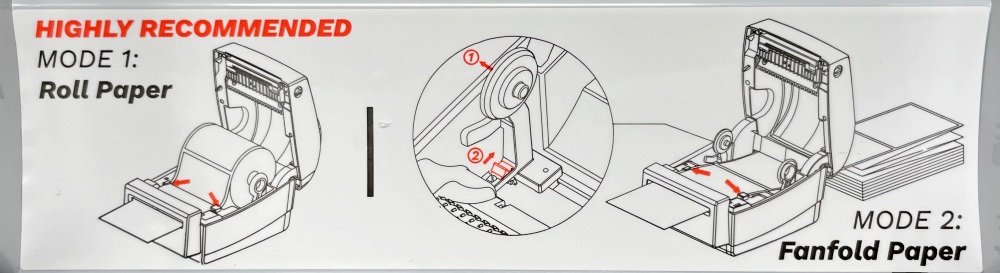
- FreeX also has an internal roll holder, which can hold everything neatly inside. To load the roll, pull down the release lever shown in the figure below to allow the spring-loaded bracket to work. Pull them apart to insert the roll with the label facing up, tuck the edge under the label guide, and then pull it slightly past the front before closing the lid.
- Now you can reach back to turn on the power switch.
- The printer will automatically advance the label and detect the label size and the end edge of the label.
- If you need to advance the label, click the big FEED button in the front corner.

Install for your computer:
- The settings of Mac and PC are roughly the same. Even if you eventually want to print via WiFi, you need to set up USB printing first.
- Visit the FreeX website to get all the necessary instructions or watch their very comprehensive video.
- You need to download the USB printing installer from the system, and then follow these prompts first.
- Add the printer through the system settings, and then select the FreeX driver installed in the previous step.
- You can now print. Just select Free X as your printer and make sure to select the label size you have loaded.
To set up WiFi printing on a Mac: (The procedure may be different on Windows)
- There is also an application named “FreeX WiFi… Toolbox Vx.x” in the folder downloaded during the previous installation.
- Open it and you will see that it is connected via USB.
- Click “FreeX Settings”
- This is where the process differs from any printer I set up before.
- There is no drop-down list of available networks. You need to enter your wireless network name and password and understand the type of security protocol. It may be the default setting there, but you should still check it. It seems that FreeX also does not support 5G networks for reference only. Click “Settings” when finished
- The printer will kick out labels with IP, SSID, password information, and port number values.
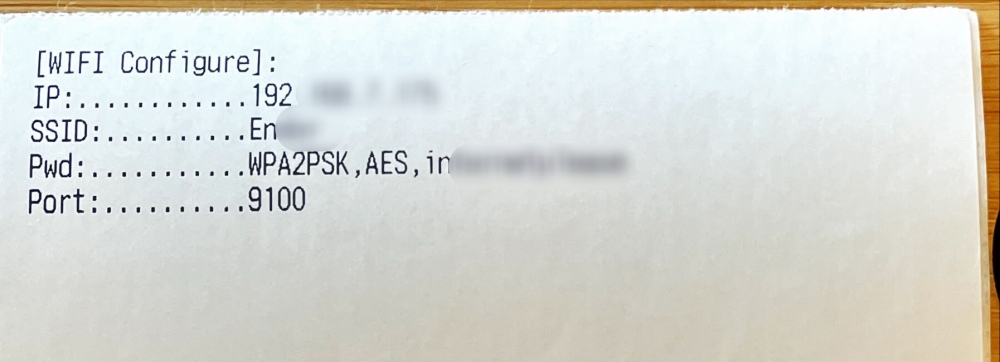
- Now go back to your printer/system settings and add a new printer again. You need to add by IP address, enter the IP address on the printed label and select HP Jetdirect – Socket for the Protocol.
- Enter the printer name, and then select FreeX software.
- To test, make sure to unplug the computer cable first and select the new printer name and label size you just assigned to it. Please note that there is a delay of 10-15 seconds for printing via USB.
which performed
When I get a new product, it’s hard not to invest directly and start exploring. After I wrote some product manuals a day, I tend to read them before the actual setup, but I seem to have a psychological barrier when watching the installation video. This is the case here, I have to say that the setup tutorial video on the FreeX website is mandatory, because the only description in the box is the card with the URL. I didn’t initially and wish I had.
As mentioned in the setup, the process of setting it up for Wifi involves printing out a label with detailed information. I ended up with 10 or more of them, and some blanks. It’s not a big deal, but it’s annoying. After watching the video, I am sure I can avoid this situation. Now that I have confessed, let’s continue.
Once set up, FreeX printers are very simple and fast to use. I still buy more than I sell on eBay, but now is the time to uninstall something, self-adhesive labels will definitely help simplify the process. It’s really easy, just make sure I tell eBay that the label I need to print is 4×6, then click Print on the dialog box, tear off the label and pat it on the box. complete!
This is how the print dialog on MacOS 11.4 Big Sur looks like…
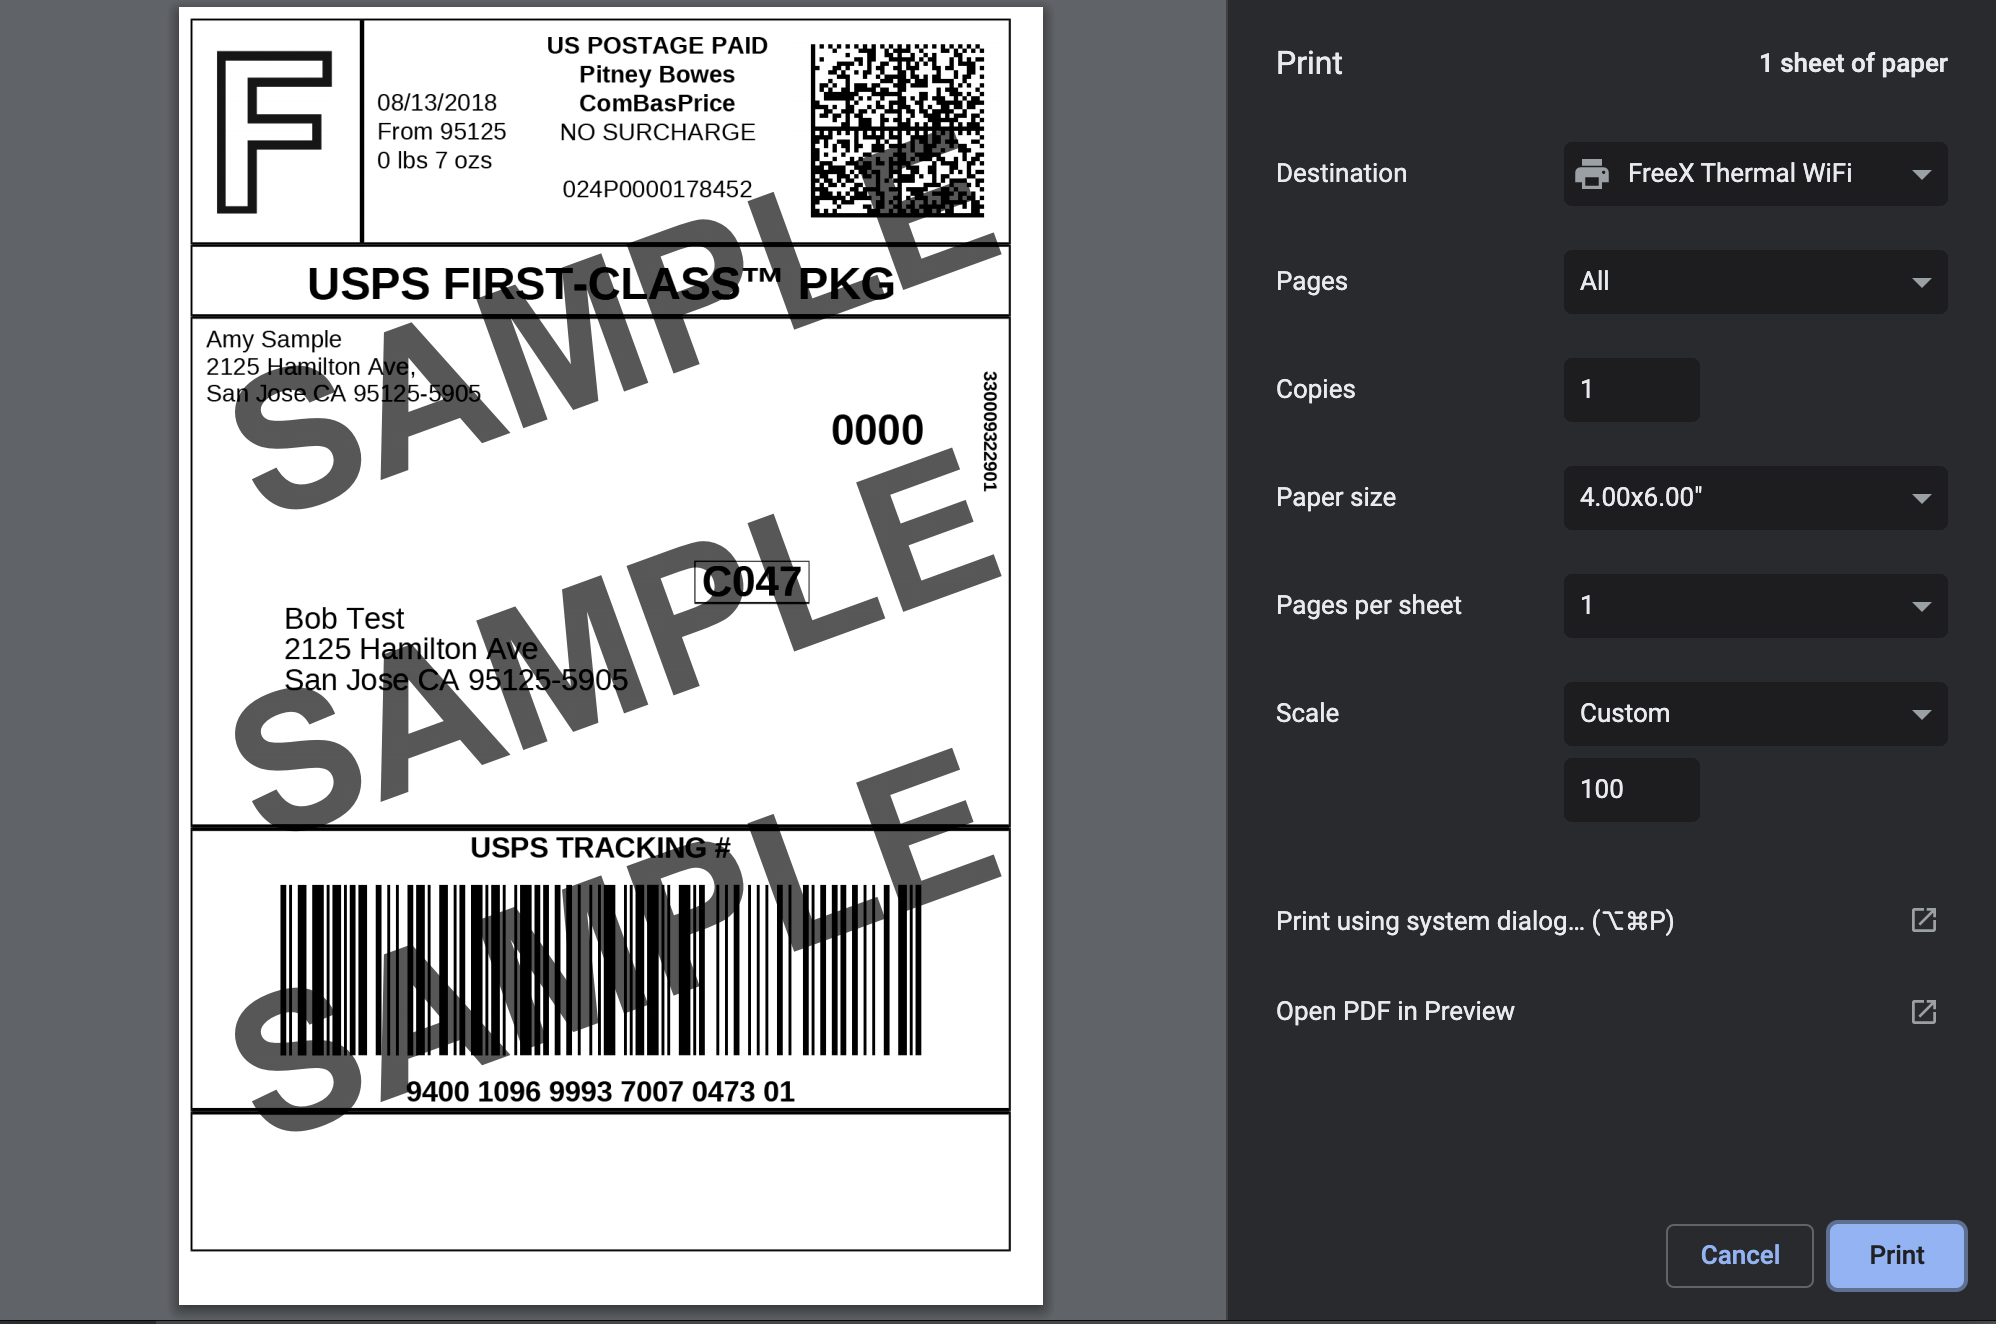
As with any printer, double check that you have selected the correct printer, selected the correct size, and you have not printed 80 pages instead of the 1 page you need. This is the key thing you want to check before clicking to print. This is an example label, and it still thinks I printed it on letter-sized paper.
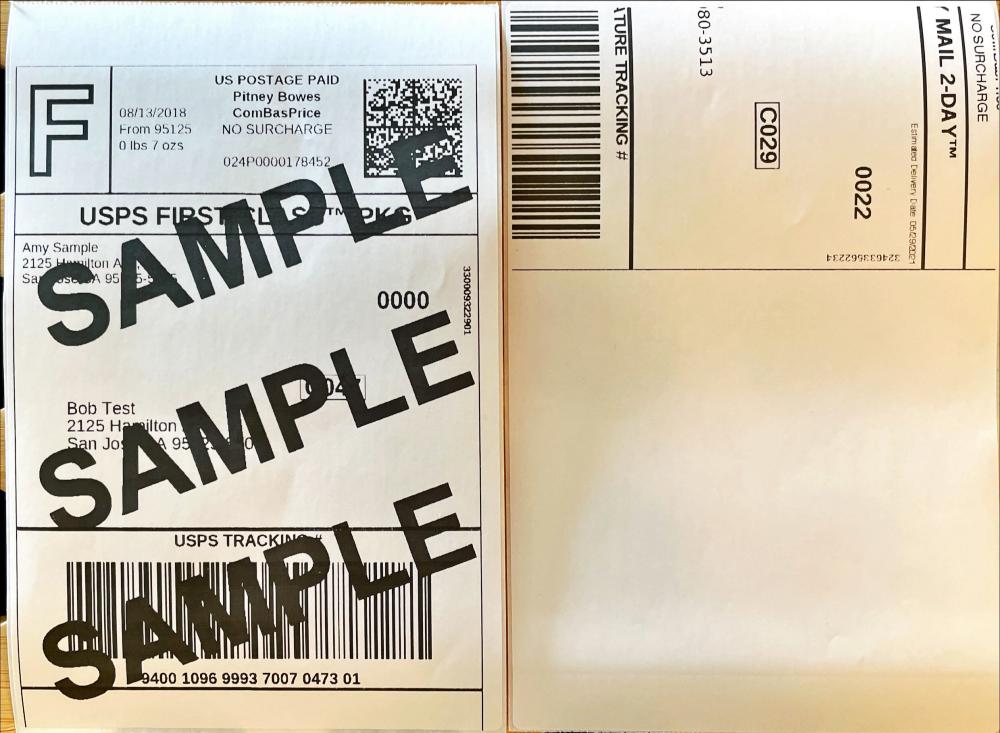
The print is very clear and deep enough. It is also very durable and will not stain. There is absolutely nothing like the thermal image of Chuck E. Cheese. I really like this, I don’t have to worry about the amount of ink, or remember to change from the carton to the flat adhesive label but then forget to cancel the exchange and end up with peeling and pasting documents that I don’t need.
The footprint is very small, especially when you run a roll of labels in the printer. If fed from behind, the depth will be doubled, or even more.
It will also support batch printing, so as long as you trust you to put the correct label on the correct box, you can knock out all the labels at once.
what do I like
- Dedicated label printing
- Thermal printing, no ink, no ink cartridges
- Large rolls that can hold up to 600 labels
What will i change
- A dozen tags are included to cover the Wifi settings, allowing users to discover that they need to order tags while still being able to ship one or two boxes.
- A smarter installation application that prefers to scan Wifi and protocols
- It feels a bit expensive, but it depends on the quantity you print, and absolutely no ink is needed to offset it
Final thoughts
You have to do your own cost/benefit analysis, but if you are printing a large number of shipping labels, or want to label every trash can in the garage, this may be the solution you are looking for. It does not take up much space, and if needed, WiFi can be easily downgraded to a remote counter near the back door. This is a cunning, one-trick pony, it does exactly what it says, and it does a good job.
price: $199.99
Where to buy: FreeX
source: The sample of this product is made by FreeX

